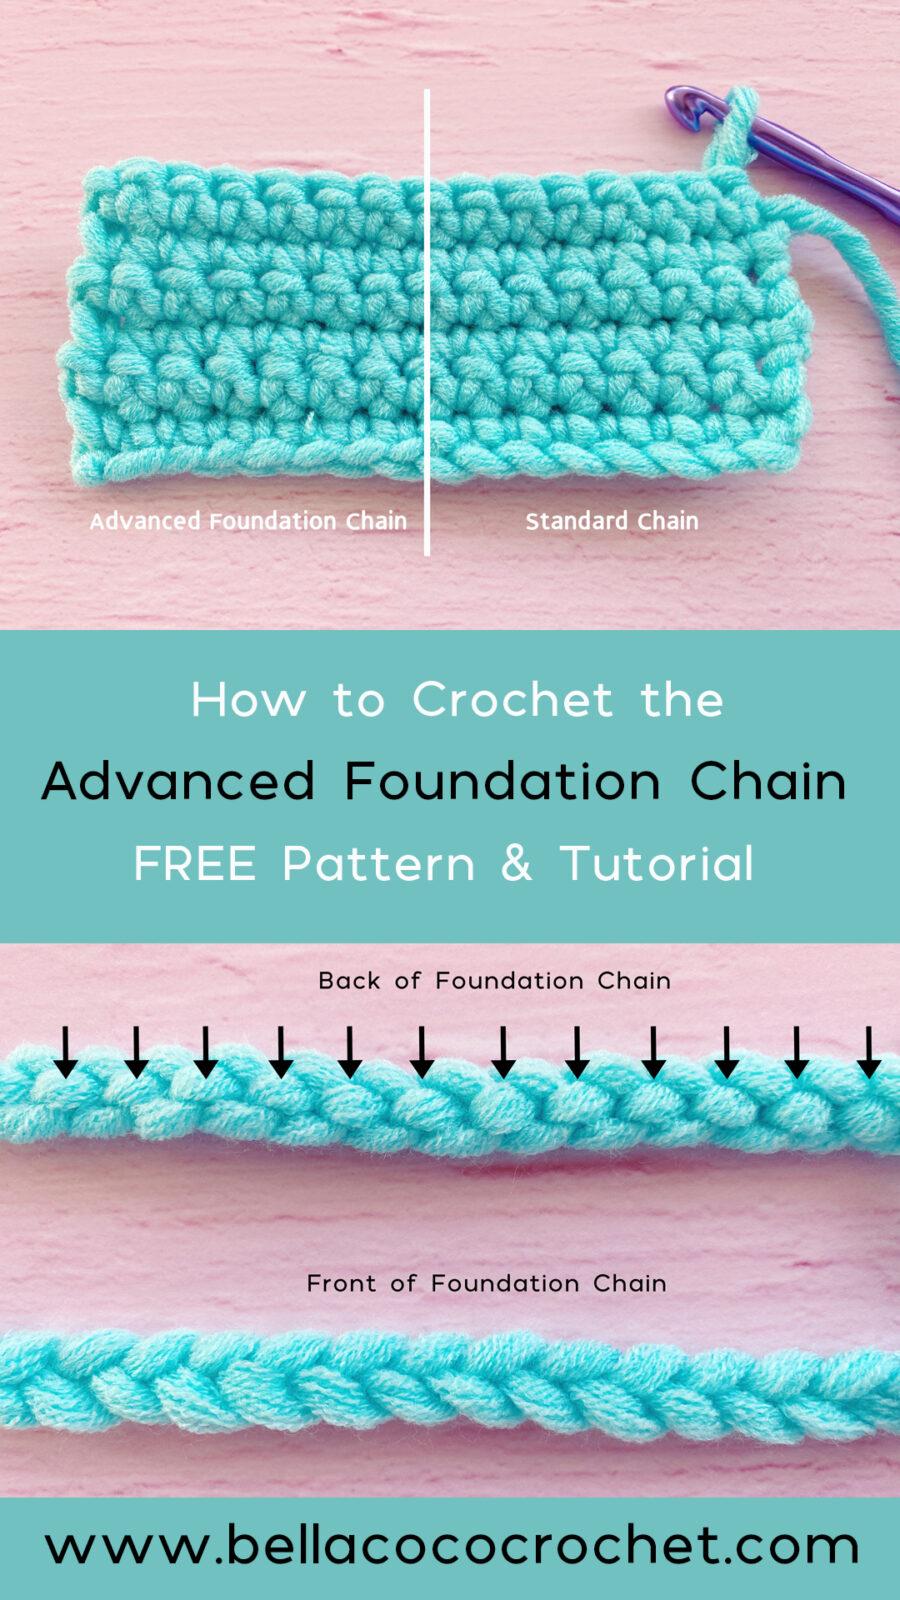
If you are wanting to take your crochet skills to the next level, you could do something as simple as changing the way you do your foundation chain. In the majority of my tutorials, I show you how to work into the front top loop of the foundation chain. This is simply to keep it as easy as possible for you, however, when it comes to adding a border, you can sometimes notice that the foundation chain looks slightly untidy as you are working stitches into it. So today I wanted to show you the advanced foundation chain technique.
The technique is only a minor adjustment that will take a little practice BUT it does make a difference to the finished product of your work. Here is an example of getting it correct and incorrect. As you can see from the photo below, the incorrect part of the chain doesn’t sit as well. This can happen if you are chaining into the back loops but then accidentally going into the front loops at times.

Crochet Terms
Written using UK terms but switchable to US terms below.
Chain: ch(s): Yarn over, pull through.
Double crochet: dc(s): Insert hook into stitch, yarn over, pull up a loop, you will have two loops on the hook. Yarn over, pull through remaining two loops.
Convert Pattern Terms
Here you can quickly switch between UK and US crochet terms. This will make following the pattern easier as all terms will be converted to your preferred version.
Notes: A beginner may work the first row of stitches into the top loop of the foundation chain. When working into the foundation chain at the end of your project, the remaining loops of the foundation chain can make your work look loose or messy.
With this new technique, the top of the stitches and the remaining loops of the foundation chain will look similar and working a border into the foundation chain will look cleaner than the beginner method.
Main Section
Steps
Make a slip knot and chain 15.
Examine the chain: When looking at the row of Vs made by your chains, each chain has a bottom loop, top loop and the back loop. The back loop is seen when you roll the V’s toward you and see the other bumps along the back side. You may also hear this being referred to as the ‘back bump’ or ‘spine’ of the chain.
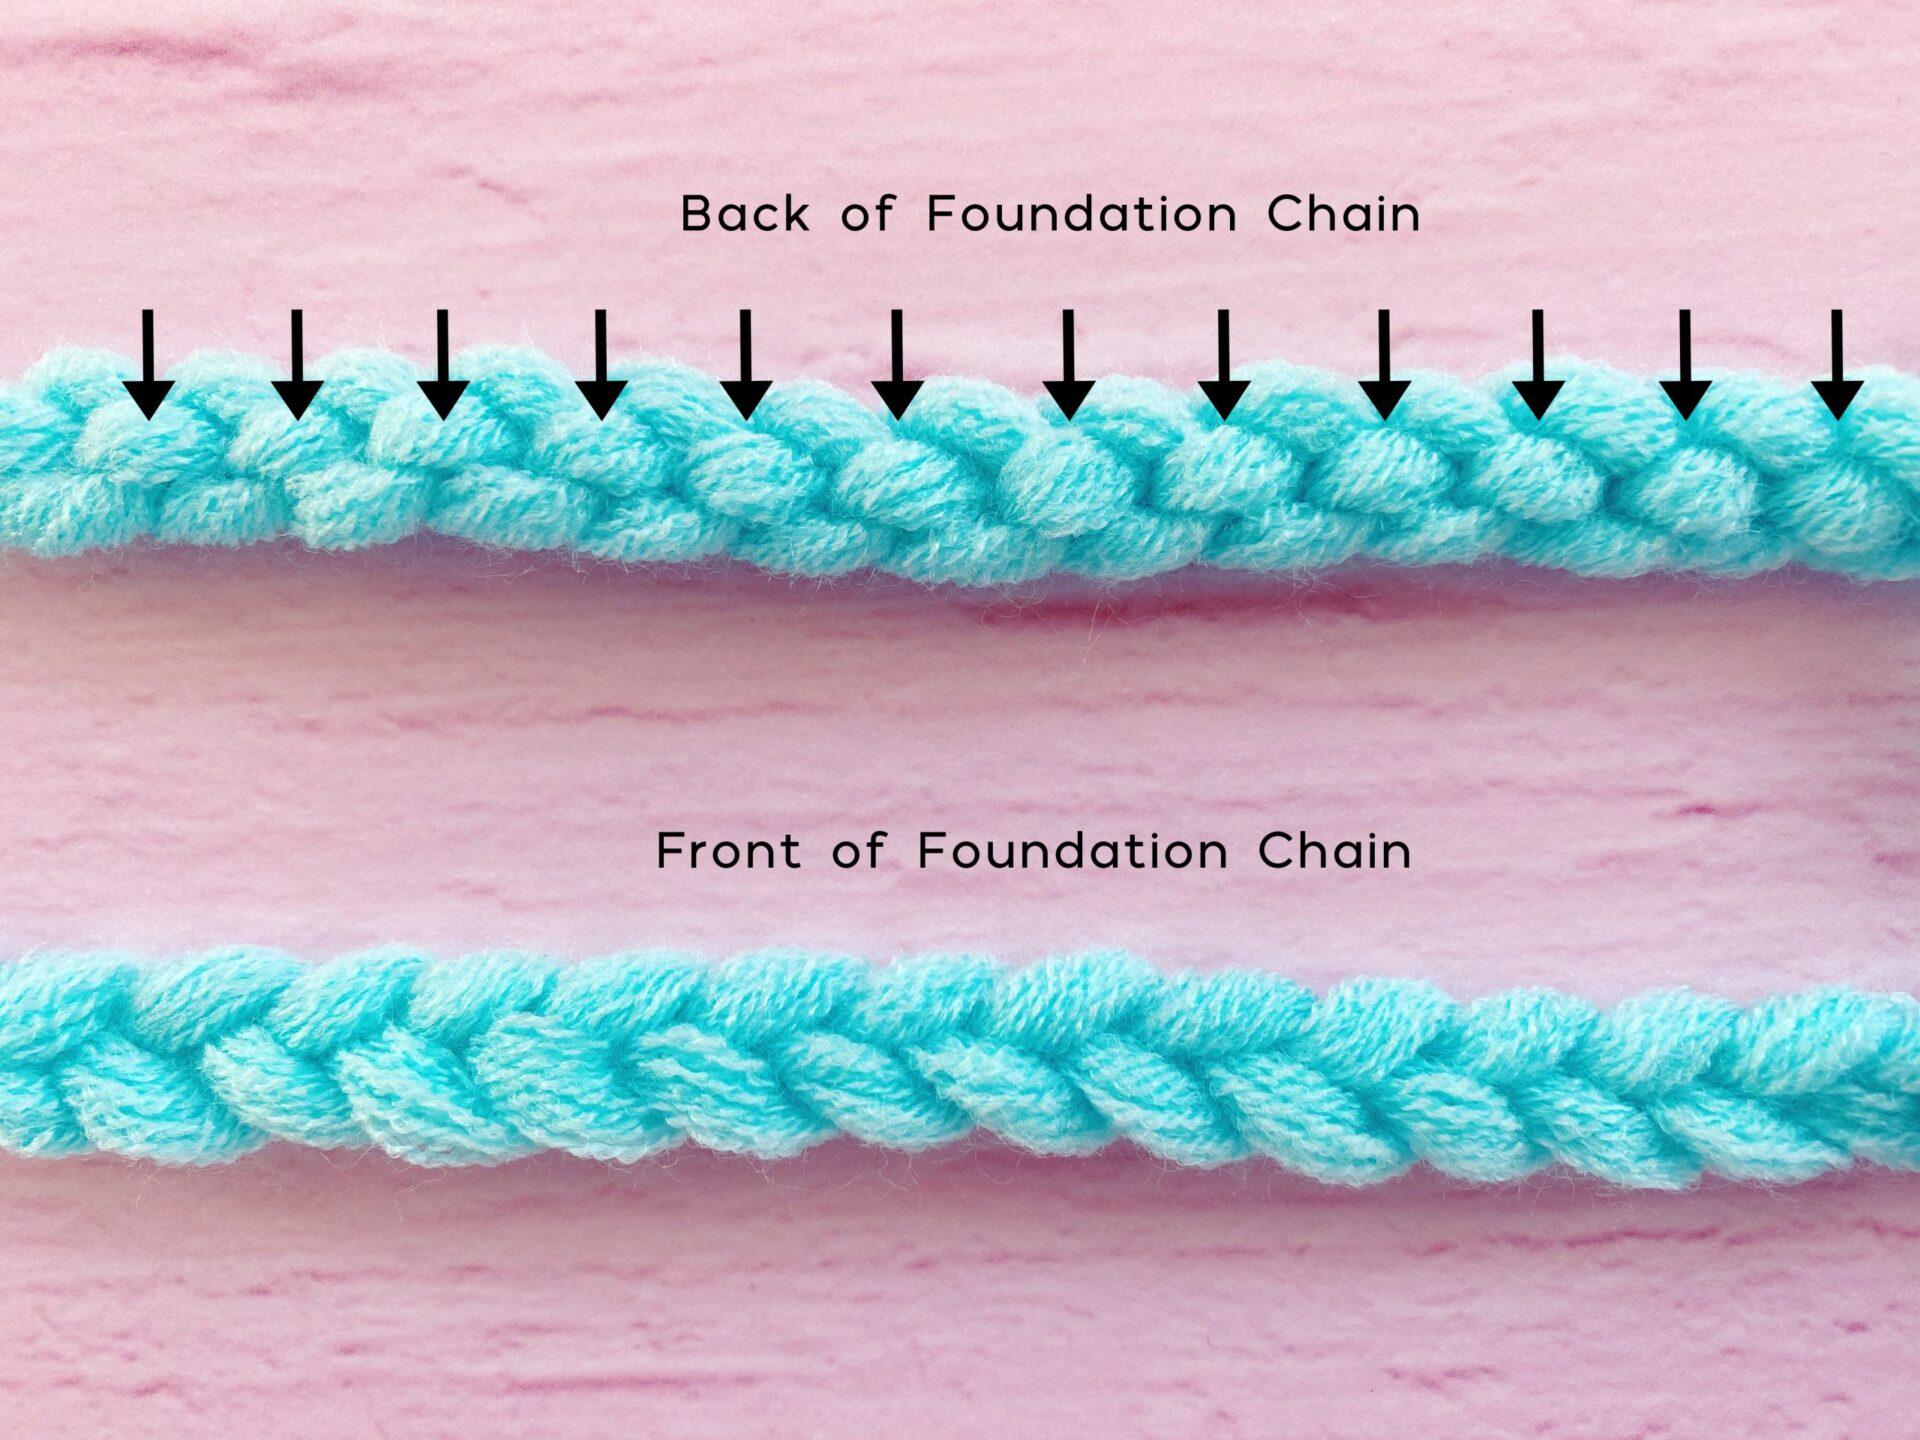
For this tutorial, we are going to work our stitch into that back bump. Insert hook into the back bump to draw up your loop, finish your stitch.
Work slowly so that you don’t pull the existing foundation chains too tightly or you might get confused about which loop to choose. I like to pinch my chain when I put in the stitch so I’m not pulling on the back bump too much.
Your resulting piece, after one row of double crochet, should show a row of Vs at the top and at the bottom. The bottom V’s are the normal top and bottom loops from the original foundation chain.

There is a video tutorial below demonstrating this technique for you. I’d love to know if you give it a go. Leave me a comment below and let me know what you think.

PIN THIS PROJECT FOR LATER
AWESOME, THANK YOU VERY MUCH
Much neater edge, thank you
Makes a big difference, I’m just learning the no chain foundation rows just now through your tutorials, no matter who’s tutorial I’m using I always come back to you to learn whatever stitch that appears new to me , I started crocheting with you and you explain so well taking your time to show and explain exactly what your doing thank you so much for your tutorials and I can’t wait for the CALs starting super excited only thing is I will want to make more than 1 cushion xx
Thank you so much for your feedback and your support, it really does mean a lot to me 🙂
Thank you Sarah Jayne for this information videos I love your site an videos I have learned so much from watching I’m crocheting sometimes I have trouble seeing the singles etc you r awesome beautiful work
You’re very welcome 🙂
Thank you for this tutorial! It’s look much nicer. You do such a fab job of demonstrating in your videos. Do you have a preference between this method or using a chainless foundation? Thanks!
Hi Alicia Thank you for your lovely comments, to be honest I don’t really have a preference 🙂
I love your videos! I am in Ontario, Canada and I do have to make the conversion in my head to North America stitches but it is so easy, as it comes up on the screen. You explain things so well, I am so glad I found your social media and lessons . You inspire me to learn. Thank You
Hi Jan thank you for your lovely comments 🙂
Thank
Thank you so much Sarah, I’m trying this out, so far so good
I love your videos.
Thank you that really does mean a lot 🙂
I really enjoy your videos. In fact, I have watched your beginners tutorials to learn how to crochet. I’m having trouble making my edges more square. Any suggestions?
Hi Lona Thank you, I’m happy to hear you’re enjoying my videos I do actually have a tutorial with some tips to keep your edges straight which you can find here: https://www.youtube.com/watch?v=YA46KLsg9LM&t=5s Hope this helps.
How do you end a piece when you start it with no chain foundation?
Because that first two rows using NFC looks way different than the ending row of a piece.
I love the NCF to begin but would like to know if there is a way to end a project with the last row looking the same as the first.
Hi Tracey If you end by doing a row of double crochet stitches (UK terms) it should look similar to the beginning
Thank you so much! My chainless foundations just don’t look nice but this works perfect and looks great, especially when you want to add a border.
Hi Heidi You are very welcome 🙂