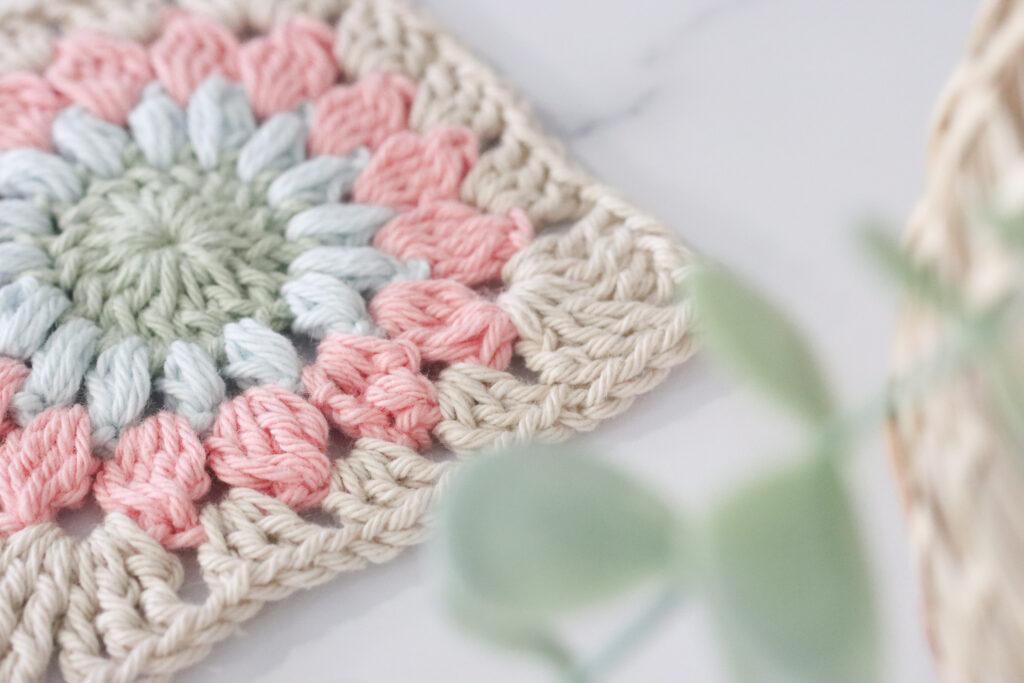
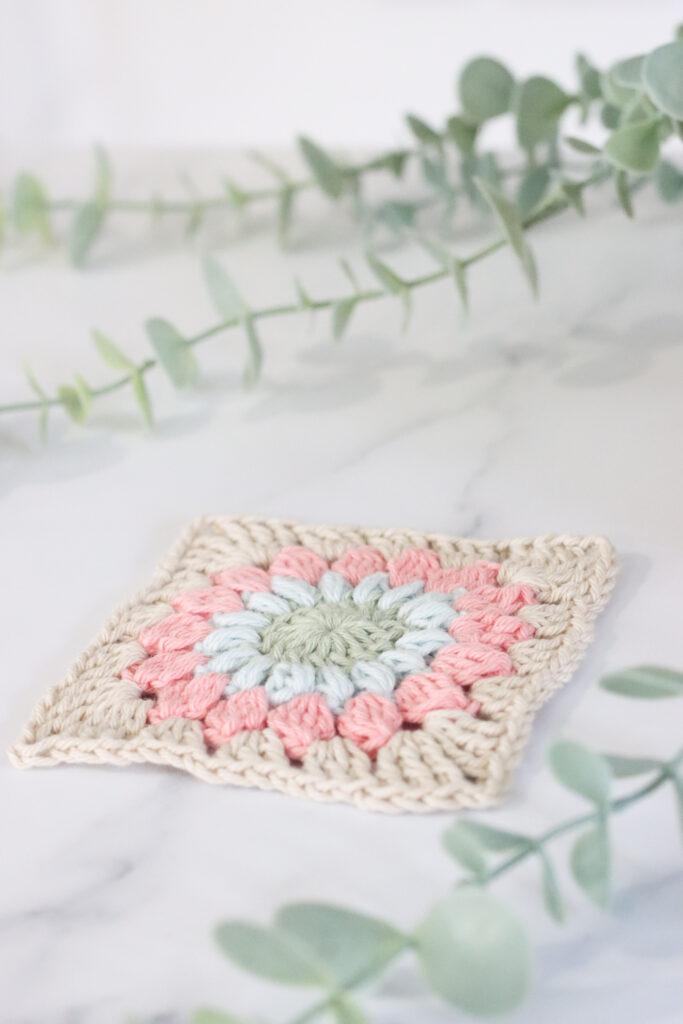
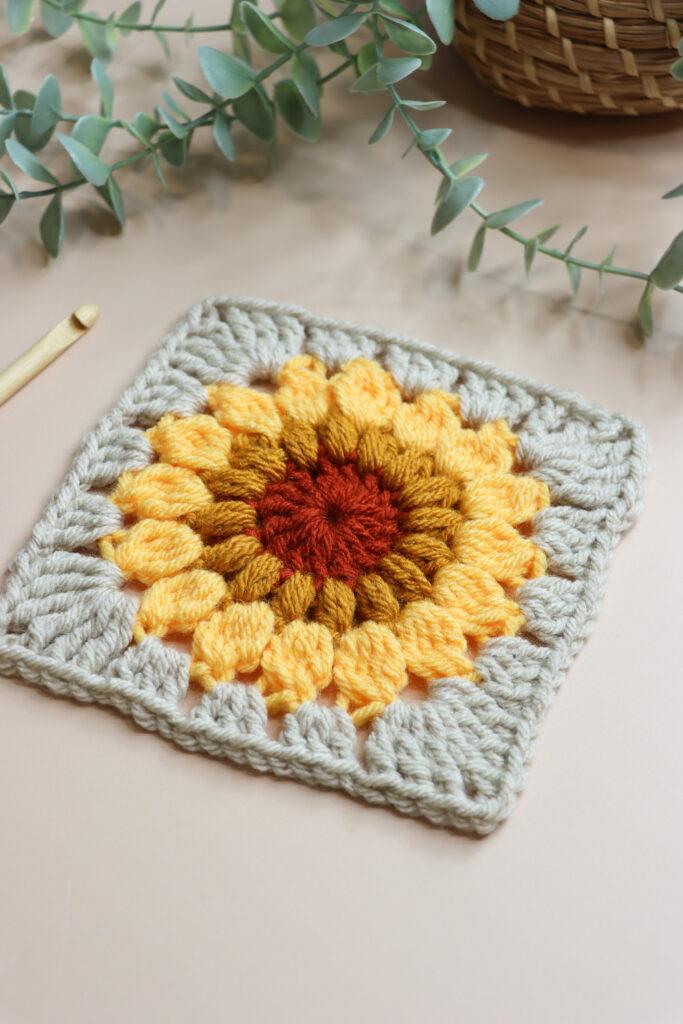
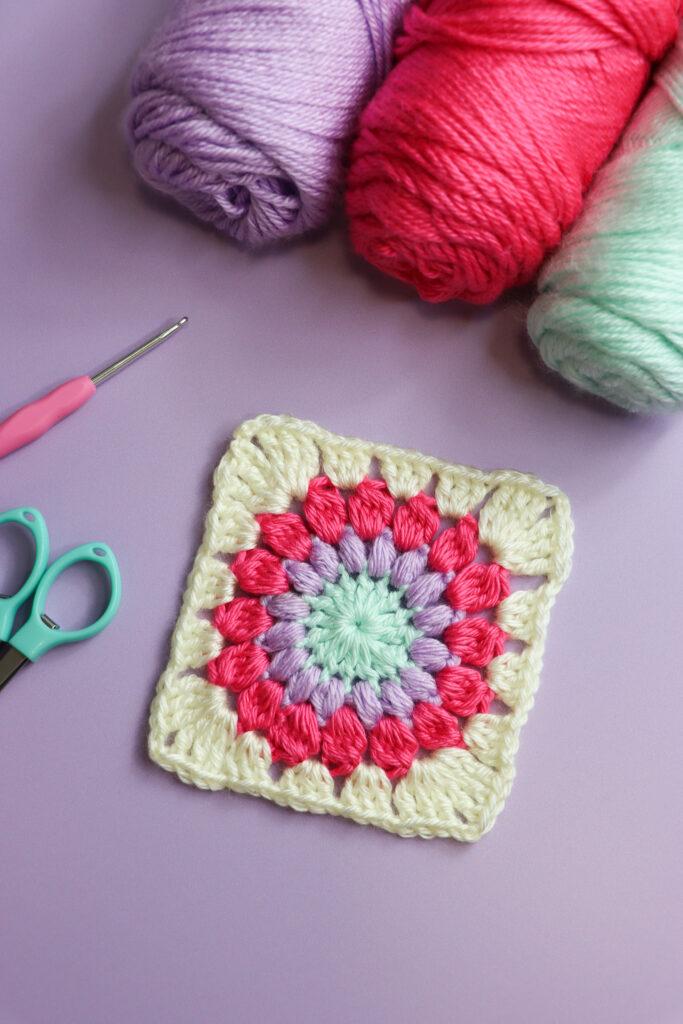
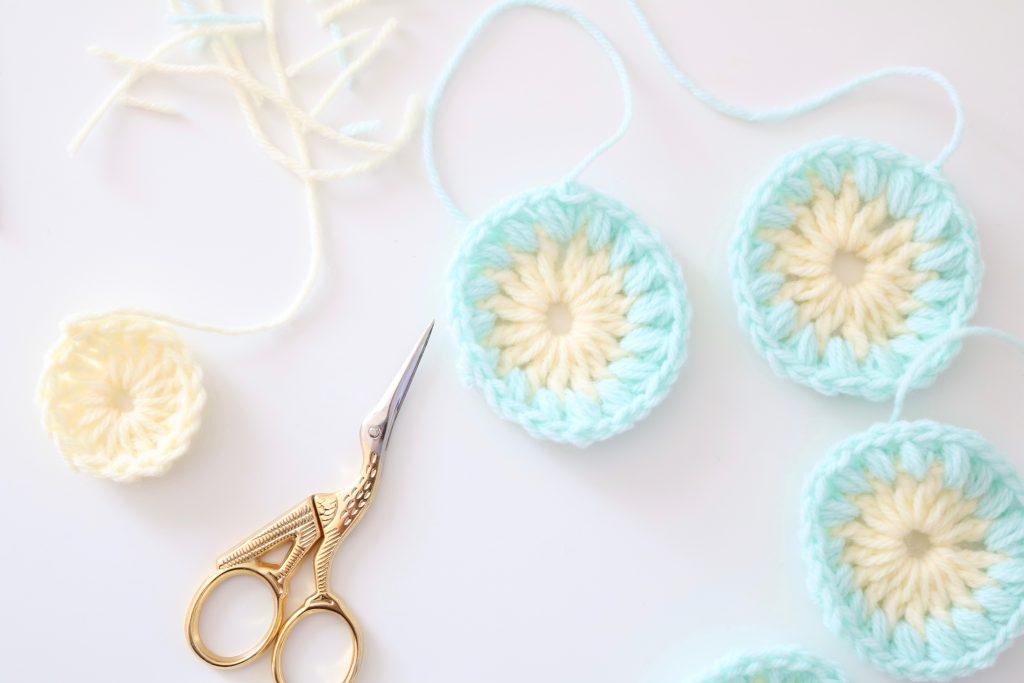
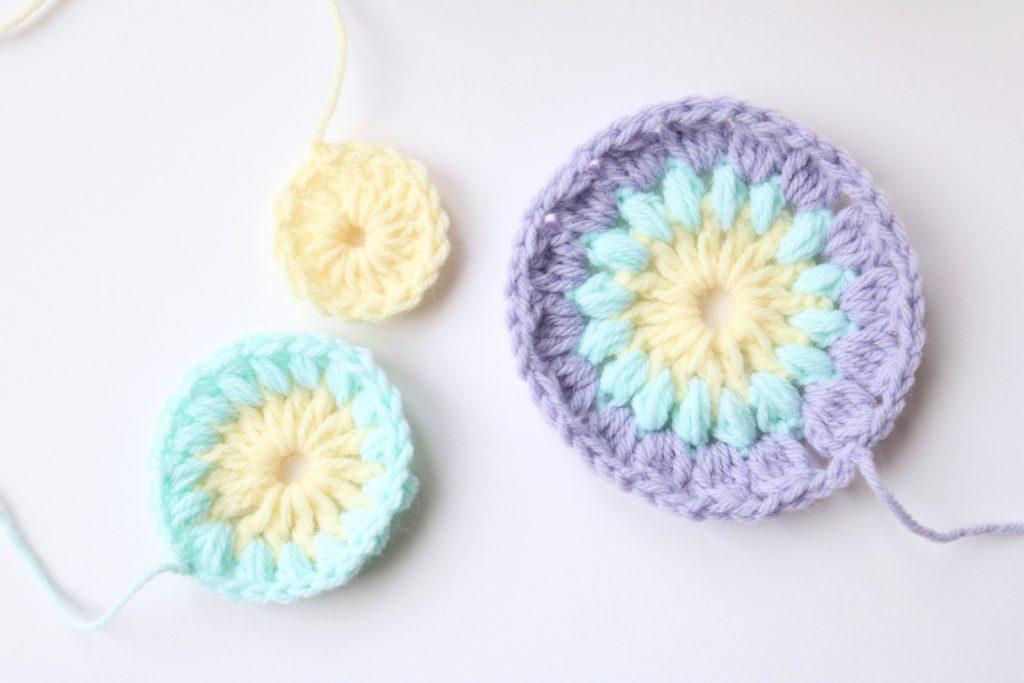
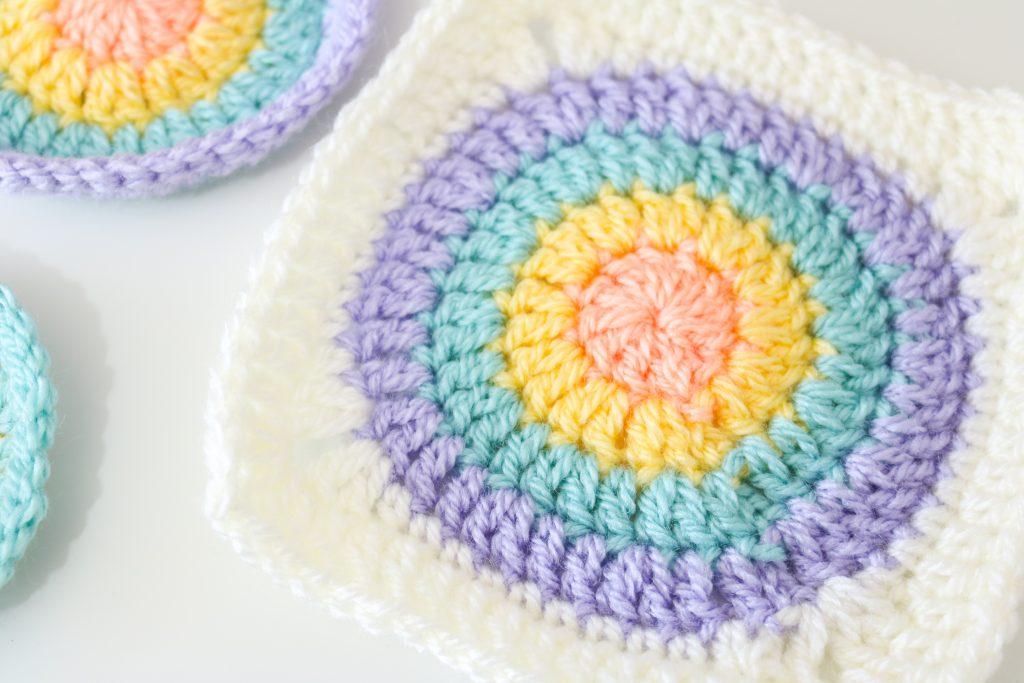
In this post, you will learn how to crochet a sunburst granny square with my free step-by-step pattern and video tutorial. If you love texture and colour you’ll love this cheerful sunburst granny square that features a circular motif with a burst of radiating colours. This pattern uses multiple colours and therefore can be easily customised.
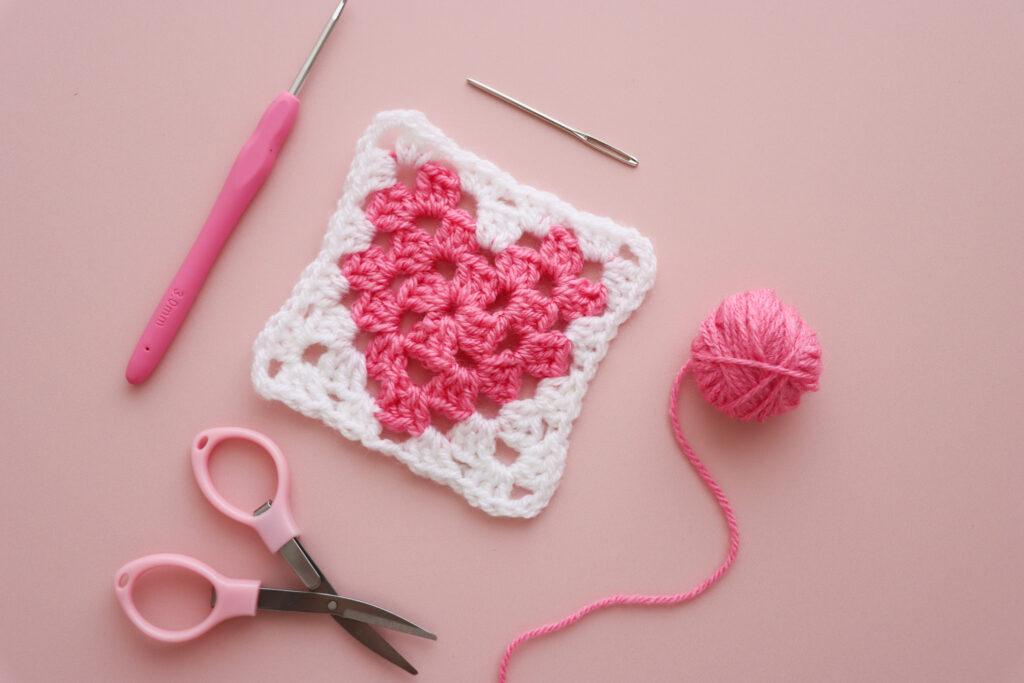
Materials & Tools
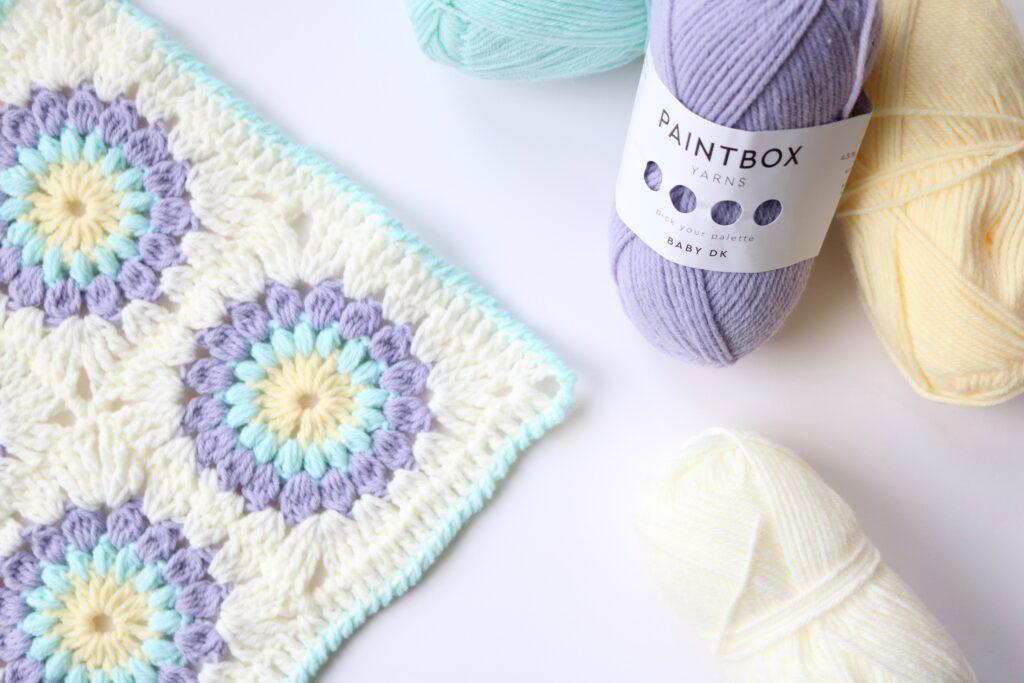
- Yarn: Used in the picture below: Paintbox Yarns Baby DK is perfect for this project. I used Mint Green, Banana Cream, Baby Lilac and Champagne White. See below for more colour inspiration.
- Hook: 4mm
- Scissors
- Darning Needle


Colour Inspiration
Paintbox Cotton DK in colours:
- Pistachio
- Seafoam
- Blush Pink
- Vanilla Cream
Stylecraft Special Chunky in colours:
- Rust
- Gold
- Saffron
- Parchment
Caron Simply Soft in colours:
- Soft Green
- Orchid
- Neon Pink
- Off White
Pattern Notes
- Written in UK terms but switchable to US terms below.
- Video tutorial can be found at the base of the post.
Convert Pattern Terms
Here you can quickly switch between UK and US crochet terms. This will make following the pattern easier as all terms will be converted to your preferred version.
Terms & abbreviations
- Puff Stitch: *yarn over, insert hook, yarn over and pull through stitch* three times (7 loops on hook). Yarn over and then pull through all loops on hook. Then, chain 1 to lock into place.
- Cluster stitch: *yarn over, insert hook in next stitch and pull up a loop, yarn over and pull through 2 loops* 4 times (5 loops on hook). Yarn over and then pull through all loops on hook.
- Half treble crochet (htr): yarn over, insert hook, yarn over pull through stitch (3 loops on the hook). Yarn over and finally pull through all 3 loops on hook.
- Treble crochet (tr): yarn over, insert hook in next stitch, yarn over, pull through stitch (3 loops on hook). Yarn over, pull through two loops on hook (2 loops on the hook). Yarn over and then pull through 2 remaining loops on hook.
- Double treble crochet / US triple crochet (dtr): Yarn over hook twice, insert hook into next stitch. Yarn over, pull through stitch (4 loops on hook). Yarn over, pull through two loops (3 loops remaining on hook). Yarn over, then pull through two loops (2 loops remaining). Yarn over and finally pull through the last two loops on hook.

Unsure of the differences between UK and US terms? Need a refresher on how to do your stitches? In my ‘How to crochet: A handy reference guide’ EBook I help you with all of these terms and you can always have them to hand! You will also get exclusive access to free video instructions. Learn more about the eBook here.
Pin for Later
Pattern Support
The fastest way to get pattern support is to ask in our dedicated facebook group for Bella Coco Crochet patterns. This is the best place for you to connect with other crocheters.
Please note, if you wish to change and adapt this pattern in any way, this must be done at your own exploration and we cannot offer assistance with this.
You are viewing this pattern in UK terms.
Sunburst Granny Square Pattern
You are viewing this pattern in UK terms.
1. First Edge of Your Square
- Chain 4, work 2 dtr stitches into same chain space.
- Chain 1, work 3 tr stitches into next chain space.
- Chain 1, work 3 htr stitches into next chain space.
- Chain 1, work 3 tr stitches into next chain space.
- Chain 1, work 3 dtr stitches into next chain space.
- Chain 3 (for the corner).
2. Second Edge
- Working in the same chain space (that you have just completed 3 dtr) work 3 dtr.
- Chain 1, work 3 tr into next chain space.
- Chain 1, work 3 htr into next chain space.
- Chain 1, work 3 tr into next chain space.
- Chain 1, work 3 dtr crochets into next chain space.
- Chain 3 (for the corner).
3. Third Edge
- Working in the same chain space (that you have just completed 3 dtr) work 3 dtr.
- Chain 1, work 3 tr into next chain space.
- Chain 1, work 3 htr into next chain space.
- Chain 1, work 3 tr into next chain space.
- Chain 1, work 3 dtr into next chain space.
- Chain 3 (for the corner).
4. Fourth Edge
- Working in the same chain space (that you have just completed 3 dtr) work 3 dtr.
- Chain 1, work 3 tr into next chain space.
- Chain 1, work 3 htr into next chain space.
- Chain 1, work 3 tr into next chain space.
- Chain 1, work 3 dtr into next chain space.
- Chain 3 (for the corner).
- Insert hook into forth chain from the hook (from the original chain 4 of this round and then fasten off.
Now it’s time to join your squares, if you need some help I have a video tutorial that shows two simple and neat methods. Alternatively, you can just sew them together with the same yarn you used for round 4.
Video Tutorials
Right-handed

Left-handed

Granny Square Patterns
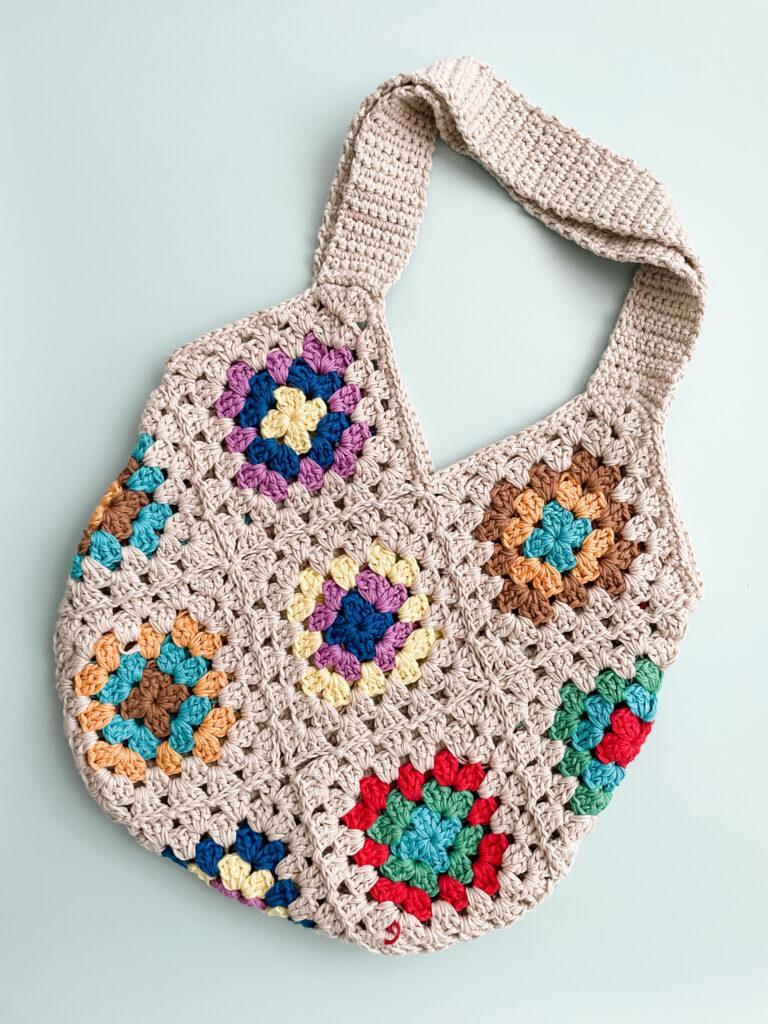
Do you love crocheting granny squares? I have so many free patterns available on the blog! CLICK HERE to explore them all or check out these below:

Granny Square Projects
Are you looking to turn your granny squares into a project? Check out these patterns below:


I always love to see your makes so if you try any of my patterns or follow my stitch tutorials please tag me @bellacococrochet or use the #bellacococrochet
sarah-jayne
Hi
How many balls of yarn did you use for the sunburst granny blanket?
Thanks
Lynne
Hi Lynne it’s really difficult to answer this question as it would depend on the yarn you use, your hook size and your tension. If you do a some squares you may then be able to work out how many balls you would need.:)
I love this fresh, springtime project.
Thank you 🙂
Beautiful pattern Sarah-Jayne I can’t wait to start.
I can’t seem to work out how many balls of yarn I need in each colour.
Sorry if I’m missing it somewhere, but I’d love to know how much I need to buy.
Thank you for the pattern and for generously sharing it.
Meas x
Hi Meas
You’re very welcome, I’m so glad you like the pattern It does depend on which yarn you want to use and which hook size, but as a rule of thumb I would advise to get one ball of each colour and one or two balls of the main joining colour. You can always buy more but sometimes the dye lots differ and then you could end up with slightly different shades, so best to buy all together if possible.
Hope this helps.
Sarah-Jayne
I plan on using the same yarn you did and hook size, so how many balls of each color did you end up using please
Hi denna I used one ball of each and a 4mm hook size. However the amount of yarn you use will depend on how big you want the blanket to be and will also depend on your tension 🙂
Hi Sarah-Jayne,
In relation to “How many balls” used….how many did you use & how many squares did you end up with? And what size (dimensions) was your throw/blanket?
This will give me a bit of an idea (roughly) to how much more (if any main colour like your “champaign” to get)
Thx heaps
Chris
Hi Chris I can’t really answer these questions for you as it would totally depend on what yarn you use, your hook size and your tension. Maybe you could make a square measure it and then work out how much yarn and how many squares you will need from there. Sorry I couldn’t be of more help. Good luck with your project and let me know how you get on:)
Thx heaps
Chris
You’re very welcome 🙂
Hello Sarah Jane I’m making the sunburst granny square blanket and wondering if I need to block the squares individually or the blanket as a whole unit?
I have really enjoyed crocheting using your pattern so thank you.
I’m really happy you liked this pattern I would recommend blocking each square individually as this will make it easier to line them up when you start joining them.
Hi Bella Crochet,you teach very beautifully and with patience I see all your videos. At present I’m working with sunburst granny squares and happened to visit this page for increases in size or rounds from 5 to 8 ,but while doing so I notice the written instructions for round 4 are missing.
Please check this and add it as it will help a lot of beginners like me..
Thank you and hoping to learn a lot from you..I have voted you in UK competition.
Sangita Pai
Hi Sangita, thank you so much for your kind words and for voting for me I’ve had a look at the instructions on my website and it appears there are some errors with the formatting, so thanks for bringing this to my attention. The instructions that are listed as rounds 5 to 8 are actually the instructions for each side of round 4. I will have this edited now
Hi Sarah Jane. I’m making a little blanket for my granddaughter, she picked the design herself. How many squares do I need to complete the blanket? Thanks x
Hi Clare this would obviously depend on how big you want the blanket to be along with the yarn you use, your hook size and your tension. Maybe you could do a few squares till you get to the width you want then work it out from their ? I wish you the best of luck 🙂
Hi..and thanks for this lovely well written pattern. I’m just wondering if the stitches in round three are all cluster stitches or all puff stitches? Am I reading it right if I do a cluster stitch to start the round and then puff stitches all the way round till the join?? I’m finding it a little confusing but I’m entirely sure it’s me and not your pattern !
Hi Carla You’re very welcome The stitches in round three of the pattern should all be cluster stitches – it appears you’ve picked up on a typo in the pattern so I’m really sorry that I’ve caused you confusion! I’ll have this amended asap.
About how long will this granny square be on all sides (in terms of cm)? Thank you!
This will depend on your hook size and the yarn you are using 🙂
Hi, loving these squares but how have you done the finishing edge? Thanks in advance xx
All the details for the pattern can be found on my blog at bellacocococrochet.com 🙂
Do you have a written pattern that I can print out.
Hi Mary have you tried to copy and paste ?
I couldnt find what border you put round the blanket in the printed pattern, can you help please? I love all your tutorials, for a newbie to crocheting a blessing!!
Hi Mary Thank you and the border round the blanket is crab stitch 🙂
Hi thank you Sarah-Jayne for this lovely pattern.
Just want to ask when I’m working on the corners of Round 4 where there are stitches of different height, I tend to have the corners more and more loose (like the last corner is much loosely-spaced than the first corner). I am struggling with how to manage the height of those different stitches…(how tall/loose should the golden loop or working loop be…)
Could you offer some tips on tension and height problems when crocheting consecutive stitches that have different height? I have tried to search on youtube and google but can’t seem to be able to find proper help.
Thank you in advance for your help!
You’re welcome, I’m glad you like the pattern You can find some hints and tips for tension in my tutorial here: https://www.youtube.com/watch?v=SRVA_4uNsNw&t=1s but as with most things, the more you practise the better you will get and you should find that after completing a few squares, your stitches begin to look a lot more uniform. You can also try skipping the chain one in between each cluster of stitches as this can pull the stitches tighter and make them look neater.
In any case I would try not to overthink it too much, as you should find that blocking your squares once they are finished will sort it out anyway To do this you just need to stretch and pin out the squares into shape, and for acrylic use an iron held a couple of inches above to carefully blast steam to set the stitches into shape.
Hope this helps and good luck!
thanks a bunch! i’ll gonna have to practise more 😛
What border was used on the Sunburst Blanket? i cant find any description for this! Need help, thanks.
Hi Mary it’s the crab stitch 🙂
Is there a written instruction for the ‘join as you go’?
Hi Michon I don’t have written instructions for the join as you go method only the tutorial 🙂
I just love this blanket and the colors are gorgeous. I found your site from one of the Le Petit Saint Crochet videos. I’ve been knitting and crocheting for over 40 years but am finding a lot more time… actually I’m MAKING at lot more time to do it so all these beautiful patterns are giving me tons of inspiration. Thank you!
You are very welcome 🙂
Love your patterns and am a follower on YouTube. However, I do wish you would let us know the finished size of this and other granny squares. I’m not only looking for unique granny squares but I’m often looking for particular sizes. It would be so helpful! Thank you!
The size often depends on personal tension along with the type of yarn used and hook size so it’s really difficult to give specific sizes 🙂
Thanks so much for this! If I wanted to make the square bigger, i.e. add another round, how would I do that? Just using clusters of trebles like a traditional granny square? Thanks in advance for your help!
Hi Donna You’re welcome! Yes, you would just need to work a round (or several rounds if you wanted) of treble clusters in exactly the same way as you would when making a traditional granny square.