Learn to crochet the Jasmine Stitch with this FREE pattern and video tutorial. The Jasmine Stitch is perfect for those who love texture and depth to your crochet stitches. This stitch is perfect for cushions, blankets and accessories such as cowls, scarves and mitts.

Pattern Notes
Written in UK terms but switchable to US terms below.
Skill Level: Advanced
Stitch Multiple: 1 +1
The Jasmine stitch is made up of connected puff stitches. For this stitch, we don’t start with a traditional foundation chain; instead, we are going to work a series of puff stitches to build the correct shape.
Video tutorial can be found at the base of the post.
Convert Pattern Terms
Here you can quickly switch between UK and US crochet terms. This will make following the pattern easier as all terms will be converted to your preferred version.
Terms & Abbreviations
Chain: ch(s): Yarn over, pull through.
Slip Stitch(s): ss(s): Insert hook, yarn over, pull through stitch and loop on hook.
Double Crochet(s): dc(s): Insert hook into stitch, yarn over, pull up a loop, you will have two loops on the hook. Yarn over, pull through remaining two loops.
Special Stitches
Foundation Puff Stitch (fps): Pull up a loop (around 2 cm or 3/4 in tall), yarn over and insert hook into indicated stitch, yarn over, pull up a loop to the same height (3 loops on the hook), yarn over and insert hook into same stitch, yarn over, pull up a loop to the same height (5 loops on the hook), pinch first loop to secure, then yarn over and pull through all 5 loops on the hook. Insert hook into pinched stitch, yarn over and pull through (2 loops on the hook), yarn over and pull through remaining 2 loops on the hook.
Jasmine Stitch (J-st): Pull up a loop (around 2 cm or 3/4 in tall), [yarn over and insert hook, yarn over, pull up a loop to the same height] twice into the top of last stitch worked (first puff stitch made, 5 loops on the hook), [yarn over and insert hook, yarn over, pull up a loop to the same height] twice into next space between puff stitches (second puff stitch made, 9 loops on the hook), [yarn over and insert hook, yarn over, pull up a loop to the same height] twice into next space between puff stitches (third puff stitch made, 13 loops on the hook), pinch first loop on hook to secure, yarn over and pull through all 13 loops on the hook, insert hook into pinched loop, yarn over and pull through (2 loops on the hook), yarn over and pull through remaining 2 loops on the hook.

Unsure of the differences between UK and US terms? Need a refresher on how to do your stitches? In my ‘How to crochet: A handy reference guide’ EBook I help you with all of these terms and you can always have them to hand! You will also get exclusive access to free video instructions. You can find my EBook HERE.
Pin for Later
Jasmine Stitch Pattern
You are viewing this pattern in UK terms.
Foundation row: 1 ch, fps in first ch. Continue to build row using fps, working into the top of the last puff stitch to your desired size. Turn.
Row 1: J-st across, working first puff stitch of J-st into the end of the final puff stitch of the foundation row and working last puff stitch of last J-st into outer edge of last puff stitch from the previous row. Turn.
Row 2: Work an fps into the top of last stitch from the previous row, J-st across, working last puff stitch of last J-st into the outer edge of last puff stitch from the previous row. Turn.
Repeat Row 2 until desired height.
Fasten off and sew in ends.
jasmine stitch
I know this crochet stitch may seem a little confusing at first, however, don’t forget about the video tutorials at the base of the post for both right and left hand crochet. PLUS, here are some images to help you along!
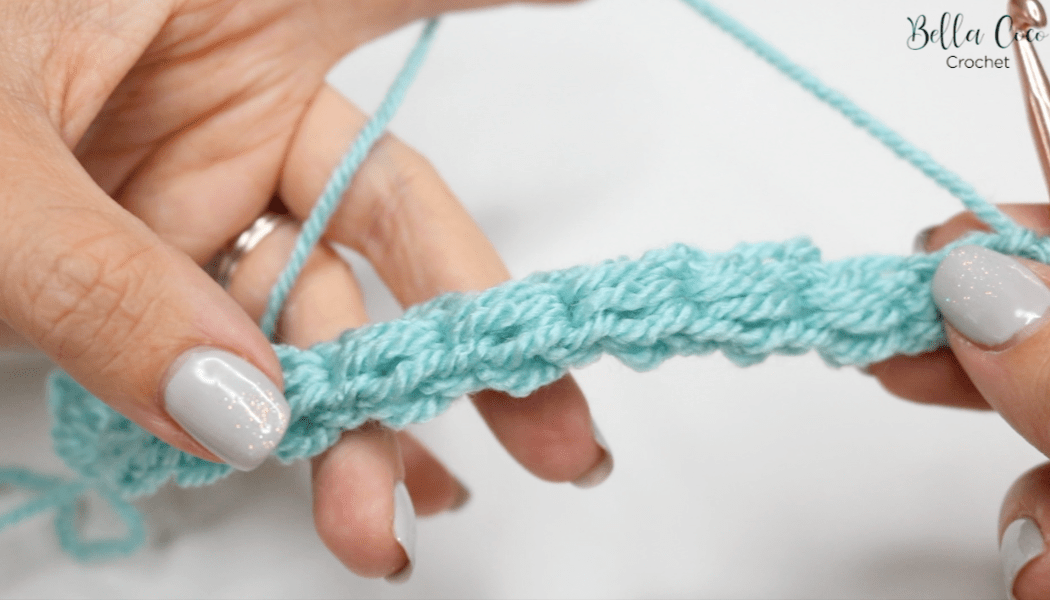
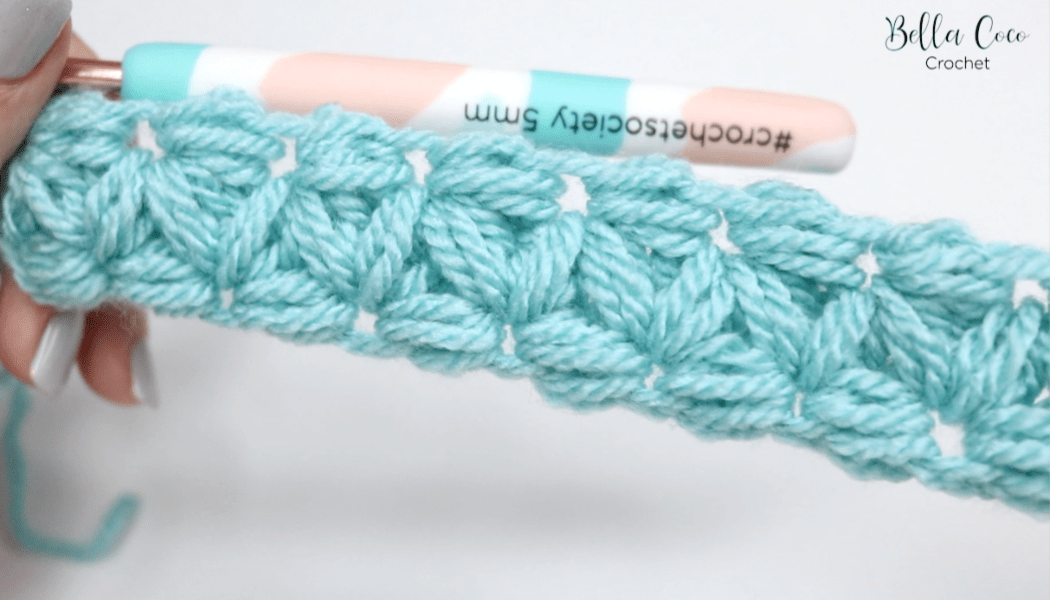
This is what your foundation puff stitch row will look like
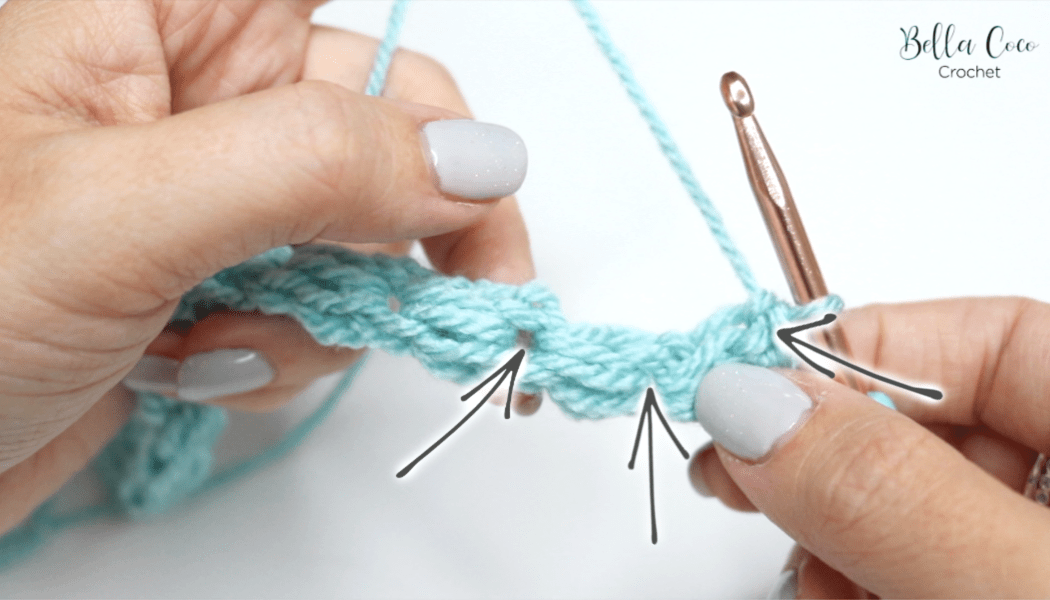
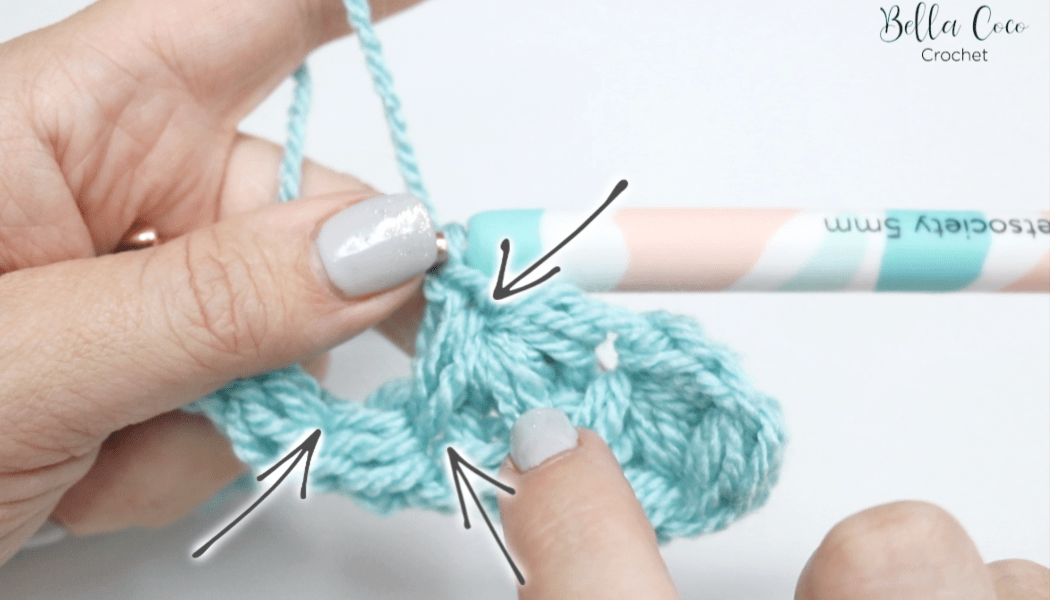
The image below is indicating where you will be placing your stitches when creating your jasmine stitches onto the foundation puff row.
The image below shows you where you will be placing your stitches on every row after the initial row 1
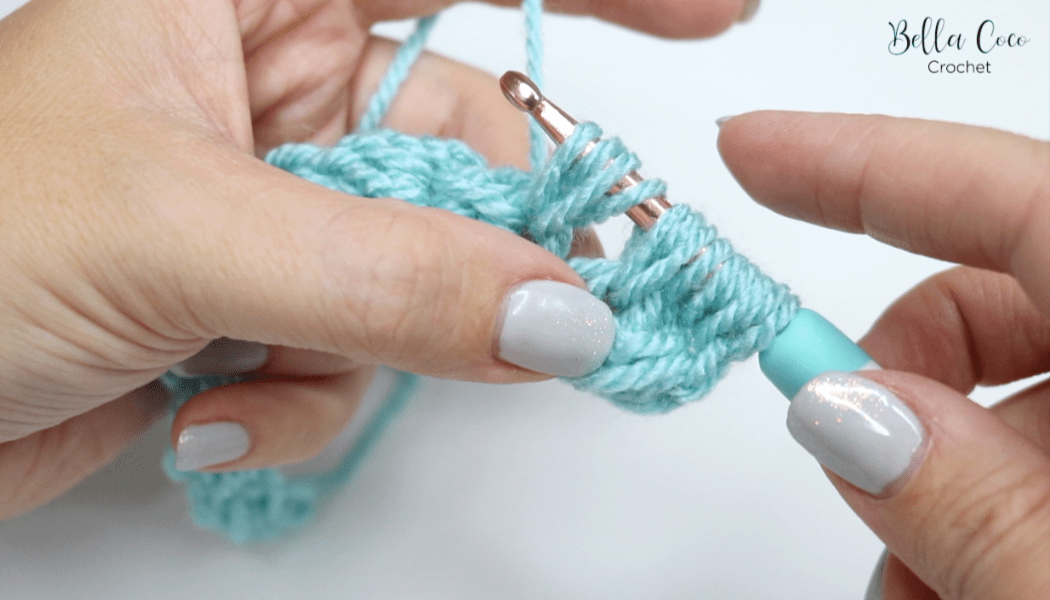
This photo shows how the ’13 stitches on the hook’ will look like on your hook for the jasmine stitch.
Completion of Foundation and Row 1
Video Tutorials
Right-handed
[adthrive-in-post-video-player video-id=”gyutAqkI” upload-date=”2025-03-26T14:40:21+00:00″ name=”CROCHET_ JASMINE STITCH | Bella Coco Crochet.mp4″ description=”null” player-type=”default” override-embed=”default”]Or you can watch on YouTube
Left-handed
[adthrive-in-post-video-player video-id=”bdcK34Xz” upload-date=”2025-03-26T14:40:21+00:00″ name=”LEFT HANDED CROCHET_ JASMINE STITCH | Bella Coco Crochet.mp4″ description=”null” player-type=”default” override-embed=”default”]Or you can watch on YouTube
I always love to see your makes so if you try any of my patterns or follow my stitch tutorials please tag me @bellacococrochet or use the #bellacococrochet
Hi Sarah-Jayne , Is the Jasmine stitch in counts of 3 ? So when making the foundation make it 3+3+3 puff stitches etc ? I hope I’m making sense lol
Hi Sarah-Jayne
What size chain do you start with and what is the multiple to make it wider?
Thank you
Hi Karen
With jasmine stitch you don’t make a chain as you normally would, you begin by making a series of puff stitches and increase until you reach the desired width. You can find the written info on my blog here: https://blog.tcctest.co.uk/jasmine-stitch/ which has the video tutorial at the bottom – you may find it makes more sense once you have watched the video. Hope this helps 🙂
I’m wondering how or in what place you would add more yarn? I’m almost finished with one skein and don’t want to use a knot or make an extra thick spot in the pattern. Help would be appreciated!
It’s best to change yarn once you reach the end of a row – as you are making the very last part of a stitch just pull through the new yarn. I have a tutorial which shows you how to do this here: https://www.youtube.com/watch?v=MaIuAWV2BA4&t=186s (even though the video shows a different stitch, the principle is the same) You would then just sew the ends in and it shouldn’t be noticeable at all.
Gah, what a beautiful stitch! So pleased to realize it’s actually quite simple after watching the tutorial. Thank you!
How many puffs would you do on your foundation stitch for a blanket?
HI Carly The best way to work this out is to crochet a small swatch. For example, if you make a small sample with twenty puffs in the foundation, you can then measure this and use it to work out how many to do for a full size blanket