The crochet starburst summer tote bag designed by Hannah of @hannahdaisycrochet is the perfect crochet accessory adding fun and colour to your wardrobe.
Featuring a mesmerising starburst design, with intricate stitches that create a captivating visual effect. The starburst pattern is reminiscent of a burst of sunshine or fireworks, adding a touch of whimsy and playfulness to the bag making this pattern versatile depending on your chosen colour pallet. CLICK HERE for inspiration when it comes to choosing yarn colours for your crochet projects.

This tote bag is spacious and practical, with ample room for your belongings, making it ideal for everyday use or for special occasions when you want to make a statement. Whether you’re heading to the beach, going shopping, or simply looking for a standout accessory, this crochet starburst tote bag is sure to turn heads and become a cherished piece in your collection of handmade accessories.
As this is a guest post, Bella Coco Crochet is unable to answer any queries. If you have a question, please contact the designer directly and they will be happy to help you.
Materials & Tools
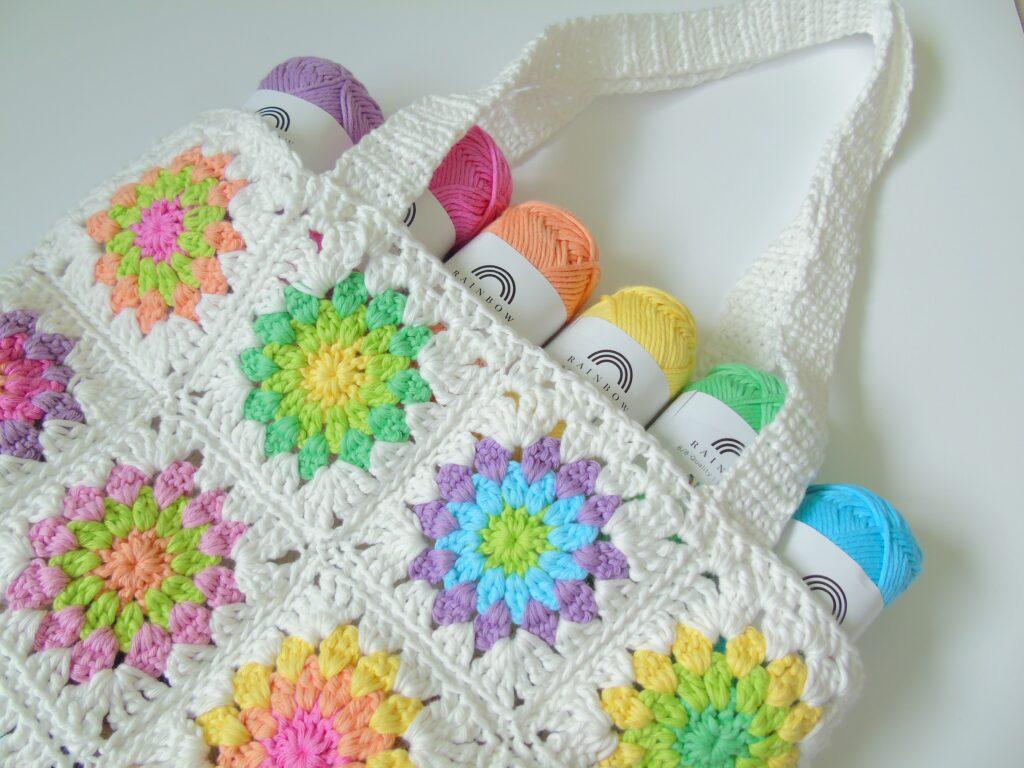
- Yarn: Aran weight cotton yarn. I used Hobbii 8/8 Rainbow cotton for my bag, in the shades: Light Pink, Peach, Ochre Yellow, Lime, Light Green, Mint, Light Turquoise, Light Sky Blue, Light Purple and Natural White. You will need 1 ball of each of the colours and 5 balls of the Natural White.
- Yarn Substitutes: You can use any 100% cotton Aran weight yarn. Paintbox Yarns Cotton Aran would work wonderfully.
- For my crochet tote bag I used 9 colours, but you don’t have to use that many. Any number of colours that is more than 3, plus your base colour would work perfectly well.
- Hook: 4.5mm
- Scissors
- Darning Needle
- Tape Measure
Pattern Notes
- Pattern written in UK terms but switchable to US terms below.
- Back panel, the ch2 at the start of each row counts as a stitch.
- Handles, the ch1 at the start of each row does not count as a stitch.
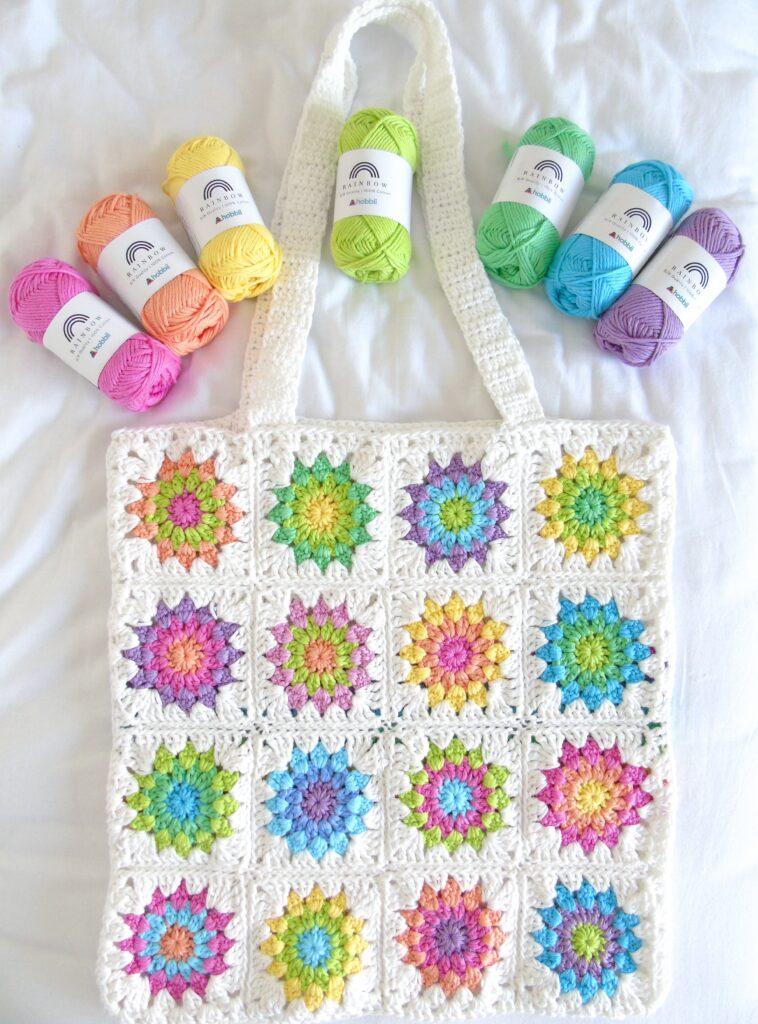
- When making your starburst squares, try to disperse the colours evenly throughout the squares – I used all 9 colours multiple times in the 16 squares. I also varied mine so that each square is different. However you can do whatever you like with the colour placement for your starburst squares – this is your chance to get creative! I have put a photo below which shows how I have done the colours for the front panel – feel free to use it for inspiration if you are stuck.
Hanna says, “This colourful crochet tote bag is the perfect project for the summer months – the cotton yarn means that it isn’t too hot or sweaty to work with. The finished tote bag should measure 16 inches across and 17 inches down (minus the handles), making it the perfect size to take out with you on your summer adventures. It features simple stitches, which means it is perfect for a beginner wanting to learn how to make the starburst granny square.“
Convert Pattern Terms
Here you can quickly switch between UK and US crochet terms. This will make following the pattern easier as all terms will be converted to your preferred version.
Gauge
- 10cm/4” square = 15 sts wide and 8 rows tall (in trs, this is for the back panel)
- One starburst granny square = 9cm (after 4 rows)

Terms & abbreviations
Chain (Ch): Yarn over, pull through one loop on hook.
Slip Stitch (sl st): Insert hook, yarn over, then pull through both stitch and loop on hook.
Half treble crochet (htr): Yarn over and insert your hook into the chain or stitch, yarn over and pull through (you will have three loops on the hook) yarn over and then pull through all three loops on the hook.
Treble crochet (tr): Yarn over and insert your hook into the chain or stitch, yarn over and pull through (you will have three loops on the hook) yarn over and pull through two loops (you will have two loops on your hook) yarn over and finally pull the yarn through both of the remaining loops on the hook.
Double Treble Crochet (dtr): Yarn over twice, insert hook through stitch, yarn over and pull through (you should have 4 loops on your hook) yarn over, pull through 2 loops on the hook (you should have 3 loops on your hook) yarn over, pull through 2 loops, yarn over and then finally pull through the remaining 2 loops on the hook.
Stitch/es (st/s)

Unsure of the differences between UK and US terms? Need a refresher on how to do your stitches? In my ‘How to crochet: A handy reference guide’ EBook I help you with all of these terms and you can always have them to hand! You will also get exclusive access to free video instructions. Learn more about the eBook here.
Starburst Summer Crochet Tote Bag Pattern
Front Panel
The front panel of the crochet tote bag is made up of 16 starburst granny squares, sewn together using the invisible seaming method.
If you’re looking for a way to join your squares, check out this blog post. It’s packed full of different ways (all with a different look) to join your starburst squares up: Crochet Blanket Join Methods.

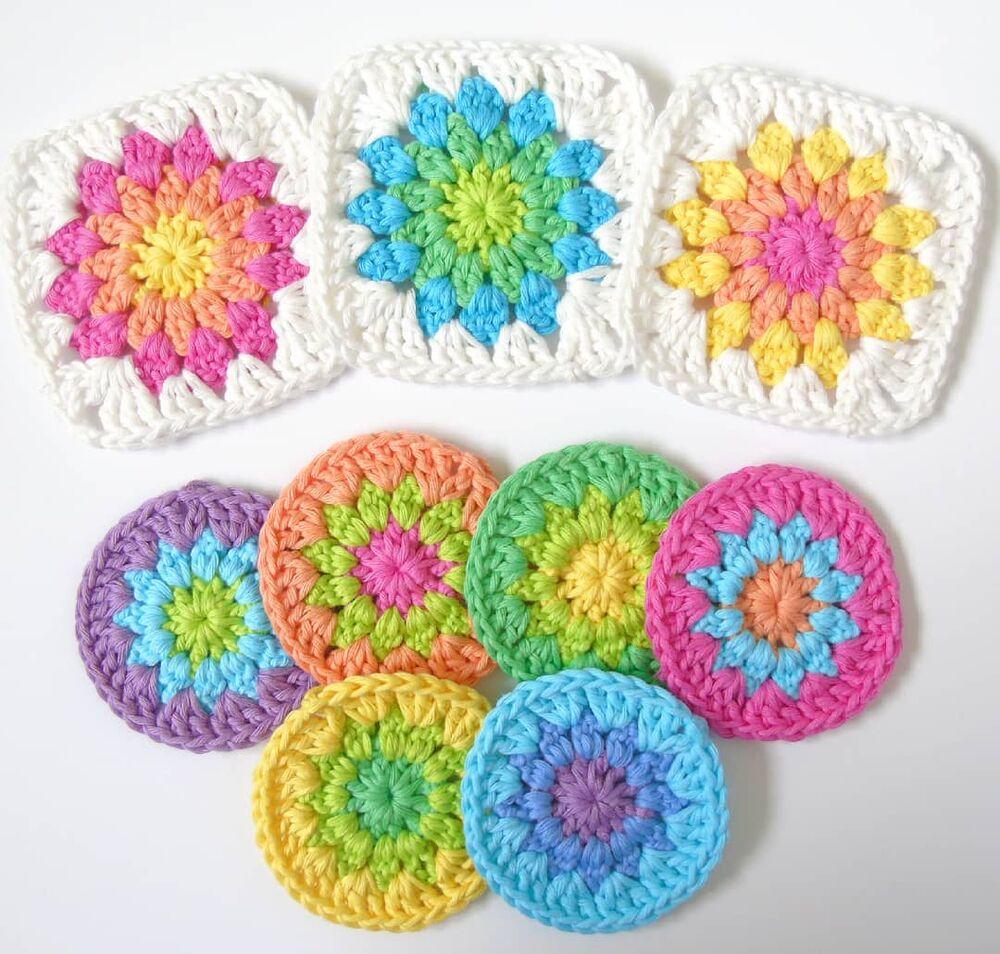
The Starburst Square pattern
You are viewing this pattern in UK terms.
Round 1
- In your first colour, ch4, sl st into the 4th ch from the hook to join into a circle.
- Ch3 (counts as your 1st tr) and do a further 11 trs into the ring.
- Sl st into the ch3 you did to begin with.
- Fasten off. (You should have 12 sts in total, including the ch3)
You are viewing this pattern in UK terms.
You will repeat this pattern for each of the 16 starburst squares.
Joining Your Squares
Once you have made all 16 squares and sewn in all of the ends, you need to join them.
To join mine I used the invisible seaming method. You can find the video tutorial for this method here: Invisible Seam
Make sure to arrange the squares in a 4 by 4 arrangement before joining. Be sure to use the same coloured yarn you used for edging your squares for the joining.
Once all your squares are joined, it’s time to add the border.
Adding a Border
- Attach your base coloured yarn (natural white) to one of the corners of the front panel.
- Ch3, 2trs, ch2, 3 trs into the same space.
- Do 3trs into each of the spaces between the granny clusters.
- When you get to the parts where 2 of the squares have been joined, instead of doing the usual 3 trs in each gap, do 2trs (this helps make the edges neater).
- At the end of this round, sl st into the ch3 you did to begin with and fasten off.
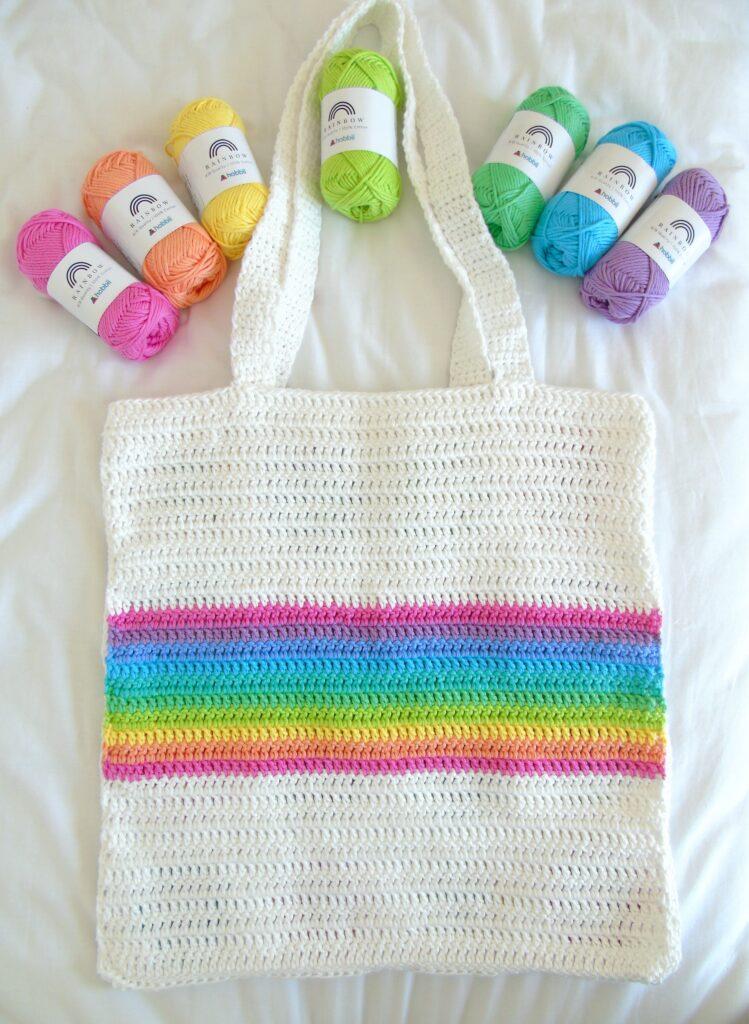
Back panel
Assembling The Bag
Place your front and back panels together, right sides facing. They should be the same size. (If they are slightly different sizes it would be a good idea to block both panels to make them the same size). Sew them together along 3 of the sides (again the invisible joining method is a good one to use), leaving one side unsewn (this will be the top of your bag).
You will attach your handles to what will be the inside of your bag. Place the handles so that there is about an inch of overlap between the ends of the handle and the top of the bag and sew them together. It is important to make sure the handles are sewn on securely.
About the designer: Hannah
Hi, my name’s Hannah and I’m a 19 year old colour obsessed crochet addict from South East England. My mum taught me to crochet about 5 years ago, but I never really got beyond making granny squares! I never did very much until the pandemic hit and we went into lockdown in march last year. Since then I’ve been crochet obsessed, and I rarely have a day where I don’t do any crochet.
I tend to get my inspiration from the colours around me, colour is definitely the main focus of all my designs and projects. Bright rainbow colours are a favourite, but I love most colours and choosing which colours to use in a new crochet project is always my favourite part!
If you enjoyed making this crochet tote bag, you can see more of Hannah’s beautiful work here: @hannahdaisycrochet
Other Crochet Bags
If you love crochet tote bags why not check out these designs available on the blog click the images below to head directly to the patterns.


Wow what a gorgeous bag. I also really like the stripes back – that’s an attention to detail you don’t always get with designs. The pattern is also really clearly written. This woman will go far!
How do you make sure the cotton doesn’t stretch? I tried with a similar bag for a trip to the ocean, and by the time we had walked 3 blocks, it stretched everywhere and was useless
Hi Jennifer It depends on the construction of the bag as well as the cotton used; a market type bag using mesh stitch is designed to stretch for example, whereas the squares used in this design will make it more sturdy. Cotton yarn that has any percentage of bamboo will stretch much more, whereas mercerised cotton is much firmer and less likely to pull. Hope this helps!
Hi! Will you be posting a US version of the Starburst summer tote bag on this site? It’s beautiful!!!!
Hi Bernadine as this was a guest post I won’t be posting a US version. However this conversation chart maybe of help to you :- bit.ly/Conversionchart 🙂