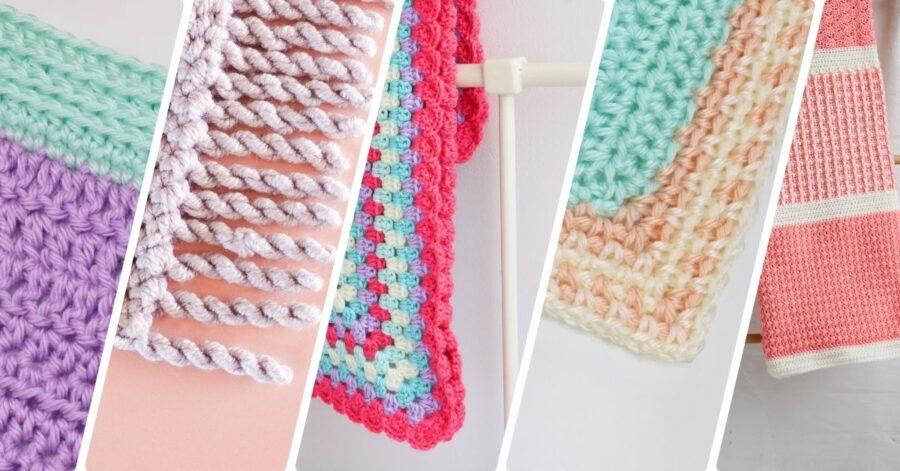
Learn how to crochet 10 types of crochet borders with my free step-by-step patterns and video tutorials. I’m often asked for advice when choosing a border, especially for a crochet blanket so I hope this post helps inspire you! Crochet borders are a versatile way to add a polished finish to your projects, whether it’s a blanket, scarf, or garment. They not only enhance the look of your piece but also offer an opportunity to showcase your creativity with various stitches and designs.
Preparing Your Crochet For a Border

It’s really important to make sure you have prepped your crochet blanket ready for the border to ensure it sits correctly and doesn’t pucker your work.
You can also brush up on your border prep knowledge with this blog post: Preparing Your Crochet For A Border

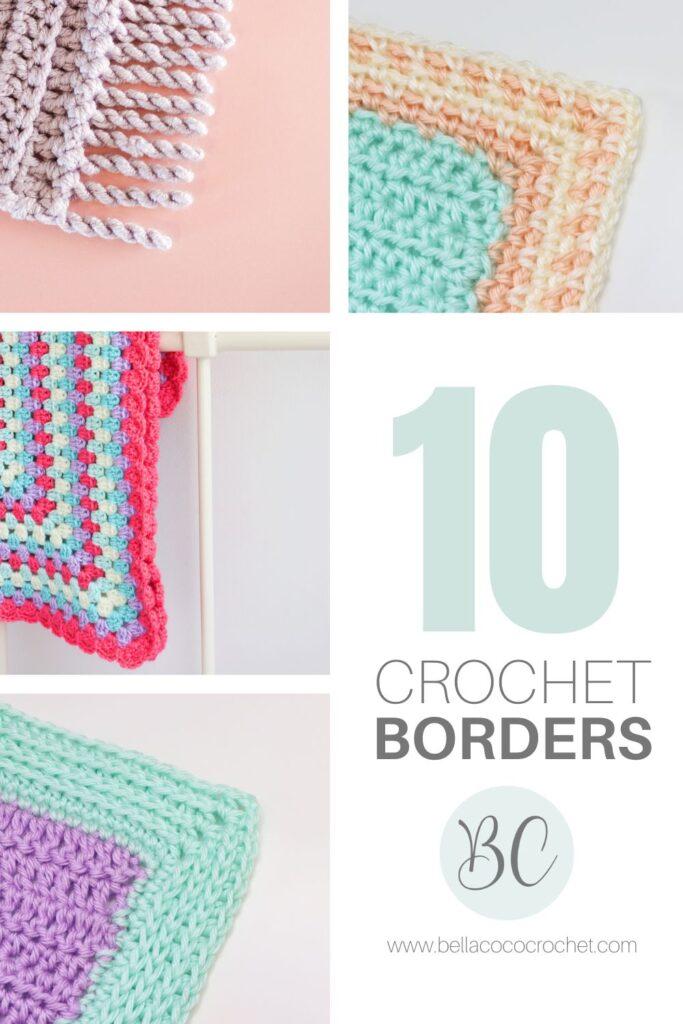
Pin For Later
Pattern Notes
- Written in UK Terms but switchable to US terms below.
- Some patterns have video tutorials
Pattern Support
The fastest way to get pattern support is to ask in our dedicated facebook group for Bella Coco Crochet patterns. This is the best place for you to connect with other crocheters.
Please note, if you wish to change and adapt this pattern in any way, this must be done at your own exploration and we cannot offer assistance with this.

Convert Pattern Terms
Here you can quickly switch between UK and US crochet terms. This will make following the pattern easier as all terms will be converted to your preferred version.
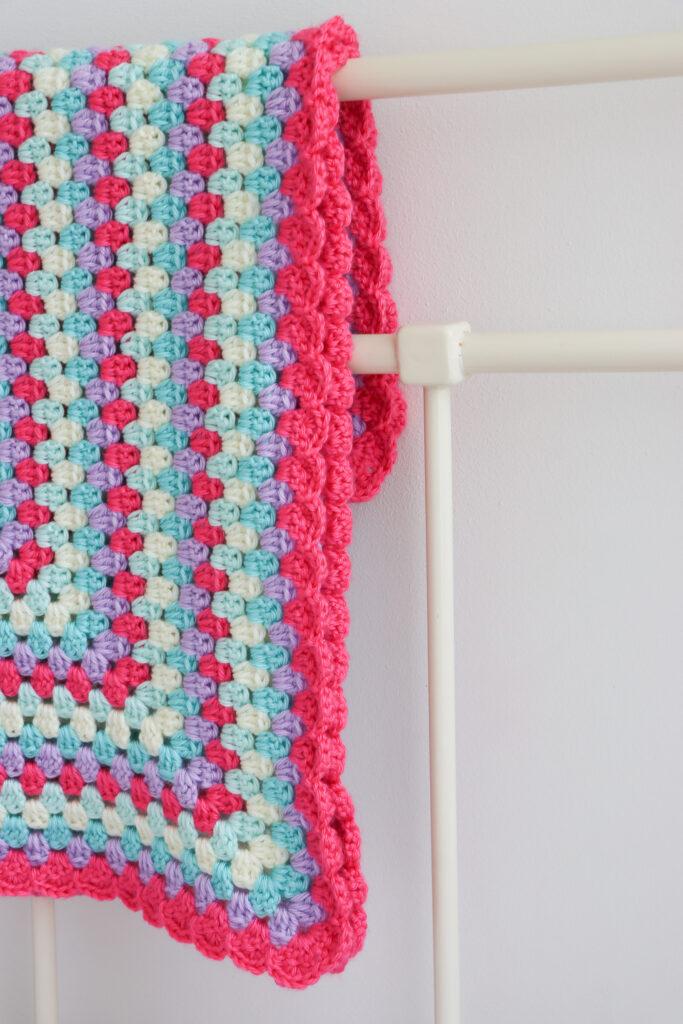
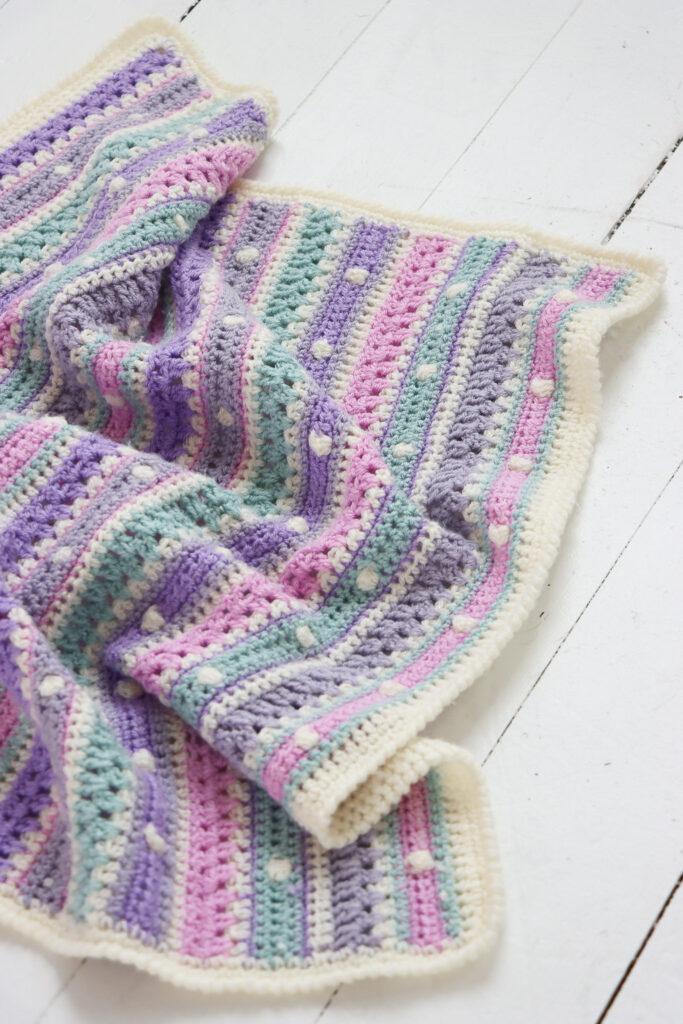
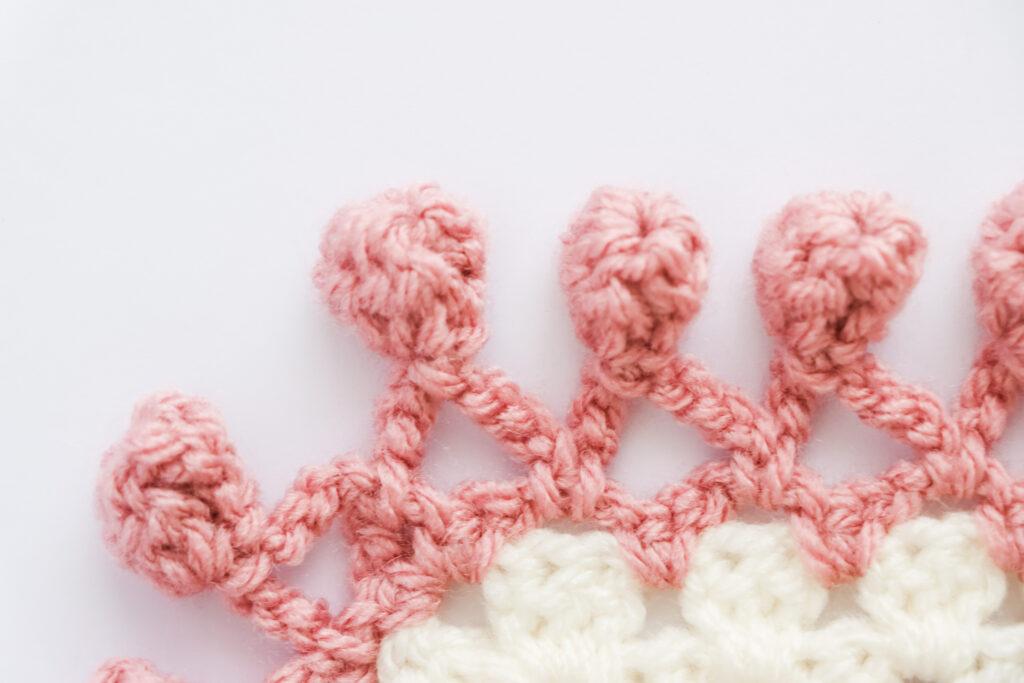
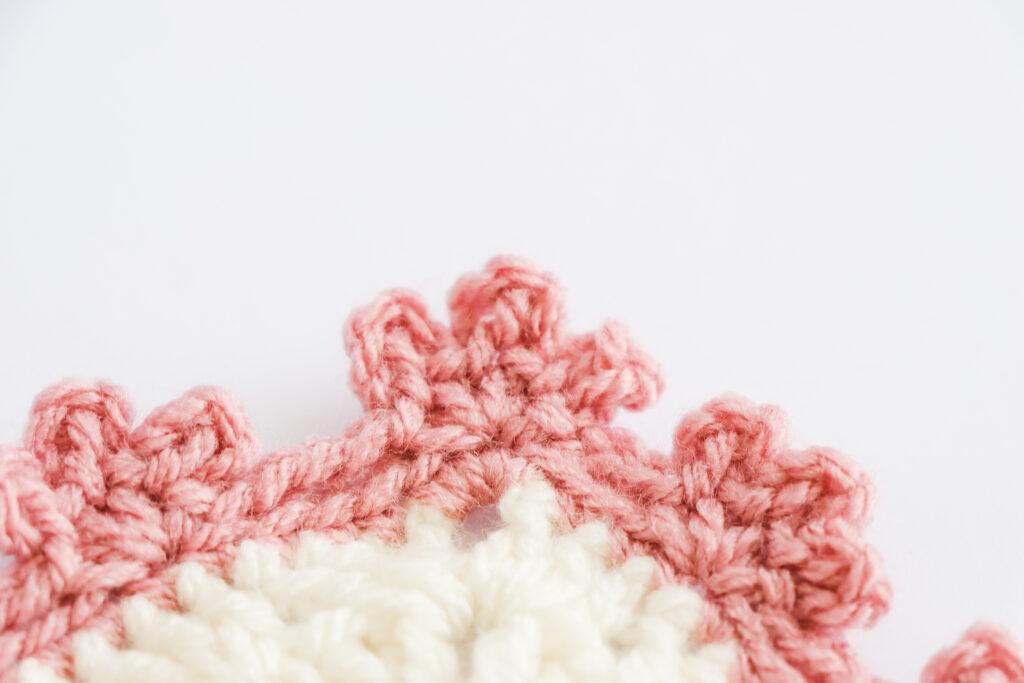
Pom Pom Edging
You are viewing this pattern in UK terms.
Prep border was added to the edge of the blanket. Prep was [2 dc in each sp between clusters, ch 3] around. The corner was worked as [2 dc, ch 3] twice in corner space.
Join to any chain space.
*Chain 6. Work cluster stitch in third ch from hook. Cluster is (yo, insert, yo, pull through, yo, pull through 2 loops on hook) three times to have 4 loops on hook. Chain 3. Work cluster again but now into the top of previous cluster. Fold top cluster over lower cluster and slip st through base of lower cluster, ch 1 to tighten. Chain 3, slip stitch into next ch-3 space on border. Repeat from * around border.
Corner is worked as other spaces with only 1 pom pom.
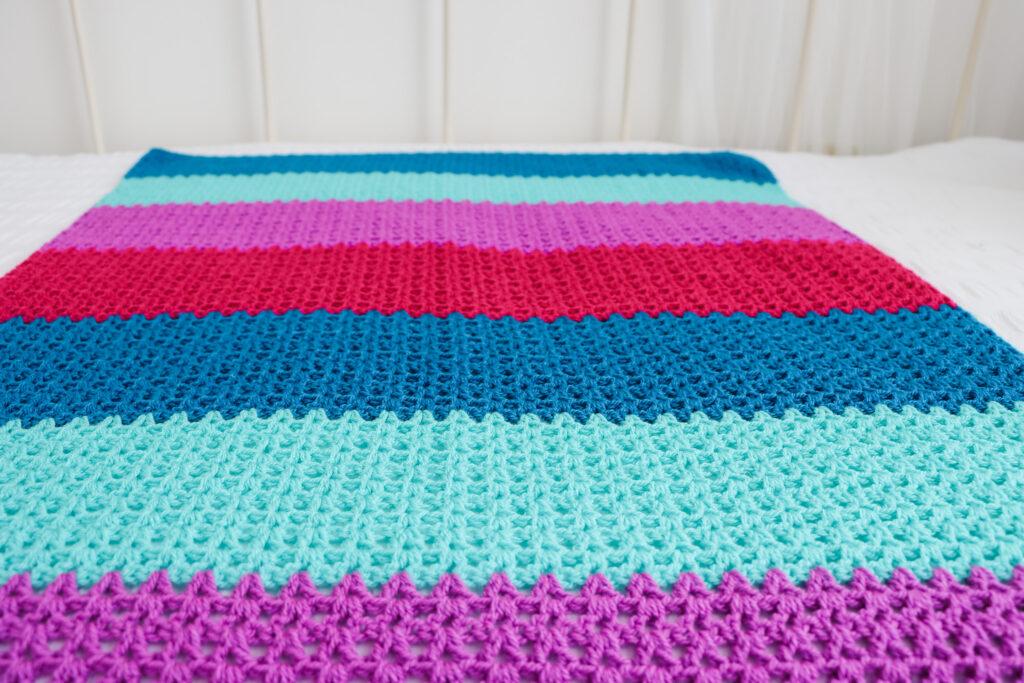
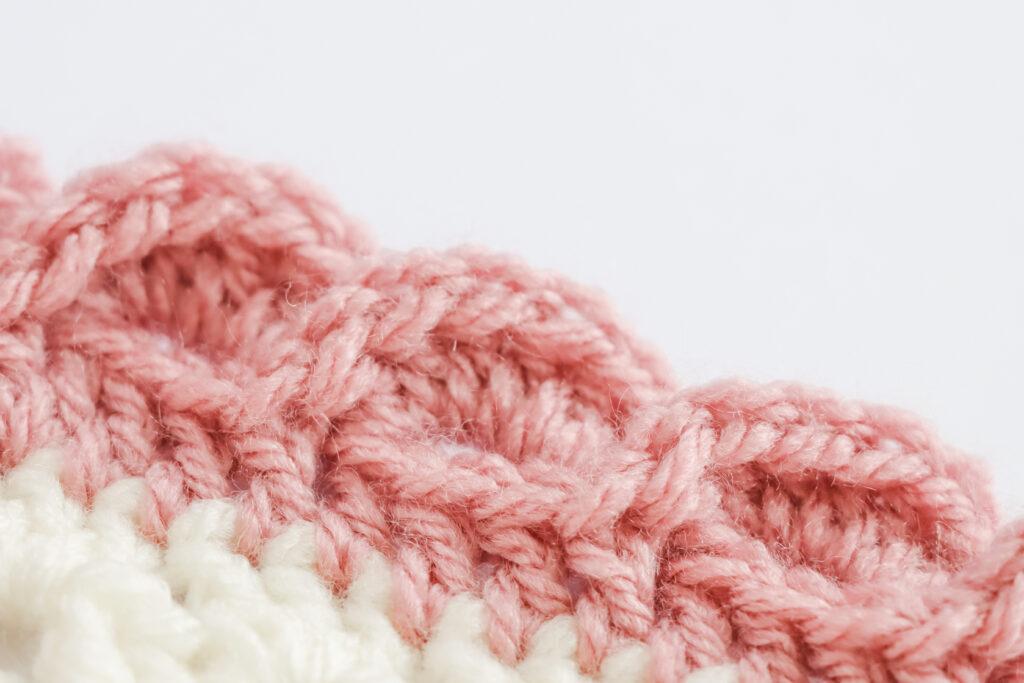
Puff Edge
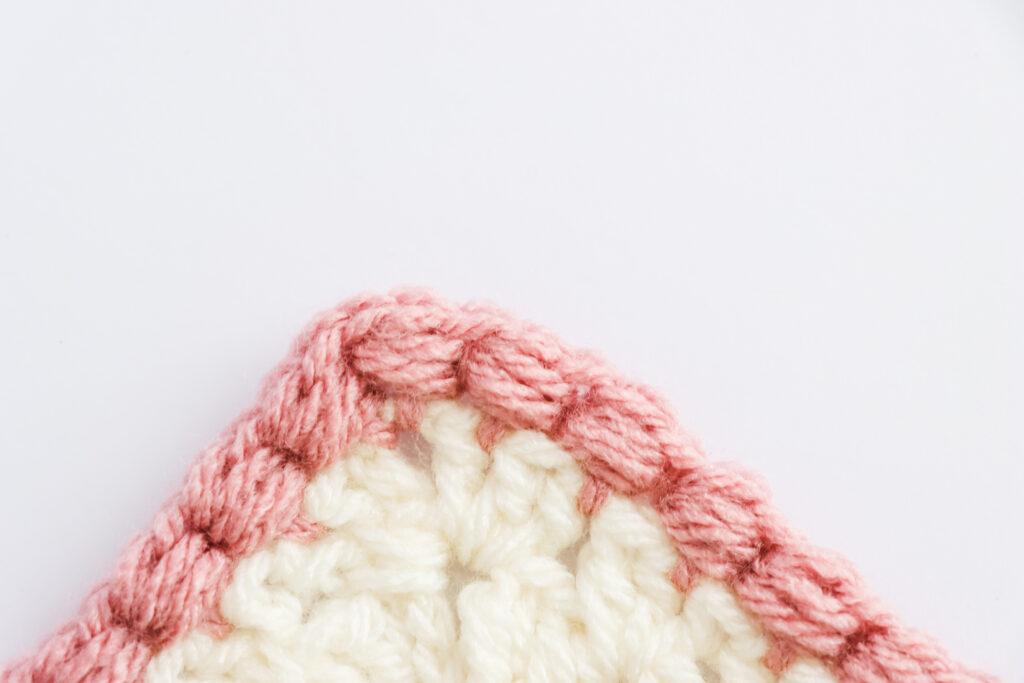
You are viewing this pattern in UK terms.
Work 1 htr, *miss 1 st, htr in next st, working around post of htr just made (yo, insert around post, yo, pull through) three times to have 7 loops on hook, yarn over, and draw through all loops on hook. Repeat from * around for border.
Join with sl st to initial htr.
Shell Edge
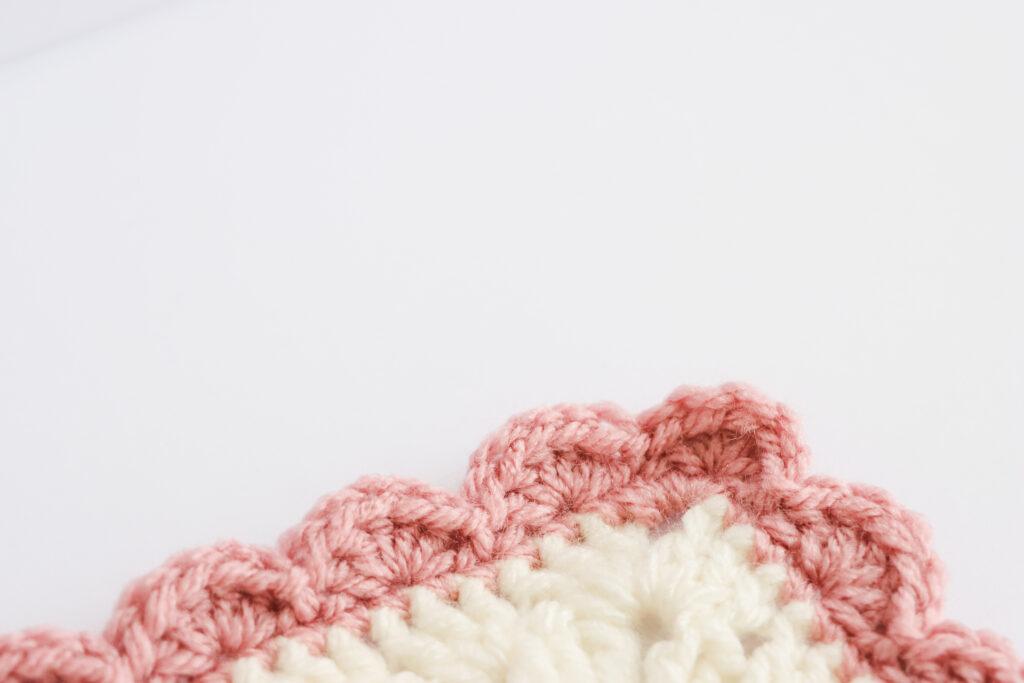
You are viewing this pattern in UK terms.
Prep round: 1 dc in each st around border.
Shell: [sl st in one st, miss 1 st, work 5 tr in next st, miss 1 st].

Unsure of the differences between UK and US terms? Need a refresher on how to do your stitches? In my ‘How to crochet: A handy reference guide’ EBook I help you with all of these terms and you can always have them to hand! You will also get exclusive access to free video instructions. Learn more about the eBook here.
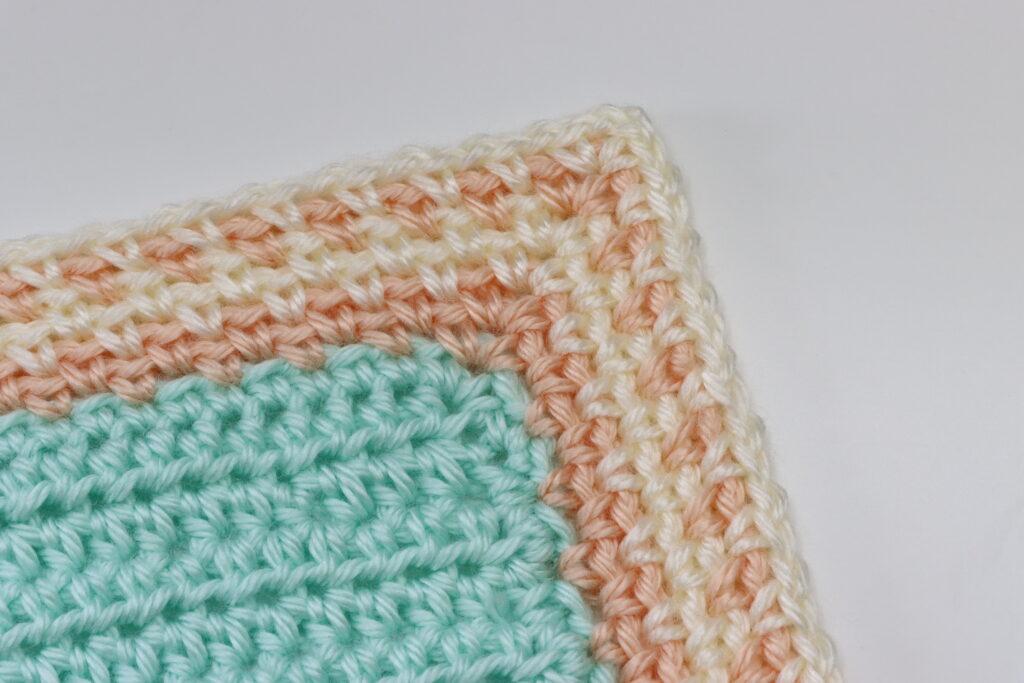
Triangle Picot Edge
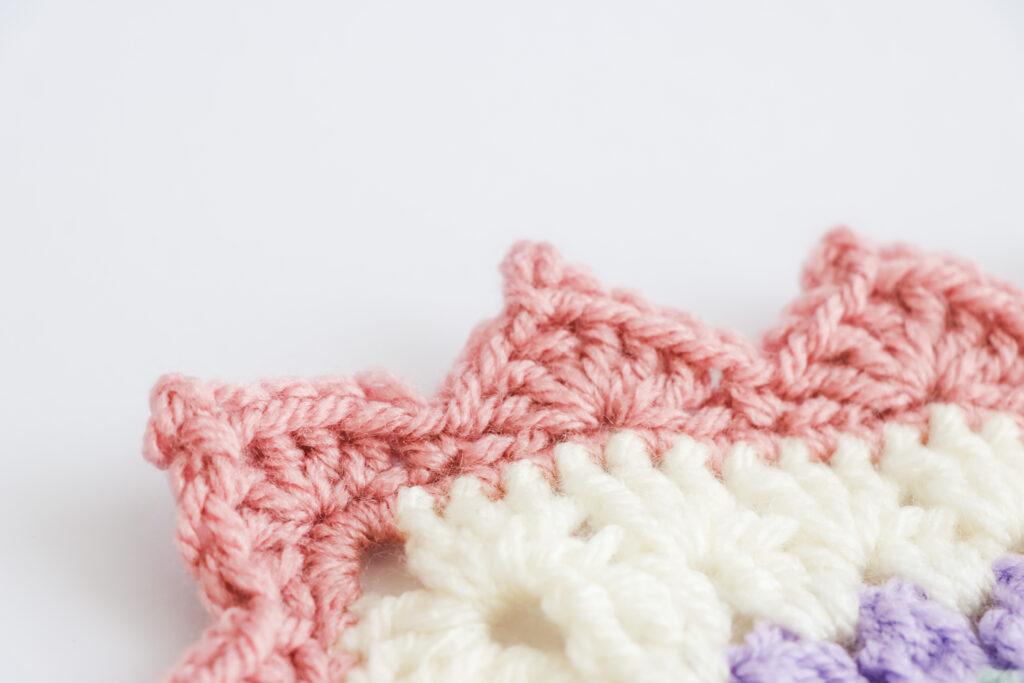
You are viewing this pattern in UK terms.
Prep round: 1 dc in each st has been worked. Corner ch-3 spaces have 5 dc worked into them.
Pattern is worked over a multiple of 6 +1.
Picot is: ch 3, sl st in third ch from hook.
Join in last st of 5dc corner. Ch 1 (counts as dc), *miss 2 sts, (3 tr, picot, 3 tr) in next st, miss 2 sts, dc in next st. Repeat from * to corner.
Corners: When working over the 5 dc of corner, miss 1 dc, work 1 tr in next st, work (2 tr, picot, 2 tr) in next st, work 1 tr in next st, miss next st, dc in next st. Then continue with pattern as normal across side.
To join, sl st to first st.
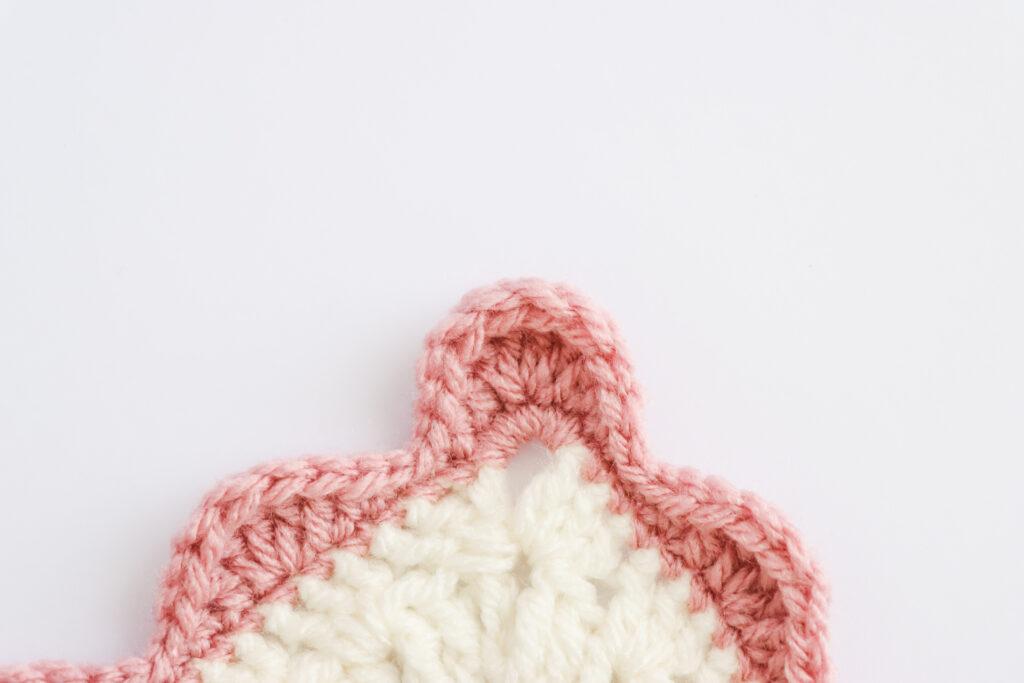
Triple Picot Edge
You are viewing this pattern in UK terms.
Prep round: one dc in each st along side, 3 dc worked in each corner. Sl st to first st to join.
Pattern is worked over 6 sts.
*(Ch 5, dc) three times in same stitch, ch 4, miss 5; repeat from * around. Adjustments in skipping stitches may be needed to work a triple picot in corner and to keep it laying flat. Sl st to first dc to join.
Wave Border
You are viewing this pattern in UK terms.
Worked over multiples of 4 (but adaptations possible).
Join in a corner space, ch 3 (classes as tr), tr in same space as joining. Work 1 tr in each of next 2 sts. Ch 4. Turn work. Slip st into top of beginning ch-3. Turn work. Work 7 tr into ch-4 sp just made. *Work 1 tr into each of next 4 sts, ch 4, turn work, slip stitch to ch-4 under last tr of previous wave, turn work, work 7 tr in ch-4 sp just made. Repeat from * to corner. If you have only 1 st before corner ch-sp, you can work 2 tr in last st and then 2 tr in corner ch-sp. Then complete wave stitch as usual. Rotate piece and begin next wave in same corner ch-sp by working 2 tr in corner space and 1 tr in each of next 2 sts.
Work in pattern around border, sl st into first tr on the bottom of first block, insert hook into first tr of upper set of tr sts, turn work, sl st into ch-4 sp of previous block (last wave of border) pulling all the way through to the front of the piece. Fasten off.
Wavy Border
You are viewing this pattern in UK terms.
Prep border of dc in each st around, 6dc worked into each corner ch-sp. Sl st to first st to join.
Worked over multiple of 9 sts across side.
Ch 1, *sl st in next st, dc in next st, htr in next, tr in next, 3 dtr in next, tr in next st, htr in next st, dc in next st, sl st in next, repeat from * to corner.
At corner, work dc, htr, tr, 4dtr, tr, htr, dc. Corners may be adjusted to make them lay flat and round appropriately.
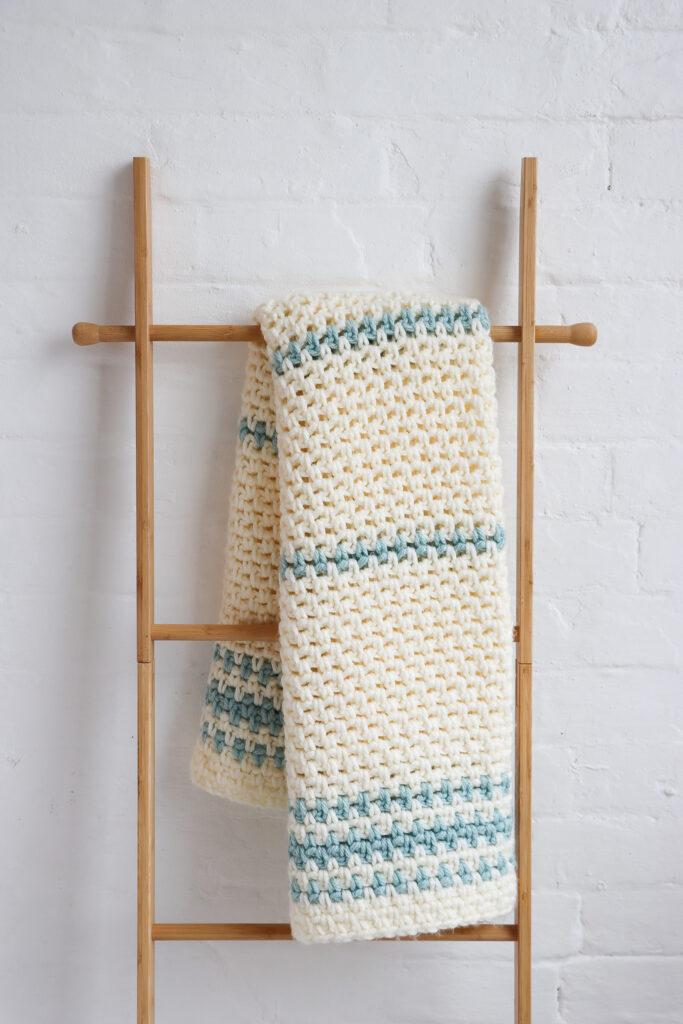
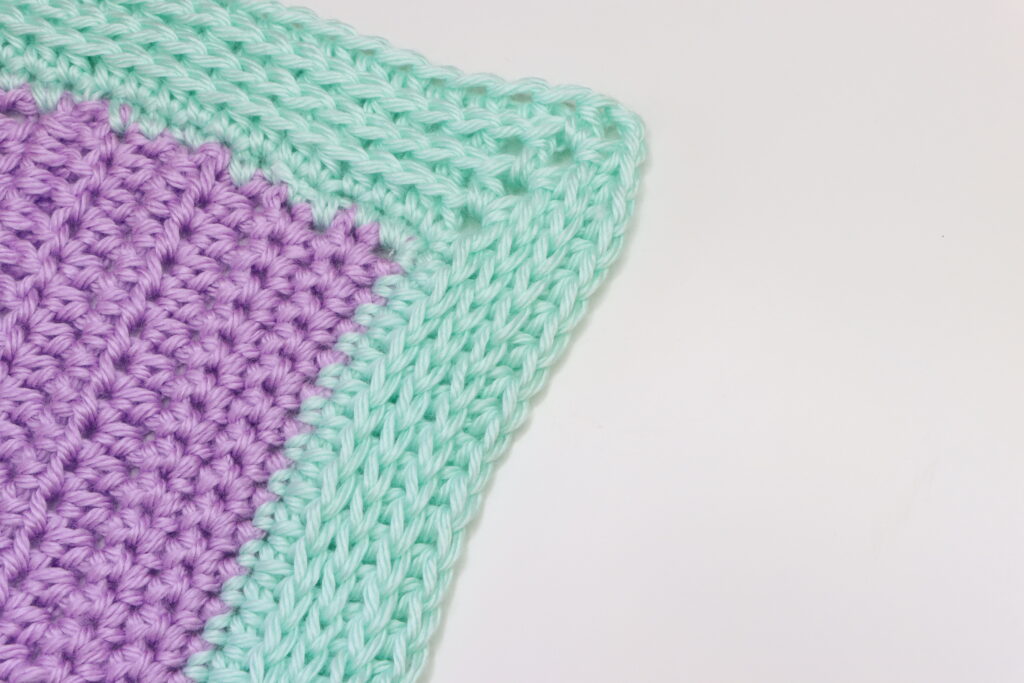
Camel Stitch Border
Moss Border
Modern Fringe Border
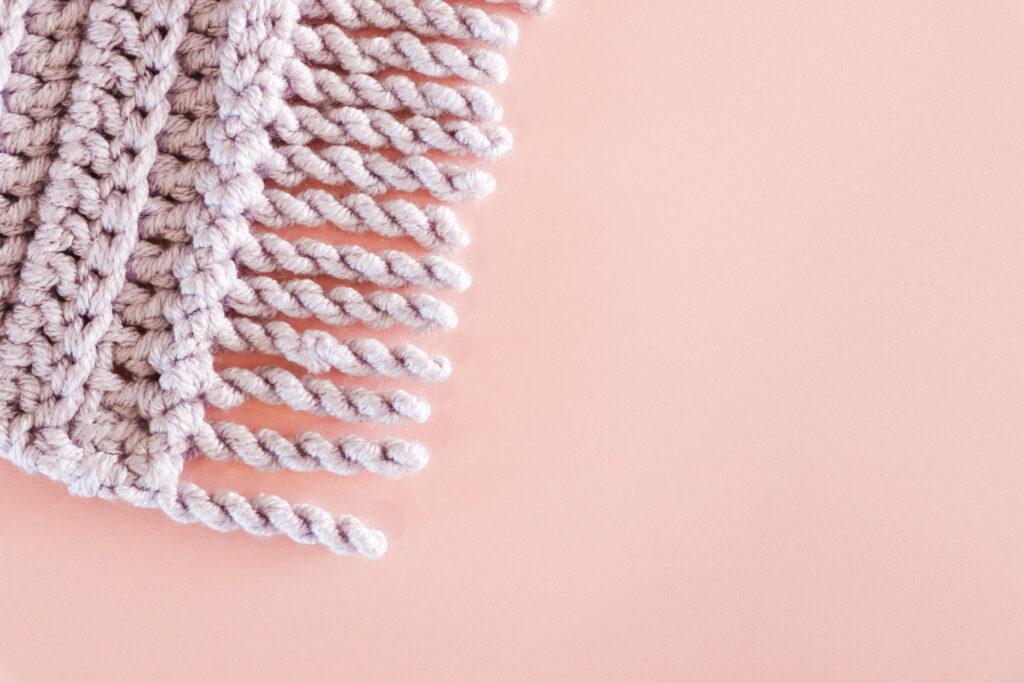
You are viewing this pattern in UK terms.
You’ll need to work the fringe into some stitches, so either the edge with stitches or the underside of a chain. You could also add a row of double crochet to the row ends of a project so you have stitches to work into.
- Start with a slipknot and ss to connect the yarn to your project.
- Pull up a loop (I did 15cm) using a ruler or guide to measure.
- Twist the yarn the same amount of times as there are centimetres and then add one, so I did 15 centimetres therefore I twisted 16 times. Feel free to experiment with this to get different looks.
- Ss into the base of the current stitch, popping your finger in the middle to bend your twist if needed.
- Ss into the next stitch.
- Pull up another loop, to the same size as before using your ruler or guide.
- Ss into the base of the stitch.
- Ss into the next stitch also and straight out your fringe twist.
- Repeat this until you get to the end of the row.
- At the end, Ss into the base of the stitch as you would normally, then DC to secure.
- Fasten off and sew in your ends.
Patchwork Blanket
If you’re looking for a project to work on gradually whilst learning new crochet stitches then the Patchwork Blanket might be the project you’re looking for. Crochet 30 stitches and construct this beautiful Patchwork Blanket following my 65 page Ebook. Click here to find out more or alternatively click the image below.
Crochet Blanket Patterns
Looking for your next crochet project? CLICK HERE to explore the FREE patterns on the blog or take a look at some of my favourite crochet blanket patterns below!