
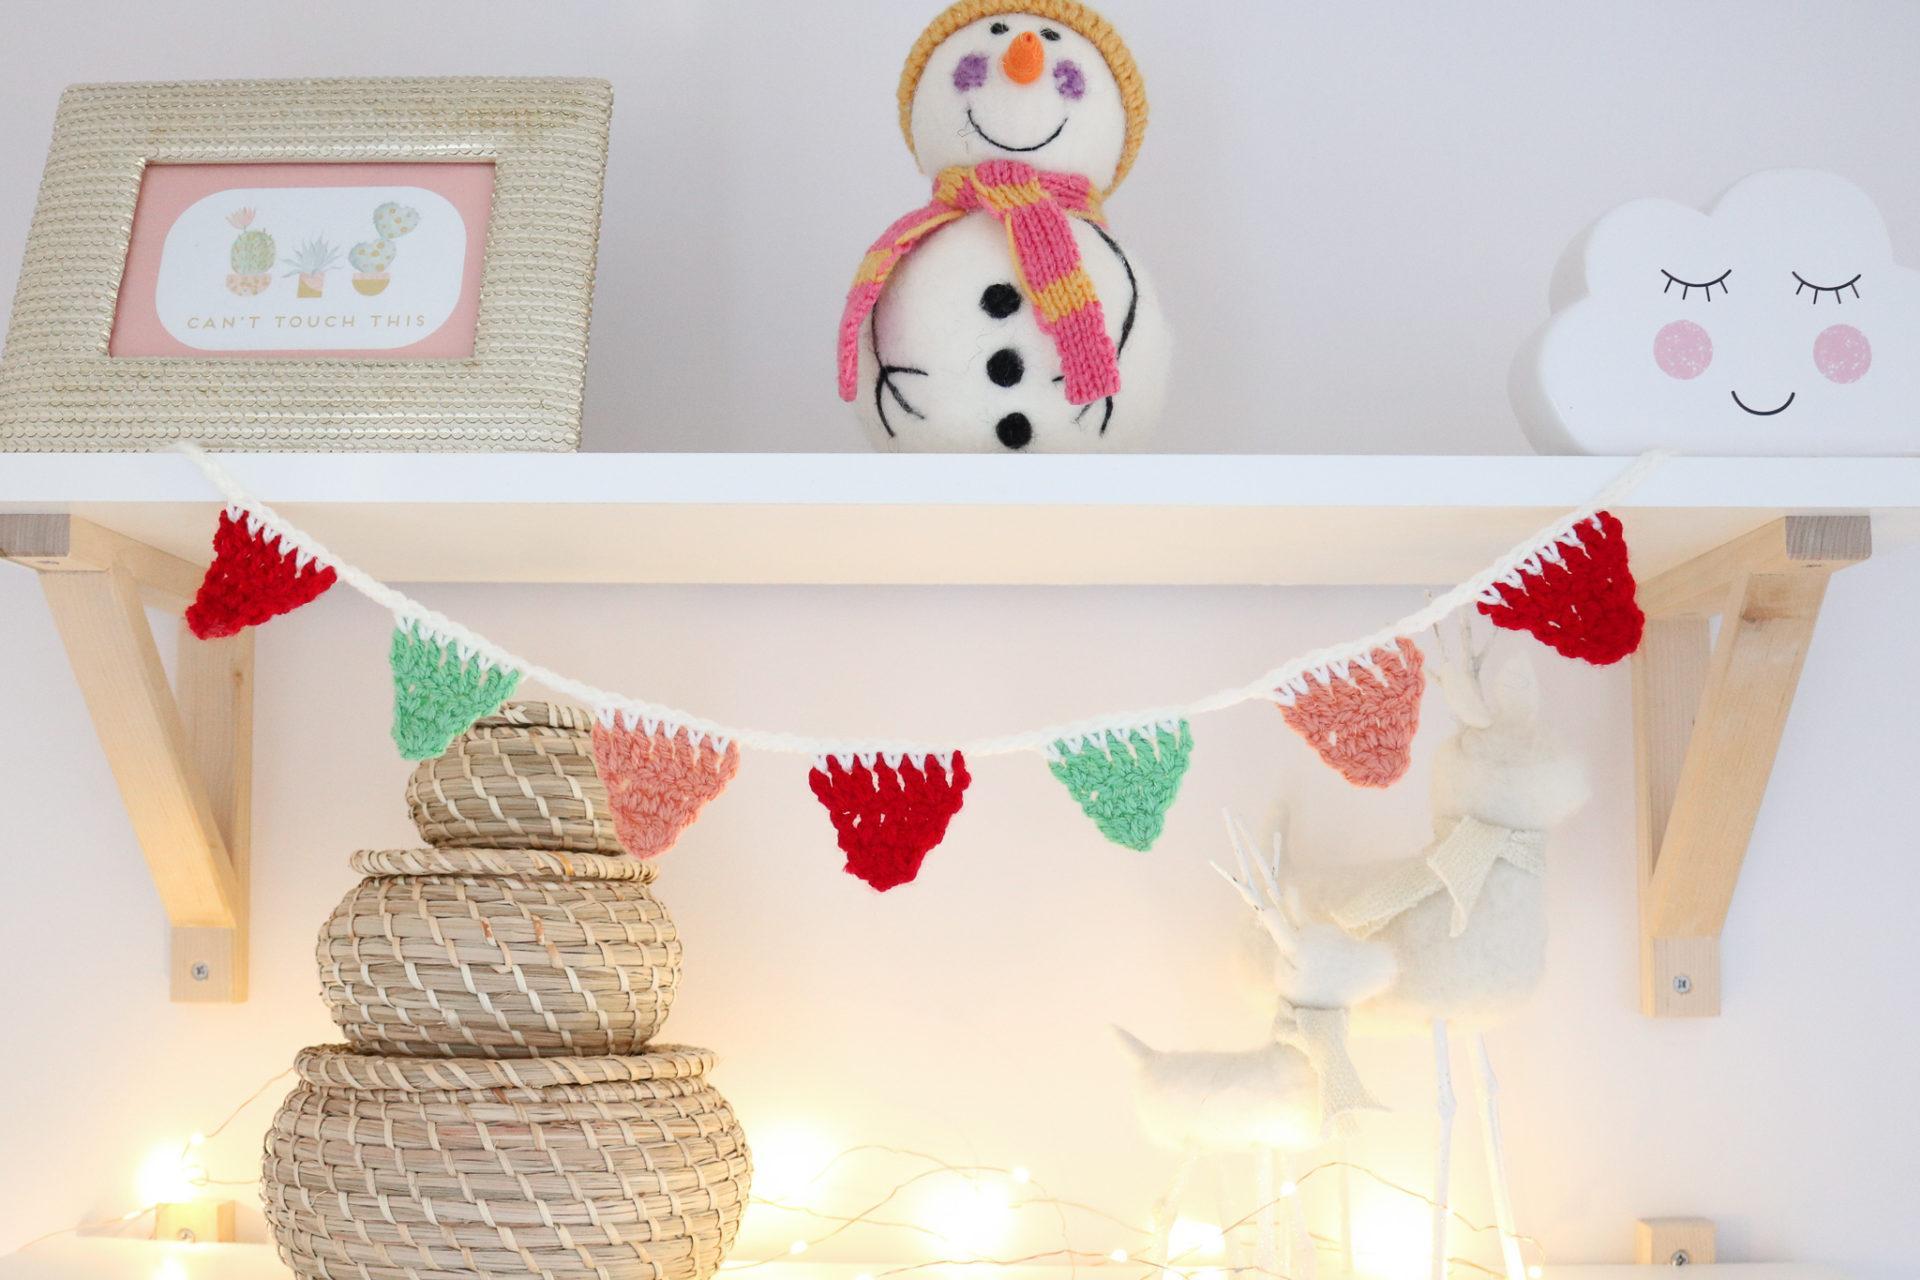
Who else loves a bit of Mini Festive Bunting at Christmas? I wanted to add a little festive cheer in my daughter’s bedroom and Mini Bunting popped right into my head. So I headed to my yarn stash, picked out a few colours and got to work! It’s super quick and easy to make but looks really effective.
In this post, you’ll find everything you need to crochet your own mini festive bunting. I have written the instructions and a video tutorial below plus more festive makes for your little ones.

Materials and Tools
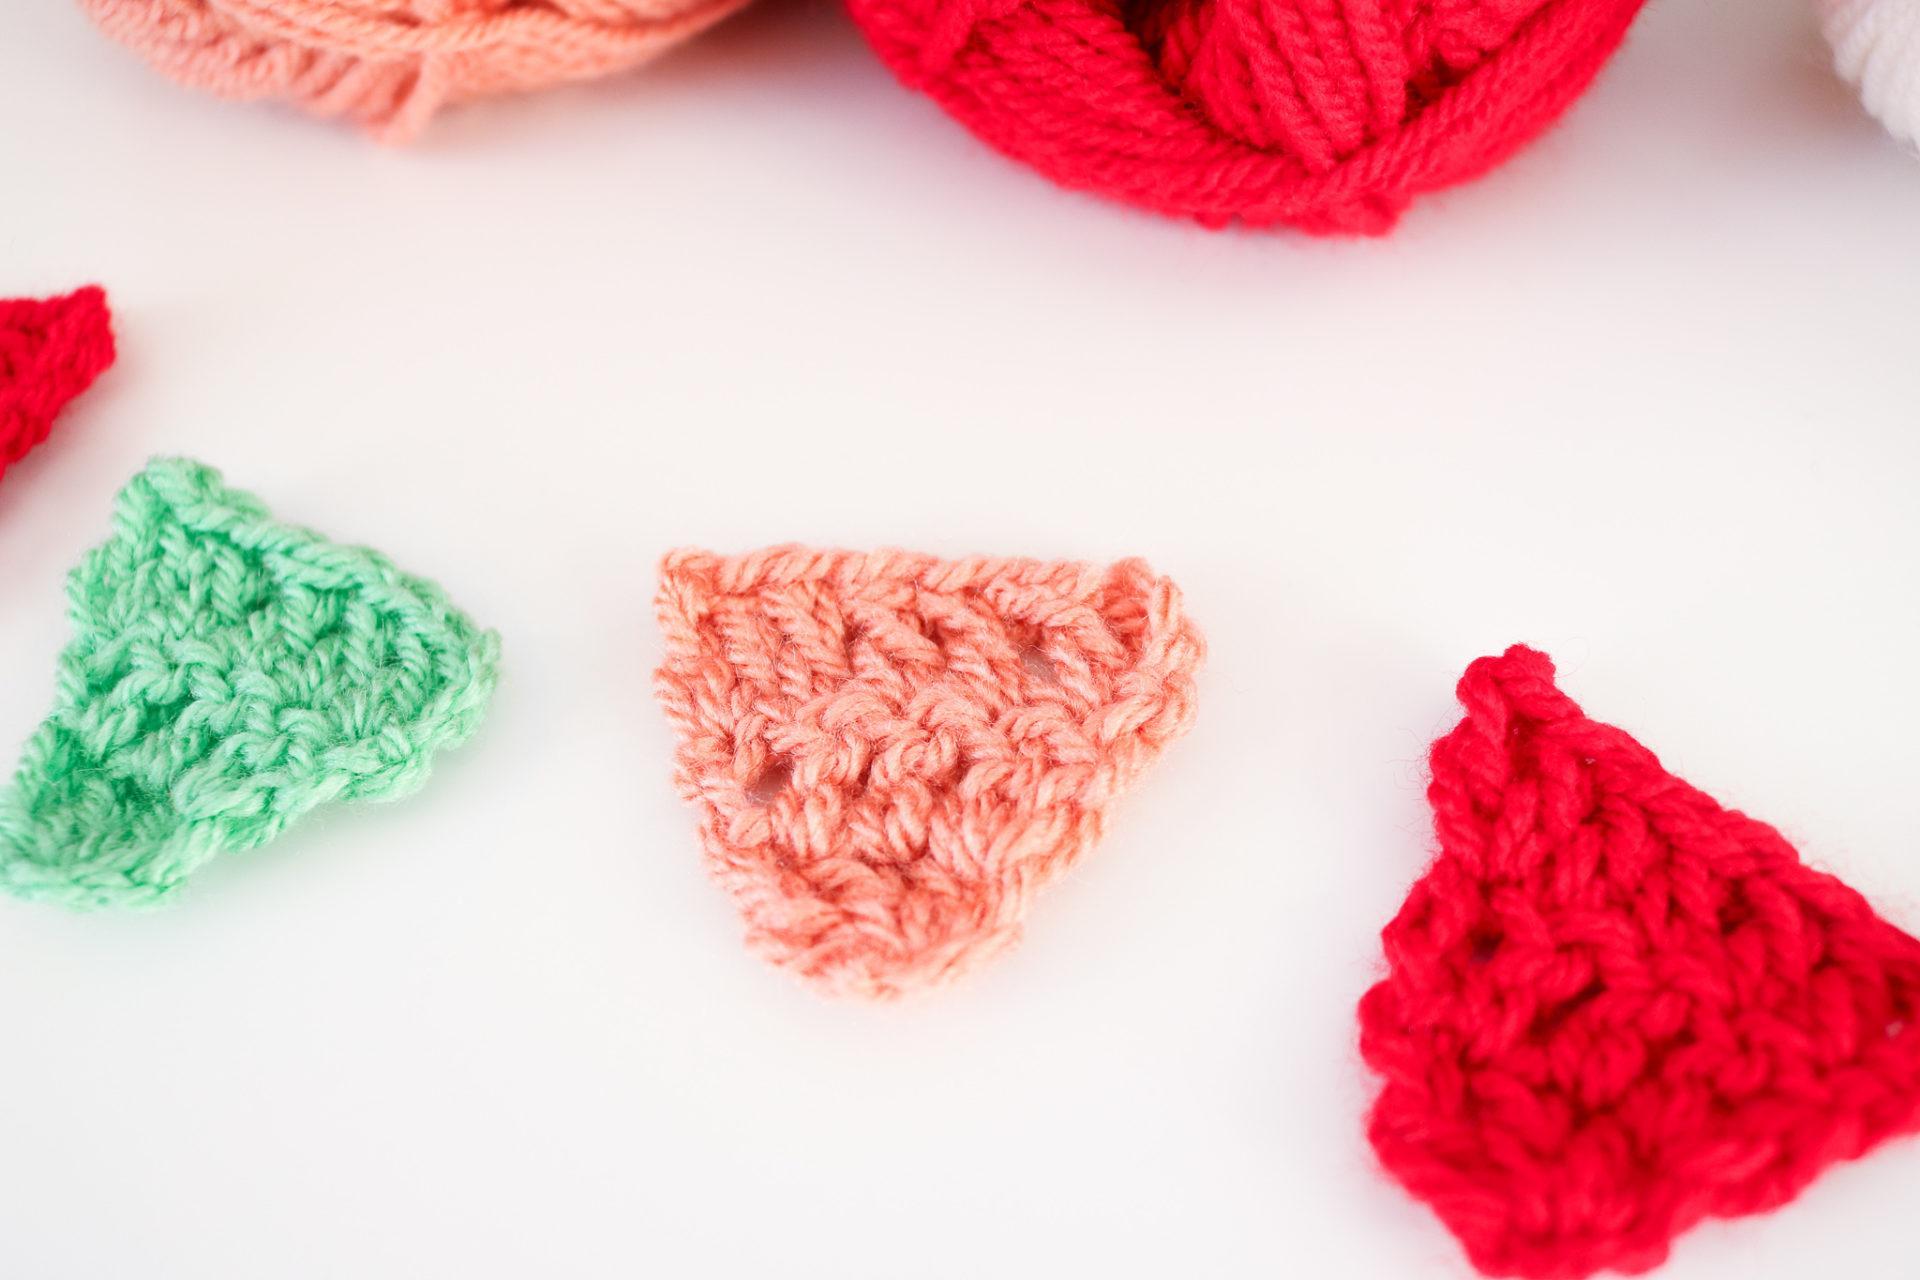
- Yarn: I have used Paintbox Simply Aran in shades Spearmint Green (255) Pillar Red (214) Vintage Pink (255) Champagne White (202)
- Hook: 5mm
- Scissors
- Darning Needle
Pattern Notes
- Written in UK terms but switchable to US terms below.
- Gauge isn’t important with this project. Just keep your hook size and tension consistent.
- Blocking is recommended in order for your bunting to hang neatly.
- Video tutorial can be found at the base of the post.

Convert Pattern Terms
Here you can quickly switch between UK and US crochet terms. This will make following the pattern easier as all terms will be converted to your preferred version.
Terms and Abbreviations
- Chain: ch(s): Yarn over, pull through.
- Slip stitch (sl-st): sl-st: Insert hook, yarn over, pull through both stitch and loop on hook.
- Double crochet: dc(s): Insert hook into stitch, yarn over, pull up a loop, you will have two loops on the hook. Yarn over, pull through remaining two loops.
- Treble crochet: tr(s): Yarn over, insert hook into stitch, yarn over, pull up a loop, you will have three loops on the hook. Yarn over, pull through two loops, yarn over, pull through remaining two loops.
- *__* repeat instructions

Unsure of the differences between UK and US terms? Need a refresher on how to do your crochet stitches? In my ‘How to crochet: A handy reference guide’ EBook I help you with all of these terms and you can always have them to hand! You will also get exclusive access to free video instructions. You can find my EBook HERE.
Pin For Later


To unlock this FREE crochet pattern all you need to do is enter your email and the grow app will appear, please enter your email and create a password. Now you’ve created a grow account you’ll be able to access all of the free patterns on the blog and bookmark your favourites so you can have them all in one place for easy access.
If you forget your password, click the “forgot password” link and follow the prompts. Please note that the team are unable to assist with resetting Grow passwords or accessing your Grow account, so please make sure you save your login information in a safe place.
Your grow account is separate from your Bella Coco account which you use to access your purchased patterns.
mini festive Bunting pattern
You are viewing this pattern in UK terms.
Ribbon
- Ch6 and ss into 6th ch from the hook to form a loop. ch10, *dc into each ch sp of your first bunting. ch4* repeat with all of your bunting. ch16, ss into the 6th ch from the hook.
- Sew in your ends and there you have it! Your very own Mini Festive Bunting!
Video Tutorials
Right-handed

Left-handed

Crochet Festive Makes
Now you’ve completed your mini festive bunting for your little ones’ bedroom take a look at these lovely festive patterns available on the blog: Baby Elf Hat, Mini Christmas Stocking and my Hexagon Christmas Stocking.


I always love to see your makes so if you try any of my patterns or follow my stitch tutorials please tag me @bellacococrochet or use the #bellacococrochet
sarah-jayne
How to Crochet Mini Festive Bunting
Learn how to crochet this quick and easy mini festive bunting.
Materials
- Yarn: I have used Paintbox Simply Aran in shades Spearmint Green (255) Pillar Red (214) Vintage Pink (255) Champagne White (202)
Tools
- Hook: 5mm
- Scissors
- Darning Needle
Instructions
- Foundation: Ch2
- Row 1: 3tr into 2nd ch from the hook
- Row 2: ch3, tr into the base of ch3, tr, 2 tr
- Row 3: ch3, tr into he base of ch3, tr into the next 3 stitches, 2tr into the top of the ch3
- Fasten off and sew in ends.
- Repeat in your desired colours and the the quantity you require and sew in your ends before moving on to the ribbon.
- ribbon
- Ch6 and ss into 6th ch from the hook to form a loop. ch10, *dc into each ch sp of your first bunting. ch4* repeat with all of your bunting. ch16, ss into the 6th ch from the hook.
- Sew in your ends and there you have it! Your very own Mini Festive Bunting!
Notes
Written in UK terms
Gauge isn’t important with this project. Just keep your hook size and tension consistent.
Blocking is recommended in order for your bunting to hang neatly.
Video tutorial can be found at the base of the post.