Learn How to Crochet a Granny Square Bucket Hat

Pin it now, make later!

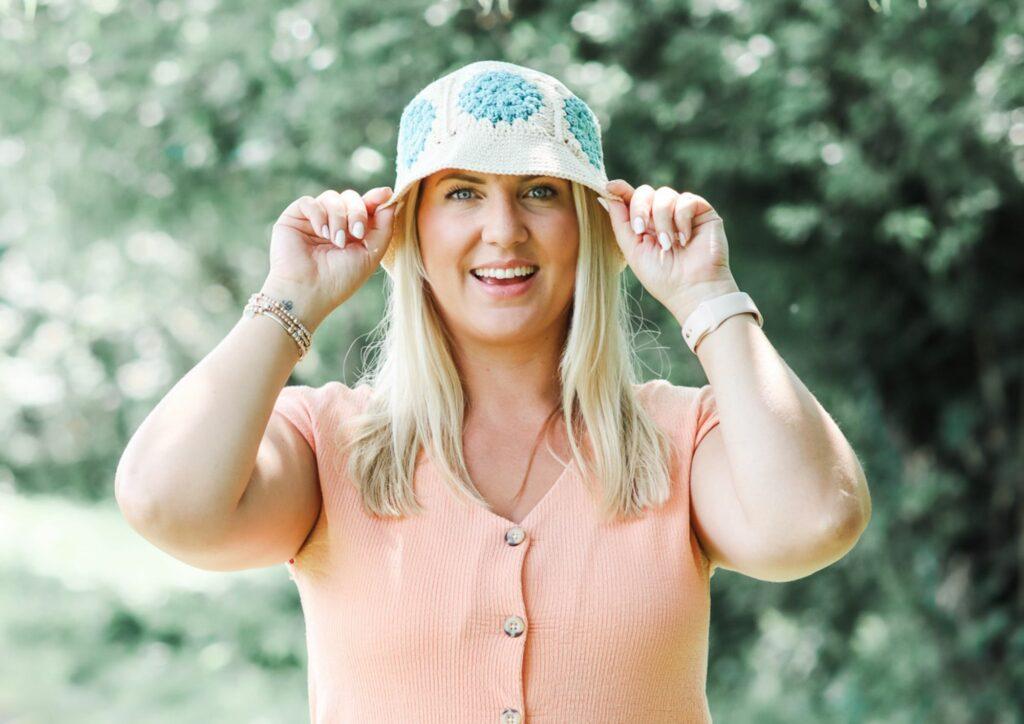
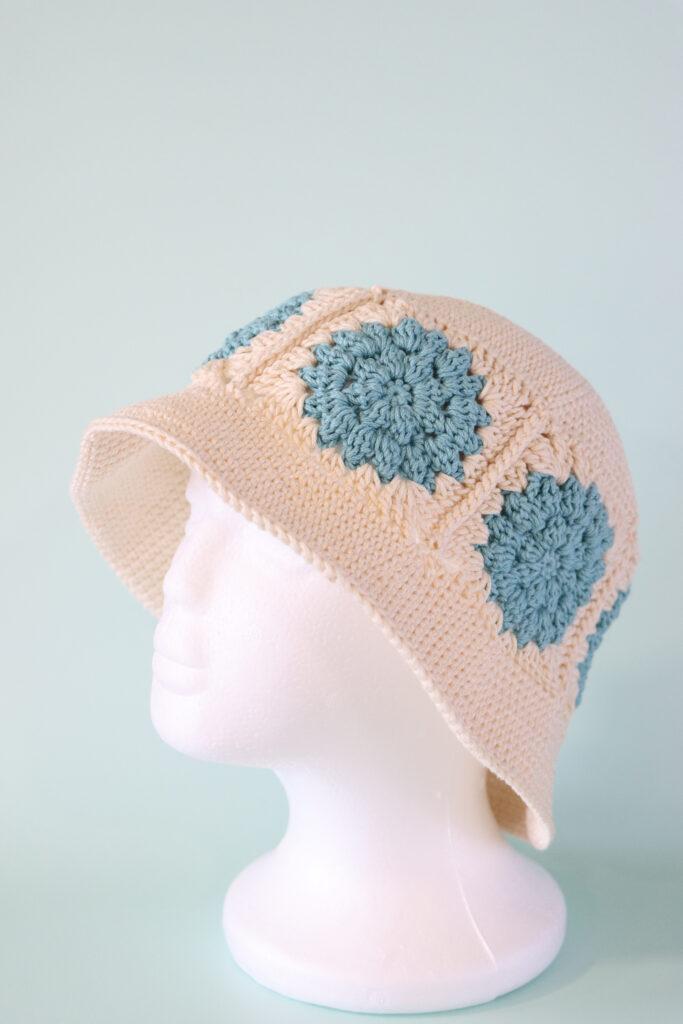
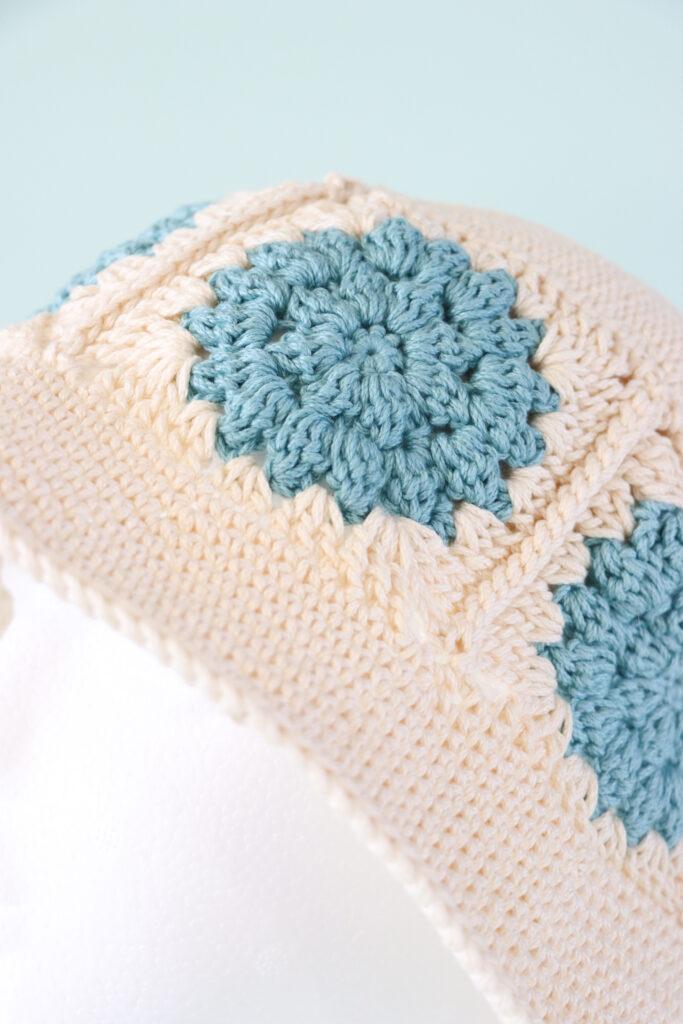
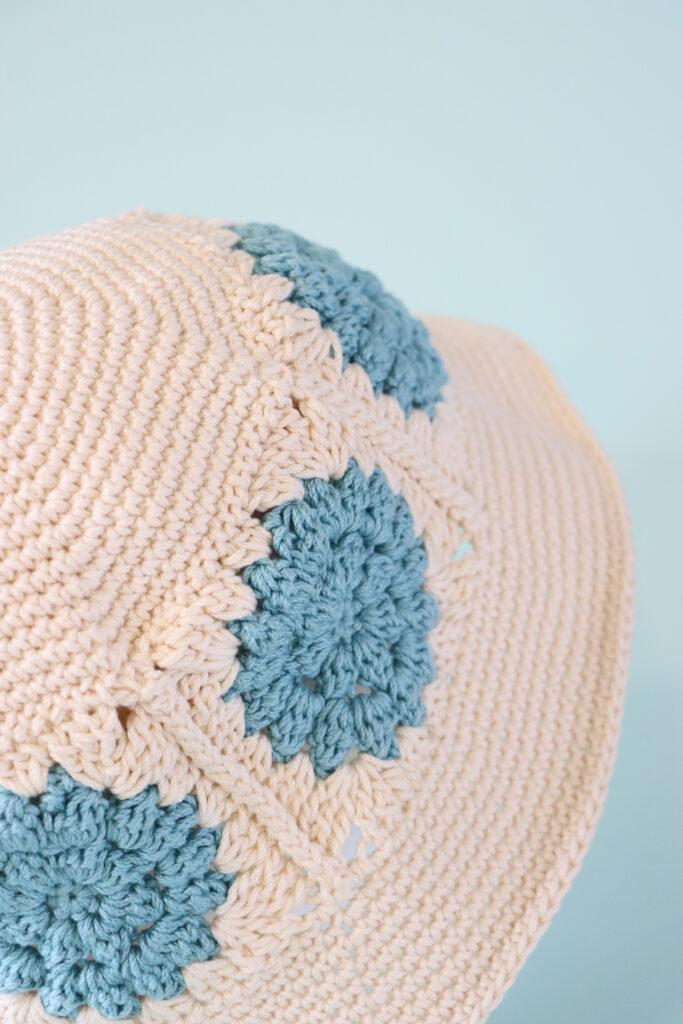
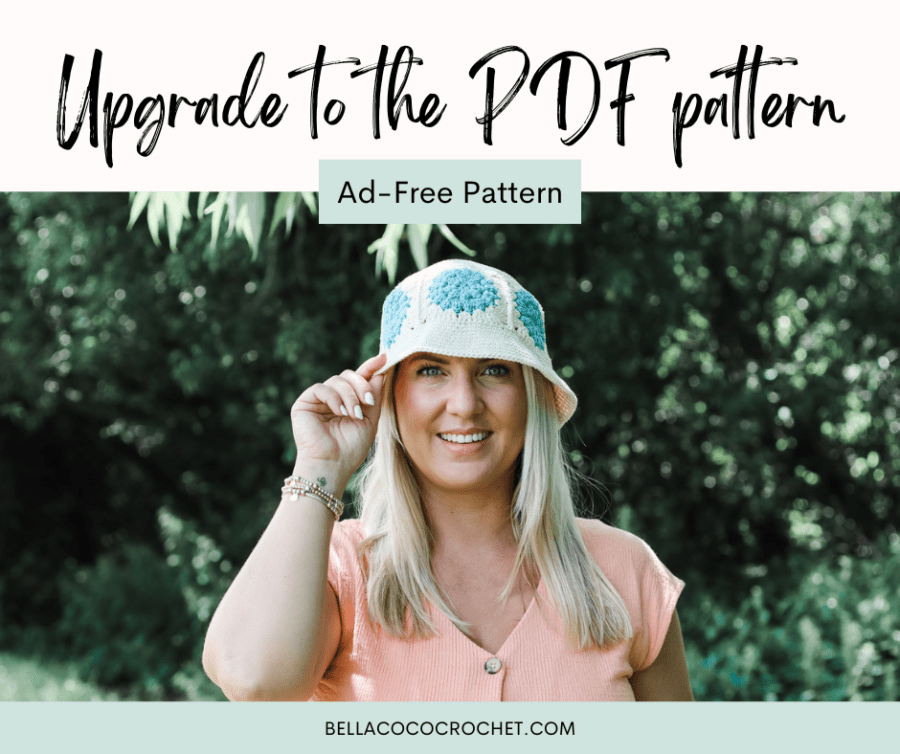
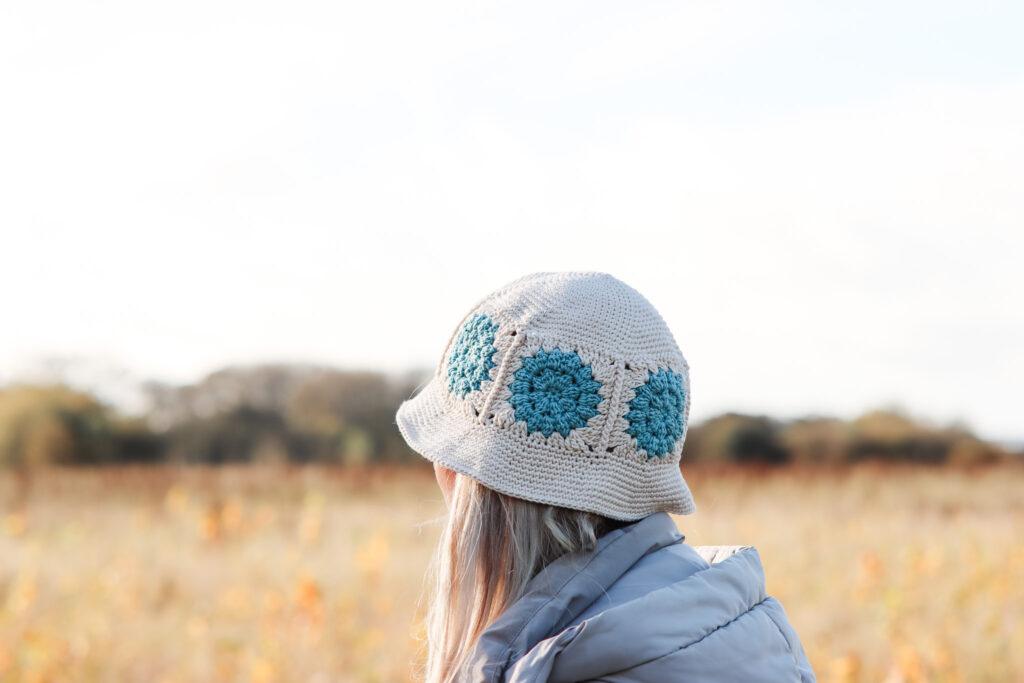
Learn how to crochet a granny square bucket hat with my free step-by-step pattern. Maybe you’ve got to grips with the basic granny square and looking for more of a challenge? The Coco Bucket hat is a perfect make which can be worn all year round and can be made in any colour combination to suit your style.

Coco Crochet Bucket Hat
Crochet Granny Square Bucket Hat
Table of Contents

    Materials & Tools

    Gauge

    • Crown: 20cm (8inch) approx.
    • Squares: 9cm X 9cm (3.5inch X 3.5inch) approx.
    • Hat circumference: 57cm (22.5inch) approx.
    • Brim depth: 6cm (2.5inch) approx.

    Completed Size

    One size, Adult Crochet Bucket Hat – approx. 21-23 inches

    crochet granny square bucket hat pattern

    Convert Pattern Terms

    Here you can quickly switch between UK and US crochet terms. This will make following the pattern easier as all terms will be converted to your preferred version.

    Terms & Abbreviations

    • Place Maker: PM: Place stitch marker in the indicated stitch.
    • Slip Stitch(s): ss: Insert hook, yarn over, pull through stitch and loop on hook.
    • Chain(s): ch(s): Yarn over, pull through.
    • Double Crochet(s): dc(s): Insert hook into stitch, yarn over, pull up a loop, you will have two loops on the hook. Finally, Yarn over, pull through remaining two loops.
    • Half Treble Crochet(s): htr(s): Yarn over, insert into stitch, yarn over, pull up a loop, you will have three loops on the hook. Yarn over, pull through remaining three loops.
    • Treble Crochet(s): tr(s): Yarn over, insert into stitch, yarn over, pull up a loop, therefore you will have three loops on the hook. Yarn over, pull through two loops, yarn over and finally pull through remaining two loops.

    Intermediate Stitches

    • Front loop only: FLO: Go through the front loop of the stitch only, not both as you normally would.
    • Double Treble(s): dtr(s): Yarn over hook twice, insert into stitch, yarn over, pull up a loop, then you will have four loops on the hook. Yarn over, pull through two loops, you will have three loops on the hook. Finally, Yarn over, pull through two loops, yarn over, pull through remaining two loops.
    • Standing Double Crochet(s): sdc(s): Starting with a slip knot on your hook, insert hook into stitch, yarn over, pull up a loop, you will have two loops on the hook. Yarn over, pull through remaining two loops.

    Special Stitches

    • Bobble: similar to working 4 treble crochet together in one stitchYarn over, insert hook into next st, yarn over, pull through (3 loops on hook), yarn over, pull through 2 loops (2 loops remain on hook), (yarn over, insert hook into same stitch, yarn over, pull through, yarn over, pull through 2 loops on hook) three times until you have 5 loops on hook, yarn over, pull through all loops on hook, chain 1 to secure. Consequently, the bobble will pop away from you.
    • Beginning Bobble (Beg-Bob): Chain 3, (yarn over, insert hook in st at base of ch, yarn over, pull through, yarn over, pull through 2 loops on hook) four times until you have 5 loops on hook, yarn over and draw through all loops on hook, chain 1 to secure. As a result, bobble will pop out away from you.
    How to Crochet: A Handy Reference Guide EBook

    Unsure of the differences between UK and US terms? Need a refresher on how to do your crochet stitches? In my ‘How to crochet: A handy reference guide’ EBook I help you with all of these terms and you can always have them to hand! You will also get exclusive access to free video instructions. You can find my EBook HERE.

    Pin for Later

    Pattern Notes

    • Written in UK terms but switchable to US terms above.
    • This pattern is worked in 3 sections and in the following order; the crown, the squares and the brim.
    • For the crown and brim, you will be working in rounds, therefore you will not be joining to move to the next round.
    • Move your stitch markers up with each round using the different colour stitch marker as your ‘BOR’ (Beginning of row).
    • Lastly, The squares will be worked with the wrong side facing, so please be mindful of this when it comes to joining.

    Pattern Support

    The fastest way to get pattern support is to ask in our dedicated facebook group for Bella Coco Crochet patterns. This is the best place for you to connect with other crocheters.

    Please note, if you wish to change and adapt this pattern in any way, this must be done at your own exploration and we cannot offer assistance with this.

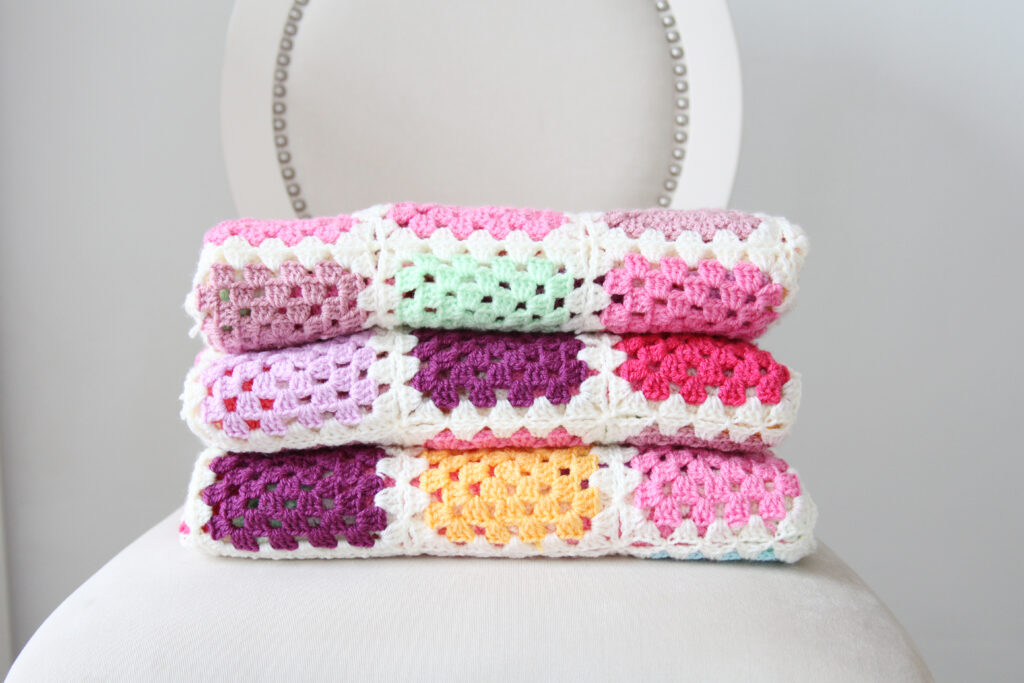
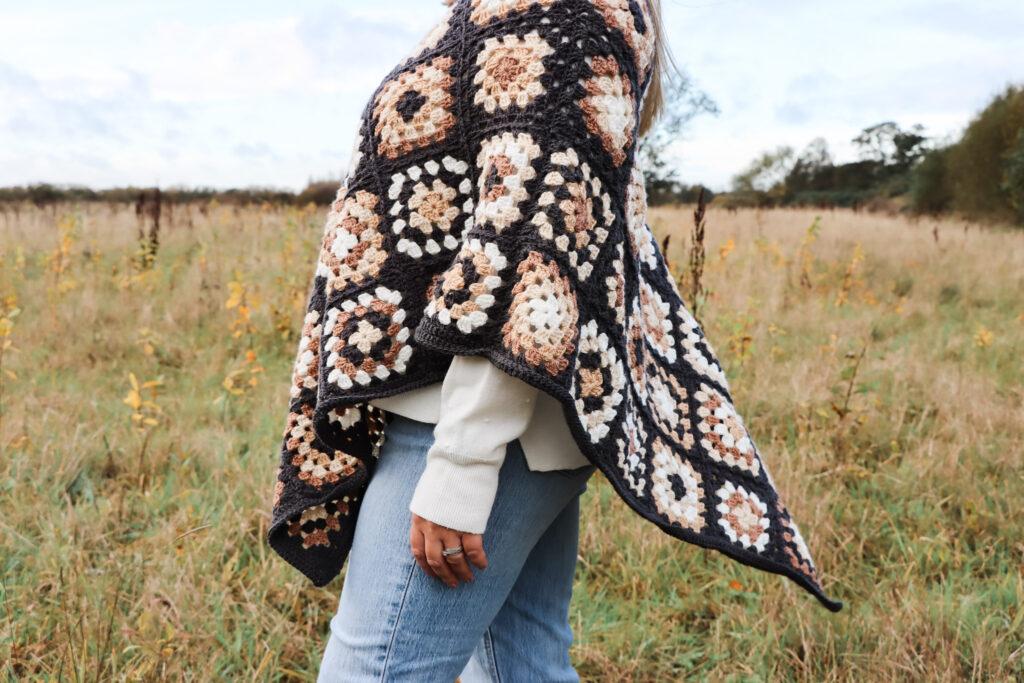
    Granny Square Patterns

    If you love crocheting granny squares and turning them into projects check out these patterns below or CLICK HERE to browse the free granny square designs on the blog:
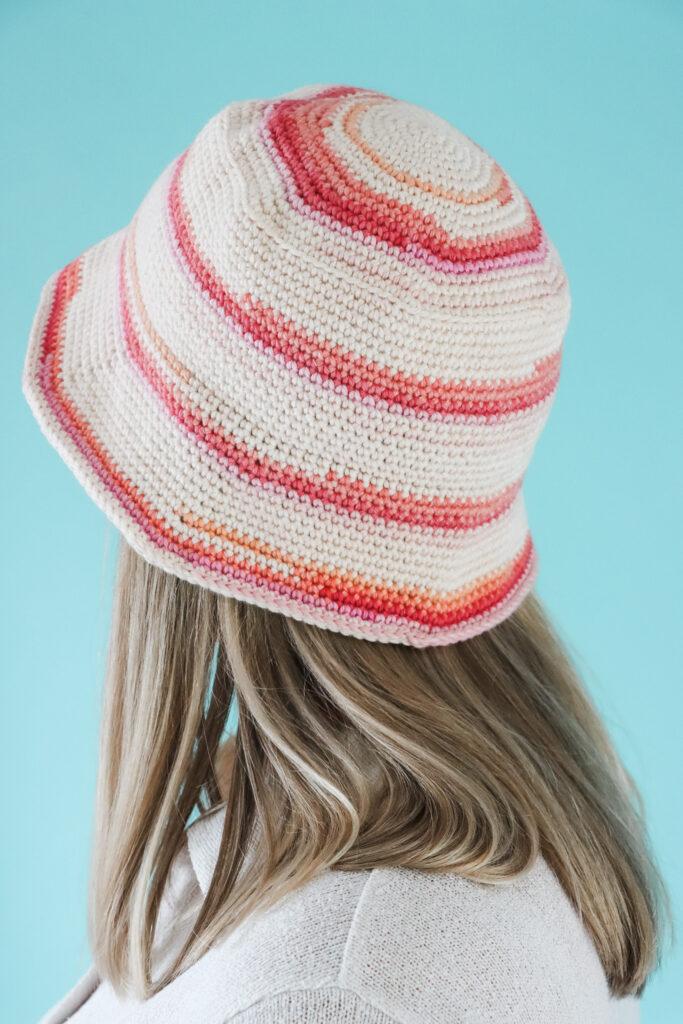
    Bucket Hat Patterns

    Before you get started, you might want to check out these two bucket hat patterns on the blog:

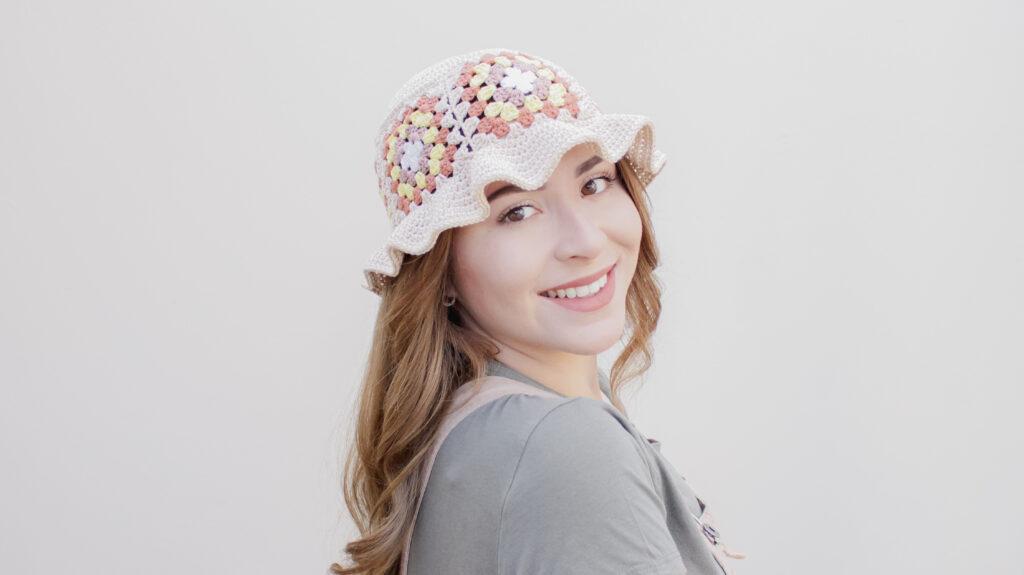
    Free Pattern: Granny Square Bucket Hat

    granny square bucket hat pattern

    Crown

    You are viewing this pattern in UK terms.

    With Colour A

    Starting round 1: Make a magic ring, ch 1 (does not count as st) and work 6dc in ring. Pull ring closed. [6 sts]

    Round 2: Work 2dc in the first st (Place your ‘starting marker’ in the first dc made), 2dc in each st around. [12 sts]

    From this point forward, move your ‘starting marker’ up as you start each round.

    Round 3: (2dc in next st, dc in next st) 6 times. [18 sts]

    Round 4: (2dc in next st, dc in next 2 st) 6 times. [24 sts]

    Round 5: (2dc in next st, dc in next 3 st) 6 times. [30 sts]

    Round 6: (2dc in next st, dc in next 4 st) 6 times. [36 sts]

    Round 7: (2dc in next st [place marker in first st], dc in next 5) 6 times. [42 sts]

    You will now have a total of 6 stitch markers, these will indicate where to work your increases from this point forward. Your ‘BOR’ indicates the beginning of the round.

    From here, move marker up to the first st of each increase.

    Round 8: (2dc in next st, dc in each st up to next stitch marker) 6 times. [48 sts]

    Round 9-17: Repeat round 8 nine more times. At the end of round 17, you will have 102 sts. Fasten off leaving an 110-cm (45-inch) tail end for sewing. Do not remove stitch markers.

    Squares (make 6)

    You are viewing this pattern in UK terms.

    Using colour B, make a magic ring.

    Round 1: Ch 1, 7dc in circle, ss in first st of round to join. Close magic ring. [7 dc]

    Round 2: Work a Beg-Bob, (ch 1, Bobble in next st) around, work 1 bobble in loops of ss from previous round, ss to top of first bobble to join. [8 bobbles]

    It will feel like ch 2 between bobbles. There is one chain to secure the bobble, then one chain to add space between bobbles.

    When working the beginning bobble in the next round, ensure the stitch goes into the same st as the ch-3.

    Round 3: Work a Beg-Bob, ch 1, bobble in next ch-1 sp between bobbles, *ch 1, bobble in top of next bobble, ch 1, bobble in next ch-1 sp; repeat from * around, ss to top of first bobble to join. [16 bobbles]

    Fasten off, weave in any ends.

    You are viewing this pattern in UK terms.

    Using colour A, join in any ch-1 sp from round 3.

    Round 4: Ch 4 (counts as st), work (2dtr, ch 2, 3dtr) in same sp. *3tr in next ch-1, 3htr in next ch-1 sp, 3tr in next ch-1 sp, (3dtr, ch 2, 3dtr) in next ch-1 sp; repeat from * twice more. Work 3tr in next ch-1, 3htr in next ch-1 sp, 3tr in next ch-1 sp. Join with ss in top of beg ch-4. [60 sts, 4 ch-2 sps]

    Fasten off and sew in ends.

    Constructing The Bucket Hat

    Connecting Squares: You will begin connecting your squares and then connecting to the crown.

    Start by holding two squares wrong sides facing.

    Seam instructions: With a slip knot on your hook and working through both thicknesses, work a ss in the ch-2 sp. Working in the FLO of square closest to you and the BLO of the square furthest away, ss in each of the next 15 sts, ss in ch-3 sp. Fasten off.

    Do not sew in ends as you will be doing this once the brim has been made.

    Continue by adding the next square and repeating the seaming instructions until you have 6 squares connected.

    Hold first and last square with wrong sides facing and repeat the seam instructions again.

    Connecting Squares to the crown

    With the connected squares turned so they have the wrong side facing out, place the crown with wrong side facing up. Line up the stitch markers on the crown with the ch-2 sp to the left of the seams between the squares and connect together.

    Using the tail end on the crown, sew the two sections together by inserting through a stitch on the crown and the squares.

    Note

    Your squares have 15 sts + 2 ch-2 sps = 17 sts. There are also 17 sts from stitch marker to stitch marker on the crown. These stitches should align and the seams should be ignored.

    Brim

    You will be working around the base of the hat and working in continuous rounds without joining.

    You are viewing this pattern in UK terms.

    Using colour A

    Round 1: Work a sdc in any seam between the base of the squares (Place marker in BOR), dc in ch-sp, dc across next 15 sts, dc in ch-sp. *dc in seam (PM in st), dc in ch-sp, dc across next 15 sts, dc in ch-sp; repeat from * four more times. Do not join. [108 sts]

    You will now have 6 stitch markers placed in your round which you will move up with each round. We will be adding more stitch markers in the next round.

    Round 2: Work 2dc in marked st [PM in first st made], 8 dc, * 2 dc in next st, PM in first of the 2 st made], 8 dc; repeat from * five more times. [120 sts]

    You will now have 12 marked stitches which will indicate where to place you increases.

    Round 3-11

    You are viewing this pattern in UK terms.

    Round 3: 2dc in marked st, dc in each st to the next marked st; repeat from * eleven more times. [132 sts]

    Round 4-5: Dc in each st moving st marker up as you go around.

    Round 6: Repeat round 3. [144 sts]

    Round 7-11: Dc in first st (PM in first st), dc in each st around. (all following st markers can be removed)

    Fasten off using an invisible join. Sew in end.

    Sewing ends of seams

    Pull the tail ends of the seams through to the back of the work and sew in.

    Infinity Granny Square Crochet Blanket

    I always love to see your makes so if you try any of my patterns or follow my stitch tutorials please tag me @bellacococrochet or use the #bellacococrochet

    sarah-jayne
     
    KEEP ON making
    Don’t miss a thing! Sign up to our newsletter, grab a cuppa and find out about the latest posts and projects.
    Thanks! Please check your inbox (and junk) to confirm your subscription!

    Pin it now, make later!

    2 thoughts on “Learn How to Crochet a Granny Square Bucket Hat”

    Leave a Comment

    Your email address will not be published. Required fields are marked *

    Scroll to Top