It’s no secret that I love a granny square and I’m not alone. Beloved of the crochet community this humble little square has launched many people’s journey into crochet. It’s for a good reason…well several reasons, actually! To begin with, it’s a really simple pattern to master. Using just a few basic stitches and with a recognisable shape, it’s a great beginning to learn shaping and stitch placement.
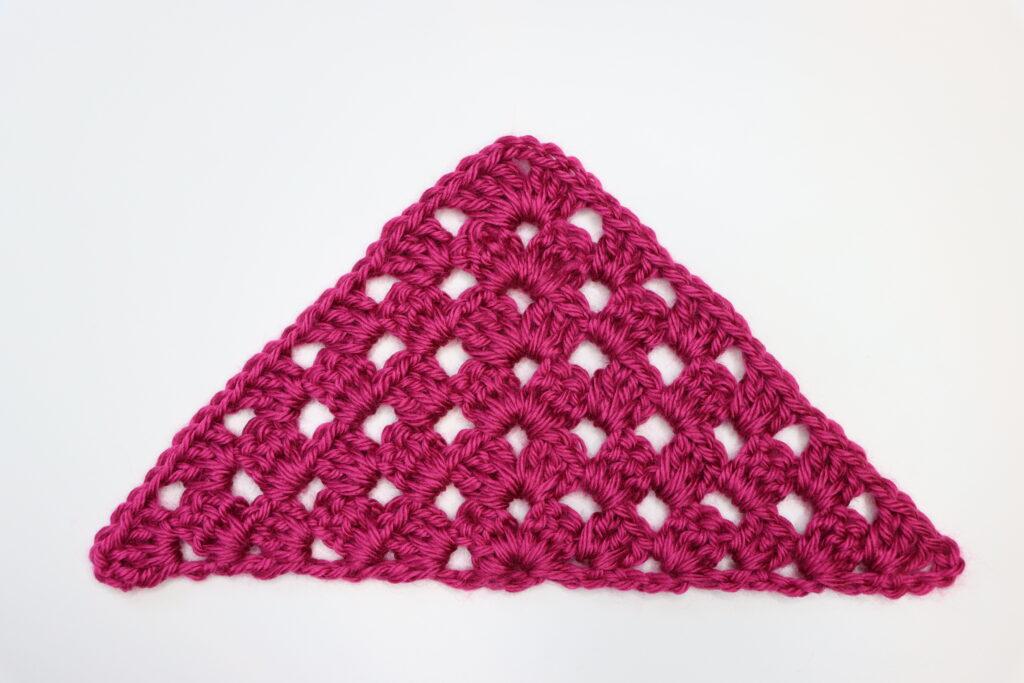
It’s also so, SO versatile – from blankets and cushions to cardigans and cowls. You can use this simple triangle for anything. Well, anything triangle shaped. So, this brings me to the pattern I’m sharing with you today, the Granny Triangle.
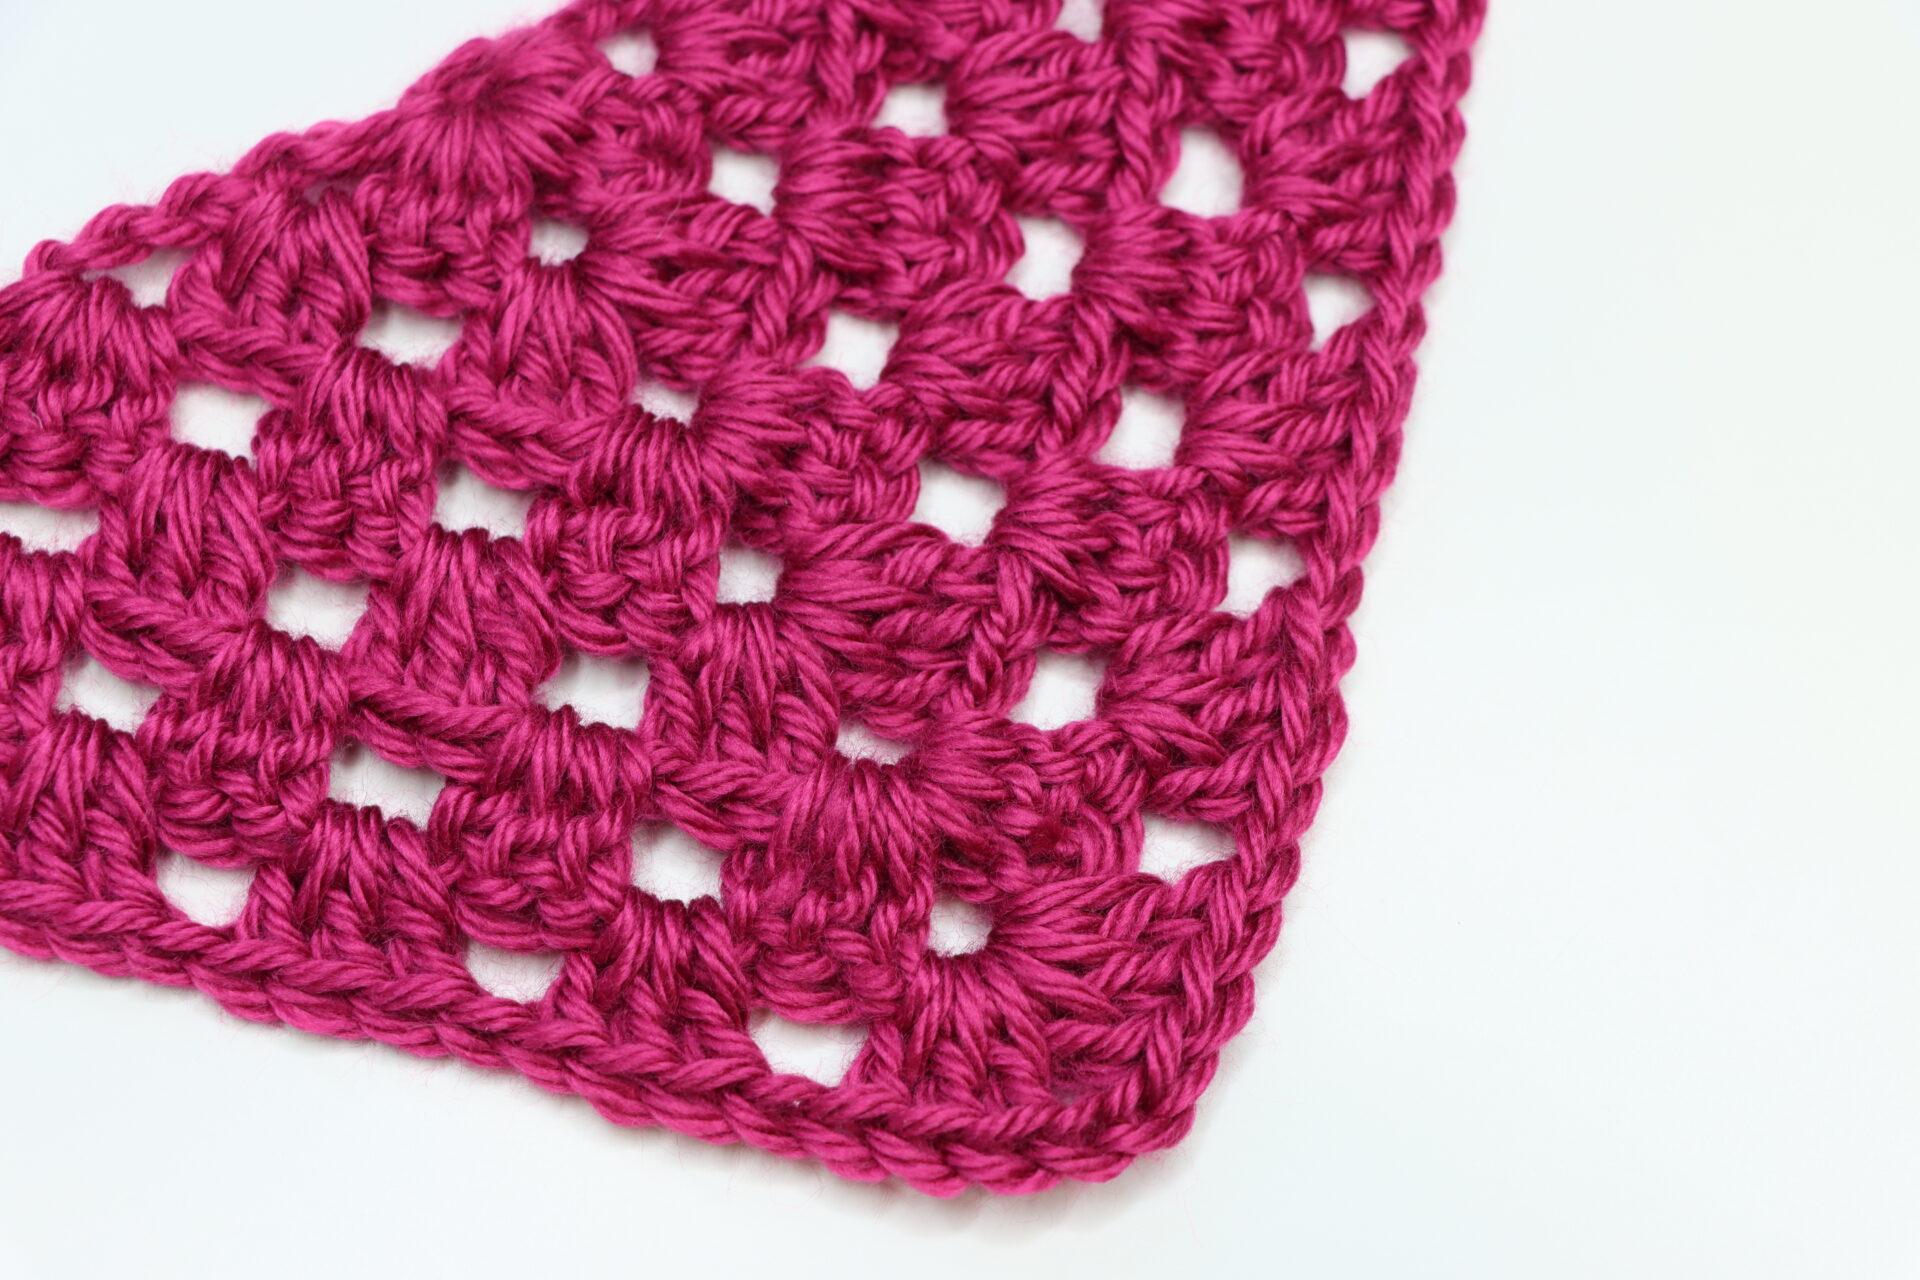
It’s all the things you know and love about a granny square…but triangular! This makes it the perfect shape for adding a funky twist to a blanket, making bunting or even a granny shawl!

PATTERN NOTES
Written in UK terms.
PIN FOR LATER
CROCHET TERMS
Chain (ch): Yarn over, pull through one loop on hook
Treble Crochet (tc): Yarn over and insert your hook into the chain or stitch, yarn over and pull through (you will have three loops on the hook) yarn over and pull through two loops (you will have two loops on your hook) yarn over and pull the yarn through both of the remaining loops on the hook
Stitch(es) (st(s))

Unsure of the differences between UK and US terms? Need a refresher on how to do your stitches? In my ‘How to crochet: A handy reference guide’ EBook I help you with all of these terms and you can always have them to hand! You will also get exclusive access to free video instructions. Learn more about the eBook here.
If you love granny squares as much as I do, you’re going to love my Great Big Granny Square Master List. It has all of the granny designs I’ve made together in one handy place!

PATTERN
Chain 4 and join with a ss.
Row 1: 4 ch (counts as tr and 1 ch here and throughout) working into circle, 3 tr, 2 ch, 3 tr, 1 ch, tr. Turn.
Row 2: 4 ch, 3 tr in 1-ch sp, 1 ch. (3 tr, 2 ch, 3 tr) in 2-ch sp. 1 ch, 3 tr in 1-ch sp, 1 ch, tr. Turn.
Row 3: 4 ch, *3 tr in 1-ch sp, 1 ch. Repeat from * to 2 ch sp. (3 tr, 2 ch, 3 tr) in 2-ch sp. 1 ch, *3 tr in 1-ch sp, 1 ch. Repeat from * to last sp. 1 ch, tr in same sp. Turn.
Repeat row 3 until you reach your desired size.
VIDEO TUTORIAL
Time stamps:
00:05 Introduction and materials
01:06 Foundation
01:44 Row 1
04:17 Row 2
06:00 Row 3
09:15 Row 4 (Explaining pattern repeat)


Want to keep up with what’s new on Bella Coco Crochet? The best way is to sign up to my newsletter, you get a weekly inbox that’s packed full of patterns, crochet chat and more!
How do I crochet dish cloths please
Hi Karen, you can find a pattern for a wash cloth on my blog at blog.bellacococrochet.com if this helps 🙂
Hi. So unless I am missing something. There is a ch missing from rows 2 and 3.
Row 1: 4 ch (counts as tr and 1 ch here and throughout) working into circle, 3 tr, 2 ch, 3 tr, 1 ch, tr. Turn.
Row 2: 4 ch, 3 tr in 1-ch sp, 1 ch. (3 tr, 2 ch, 3 tr) in 2-ch sp. CHAIN HERE? 3 tr in 1-ch sp, 1 ch, tr. Turn.
Row 3: 4 ch, *3 tr in 1-ch sp, 1 ch. Repeat from * to 2 ch sp. (3 tr, 2 ch, 3 tr) in 2-ch sp. CHAIN HERE? *3 tr in 1-ch sp, 1 ch. Repeat from * to last sp. 1 ch, tr in same sp. Turn.
You have it in row 1 and in the video.
Thanks!
Hi Susan, thank you for bringing this to my attention You’re right, the written instructions should have the ch1 where you have noted, to match the video tutorial. I’ll have these amended asap.