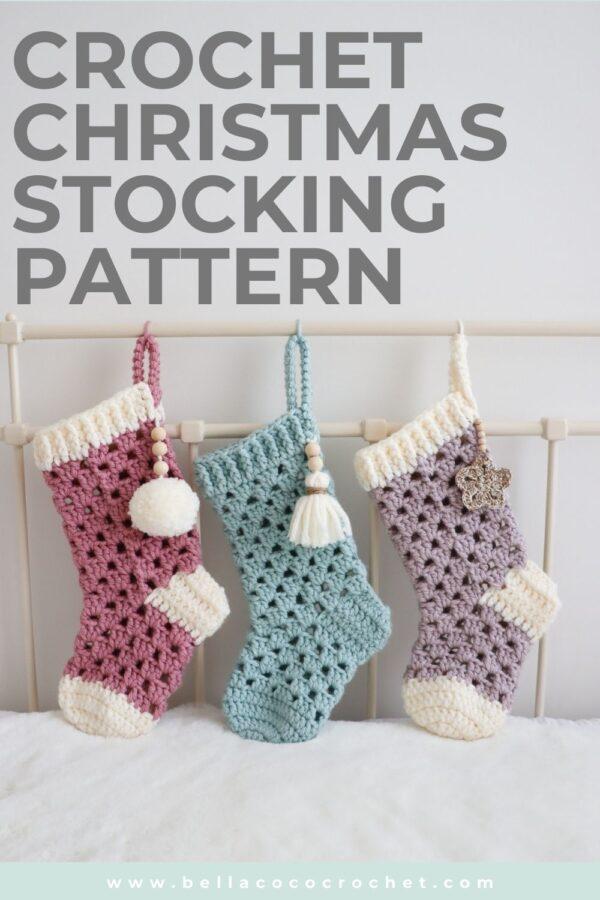
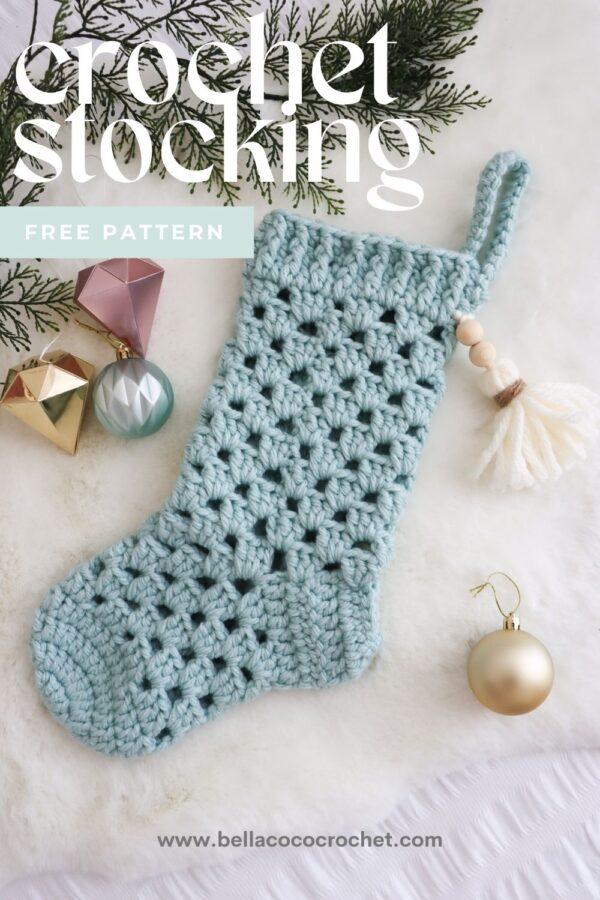
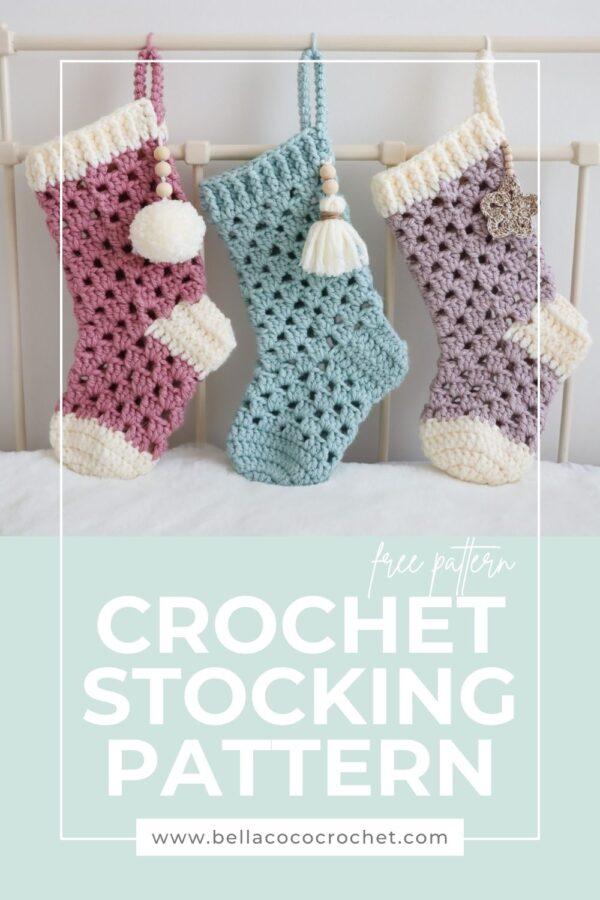
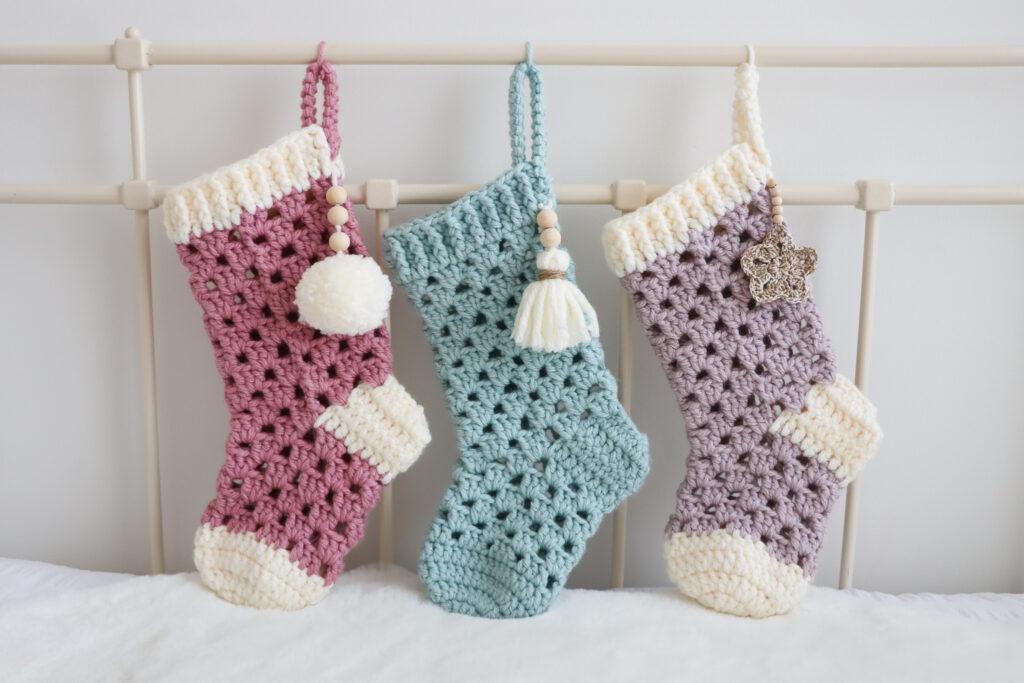
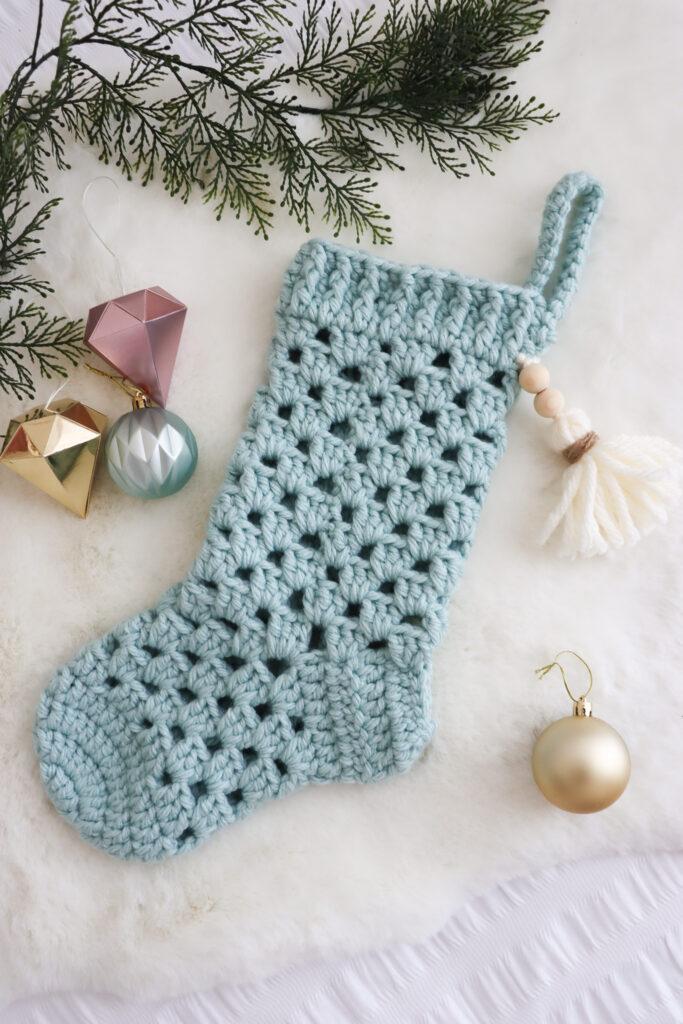
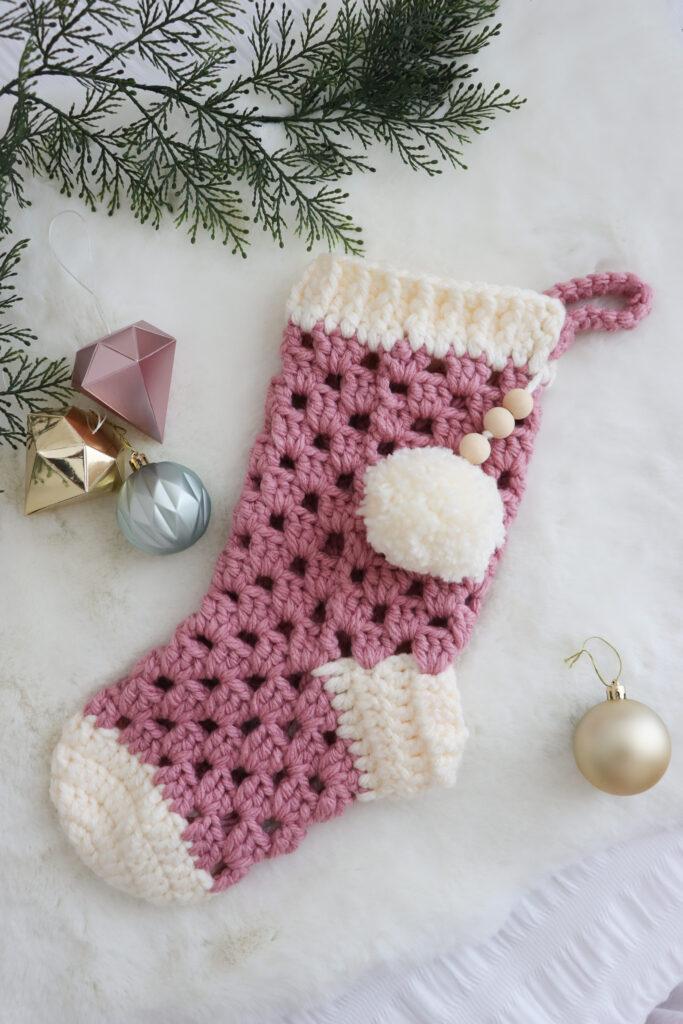
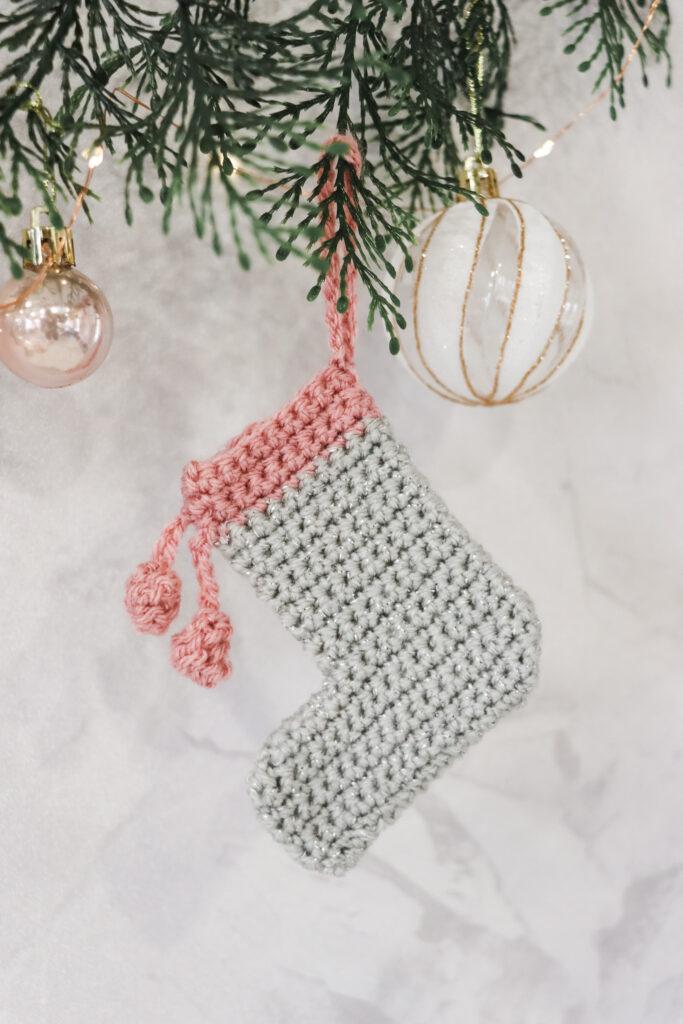
Learn how to crochet a granny stitch stocking with my free step-by-step pattern and video tutorial in less than 2 hours! There’s nothing quite like handmade holiday decor to bring warmth and charm to your home during the festive season. This year, why not add a personal touch to your celebrations with a Granny Stitch Christmas Stocking? Combining the classic granny stitch with a festive twist, this stocking is not only fun to crochet but also perfect for gifting or hanging by the fireplace.
Materials & Tools
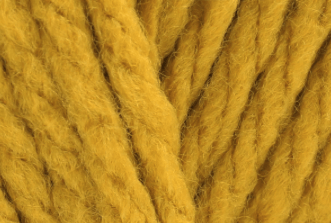
- Yarn: Stylecraft Special XL, Super Chunky, 100% Premium acrylic, 200g (7.1oz), 136m (148yds)
- Hook: 6mm (US J-10)
- Darning needle
- Scissors
- 3 inch Pom pom maker
- Wooden beads

About the Yarn
Stylecraft Special XL is a super chunky version of Stylecraft’s best-selling yarn, Special DK. It’s lovely to work with and comes in the most luscious colours! I’ll share some of my favourite colour combinations for this pattern below. Due to its super chunky size, it works up really quickly so it’s perfect for hats, scarves, blankets, garments and of course Christmas stockings!
Yarn Colours
Colours Used


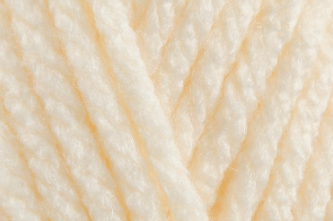

Belle


Minty

Ginger

Candy Cane


Noelle

Nutcracker

Convert Pattern Terms
Here you can quickly switch between UK and US crochet terms. This will make following the pattern easier as all terms will be converted to your preferred version.
Terms & Abbrevations
Stitch(s): st(s)
Back Loop Only: BLO: Working the indicated stitch into the back loop only.
Slip Stitch(s): ss(s): Insert hook, yarn over, pull through stitch and loop on hook.
Chain(s): ch(s): Yarn over, pull through loop on the hook.
Double Crochet(s): dc(s): Insert hook into stitch, yarn over, pull up a loop, you will have two loops on the hook. Yarn over, pull through remaining two loops.
Stacked Double Crochet(s): stdc(s): Insert hook into stitch, yarn over, pull up a loop, you will have two loops on the hook. Yarn over, pull through remaining two loops. Insert hook into the post of the stitch which is furthest away from the hook. yarn over, pull up a loop, you will have two loops on the hook. Yarn over, pull through remaining two loops.
Treble Crochet(s): tr(s): Yarn over, insert into stitch, yarn over, pull up a loop, you will have three loops on the hook. Yarn over, pull through two loops, yarn over, pull through remaining two loops.
Special Stitches
Front Post Treble Crochet(s): FPtr: Yarn over, insert hook around post of stitch from front to back to front, yarn over, pull up a loop, you will have three loops on the hook. Yarn over, pull through two loops, yarn over, pull through remaining two loops.
Treble Crochet two together (tr2tog): Yarn over, insert into chain space, yarn over, pull through, you will have three loops on the hook. Yarn over, pull through two loops. Do not complete the stitch. Yarn over, insert into the next chain space, yarn over, pull through, you will have four loops on the hook. Yarn over, pull through two loops, yarn over pull through all three loops on the hook.
Invisible slip stitch(s): Inv ss(s): Insert hook from back to front and pull through stitch and loop on hook.

Unsure of the differences between UK and US terms? Need a refresher on how to do your crochet stitches? In my ‘How to crochet: A handy reference guide’ EBook I help you with all of these terms and you can always have them to hand! You will also get exclusive access to free video instructions. You can find my EBook HERE.

Pattern Notes
- Written in UK terms But switchable to US terms above
- Skill Level: Beginner.
- Video tutorials are available for additional support.
- You will be making the stocking from the bottom up. If you wish to use just one colour, work an invisible slip stitch when pattern instructs to change colours.
Gauge & Size
- Measures 9.5cm (3.75inch) after round 2.
- Completed Size: Height: 48cm (19 inch) excluding hanger. Width: 19cm (7.5 inch)

PDF Pattern
Pattern Support
The fastest way to get pattern support is to ask in our dedicated facebook group for Bella Coco Crochet patterns. This is the best place for you to connect with other crocheters.
Please note, if you wish to change and adapt this pattern in any way, this must be done at your own exploration and we cannot offer assistance with this.
Pin For Later

Free Pattern: Crochet Stocking
You are viewing this pattern in UK terms.
Foot
- With CC, make magic ring.
- Round 1: Ch 2 (does not count), work 12 tr in magic ring. Join with Inv ss to first st. Pull ring closed. <12 sts>
- Round 2: (Stdc, tr) in first st. 2 tr in each st around. Join with Inv ss to first st. <24 sts>
- Round 3: Stdc in first st. Tr in next st, 2 tr in next st. *Tr in next 2 sts, 2 tr in next st; repeat from * around. Join with Inv ss to first st. <32 sts>
- Round 4: Stdc in first st. Tr in each st around changing to MC in last st. Join with ss to first st. Fasten off CC.
- Note: If you are using the same colour throughout, work an Inv ss instead here and throughout.
- Round 5: Stdc in first st, tr in next 2 sts, ch 1, miss a st. *Tr in next 3 sts, ch 1, miss a st; repeat from * around. Inv ss to first st. <24 tr, 8 ch-1 sps>
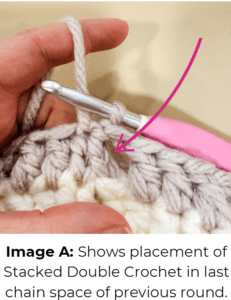
- Round 6: Stdc in final ch-1 sp from last round (Image A). *Ch 1, 3 tr in next ch-1 sp; repeat from * to last ch-1 sp. Ch 1, 2 tr in last st. Join with Inv ss to first st.
- Round 7: (Stdc, 2 tr) in first ch-1 sp, ch 1, *3 tr in ch-1 sp, ch 1; repeat from * around. Inv ss to first st.
- Rounds 8-9: Repeat rounds 6 & 7
- Round 10: Repeat round 6 changing to CC in final pull through of last st and joining with ss to first st. Fasten off MC.
Heel
- Row 1: Stdc in first ch-1 sp. (Tr in next 3 st, tr in ch-1 sp) four times. Leave remaining sts unworked. Turn. <17 sts>
- Row 2: Stdc, tr in each st. Turn.
- Row 3: Stdc, tr in next 7 sts, tr2tog, tr in remaining 7 sts. Turn. <16 sts>
- Row 4: Stdc, tr in next 5 sts, 2 tr2tog, tr in 6 sts. Turn. <14 sts>
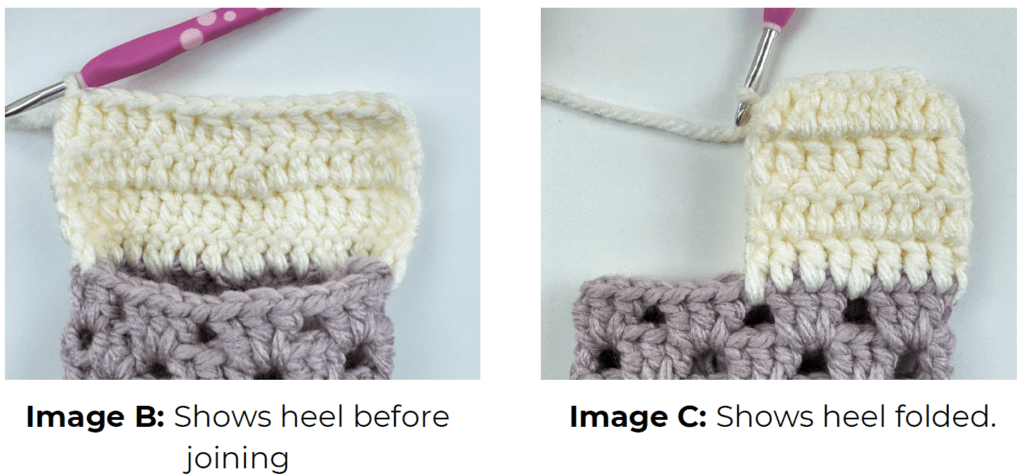
- Fold row flat in half (Image B & C) and Ss through both thicknesses to seam. Fasten off.
Upper Section
- With MC, join with ss in ch-sp where heel meets the foot. Image D.
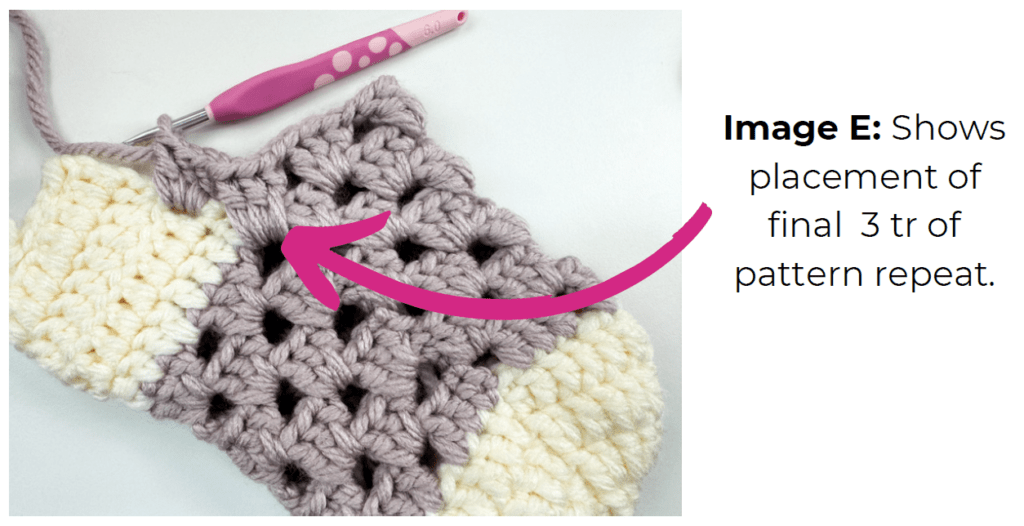
- Round 11: (Stdc, 2 tr) in first ch-sp. (Ch 1, 3 tr in next ch-1 sp) four times (See image E for final repeat placement). (Ch 1, miss a row end, 3 tr in row end) twice. Ch 1, miss seam, (3 tr in row end, ch 1, miss row end) twice. Inv ss to first st. <27 sts, 9 ch-sps>
- Round 12: Stdc in final ch-1 sp from last round. *Ch 1, 3 tr in next ch-1 sp; repeat from * to last ch-1 sp. Ch 1, 2 tr in last st. Inv ss to first st.
- Round 13: (Stdc, 2 tr) in first st. *Ch 1, 3 tr in next ch-1 sp; repeat from * around. Ch 1, Inv ss to first st.
- Rounds 14-21: Repeat rows 12 & 13. Fasten off.
Image Support

Ribbing
- Join CC to edge of last round on the same side as the heel with a ss.
- Round 22: Stdc, tr in each st and ch-sp around. Inv ss to first st. <36 sts>
- Round 23: Stdc, *FPtr around next st, tr in next st; repeat from * around. Inv ss to first st.
- Round 24: Stdc, *FPtr around next st, tr in next st; repeat from * around. Join with invisible join. Fasten off.
- Sew in all ends.
Hanger
- With CC, make a 21-cm (8-inch) Romanian cord. Leave a long tail end for sewing.
- Using tail ends, attach one end of the cord on the inside edge of the stocking on the same side as the heel around round 22.
- Ensure the cord is not twisted and attach the other end of the cord on the outside of the stocking so that the ribbing is sandwiched between the cord. Ensure the cord is secure.
Finishing Touches
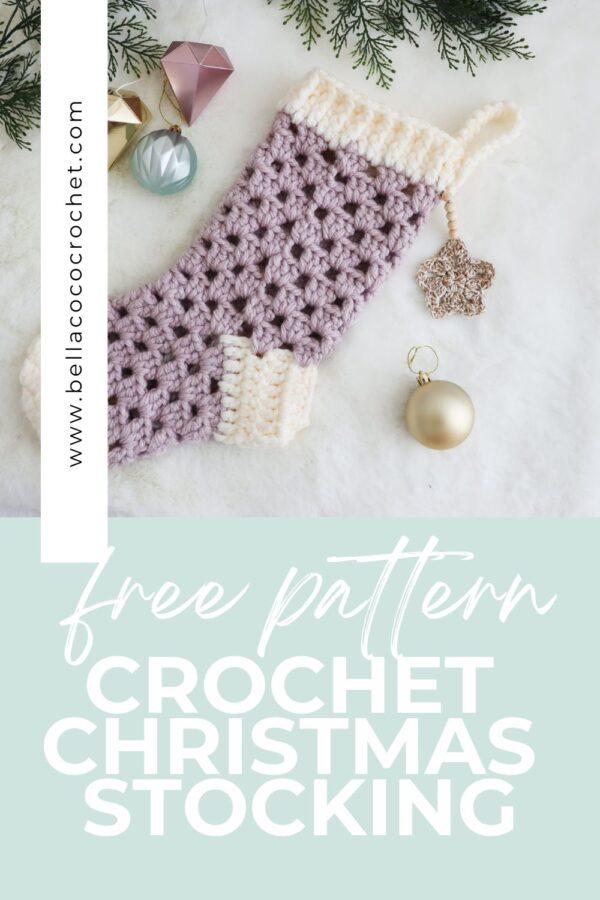
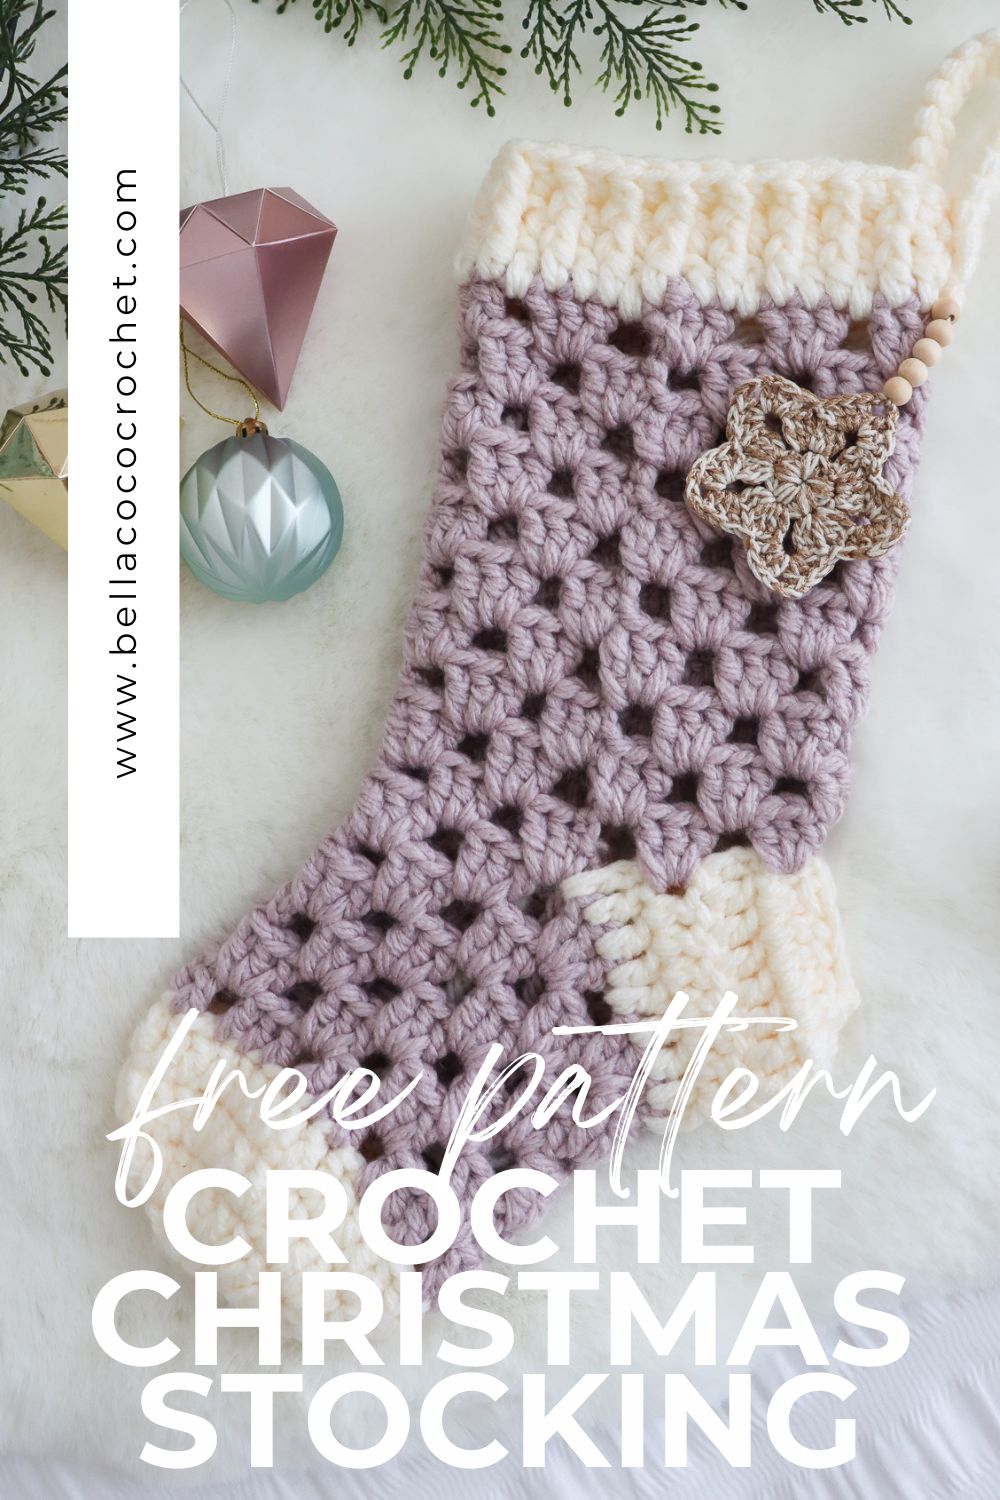
You can go ahead and play around with the finishing touches for your stocking. I like to use pom poms, tassels, wooden beads and even crochet stars. I have attached mine just below the hanger, but you can play around with the placement too!
How to Make a Pom Pom

Video Tutorials
Right-handed
[adthrive-in-post-video-player video-id=”pYwxyFLY” upload-date=”2024-12-05T14:45:34.000Z” name=”How to crochet a Granny Stocking_3.mp4″ description=”null” player-type=”default” override-embed=”default”]Or watch on YouTube
Left-handed
[adthrive-in-post-video-player video-id=”undefined” upload-date=”2024-12-05T14:56:24.296+00:00″ name=”How to crochet a Granny Stocking LEFT HANDED_2.mp4″ description=”undefined” player-type=”default” override-embed=”default”]Or watch on YouTube
Crochet Stocking Patterns

Have you seen these crochet stocking patterns? I have an adorable mini crochet stocking pattern or if you’re looking for a challenge, I have a hexagon crochet stocking pattern for you to try:
Christmas Crochet Patterns
I always love to see your makes so if you try any of my patterns or follow my stitch tutorials please tag me @bellacococrochet or use the #bellacococrochet
sarah-jayne