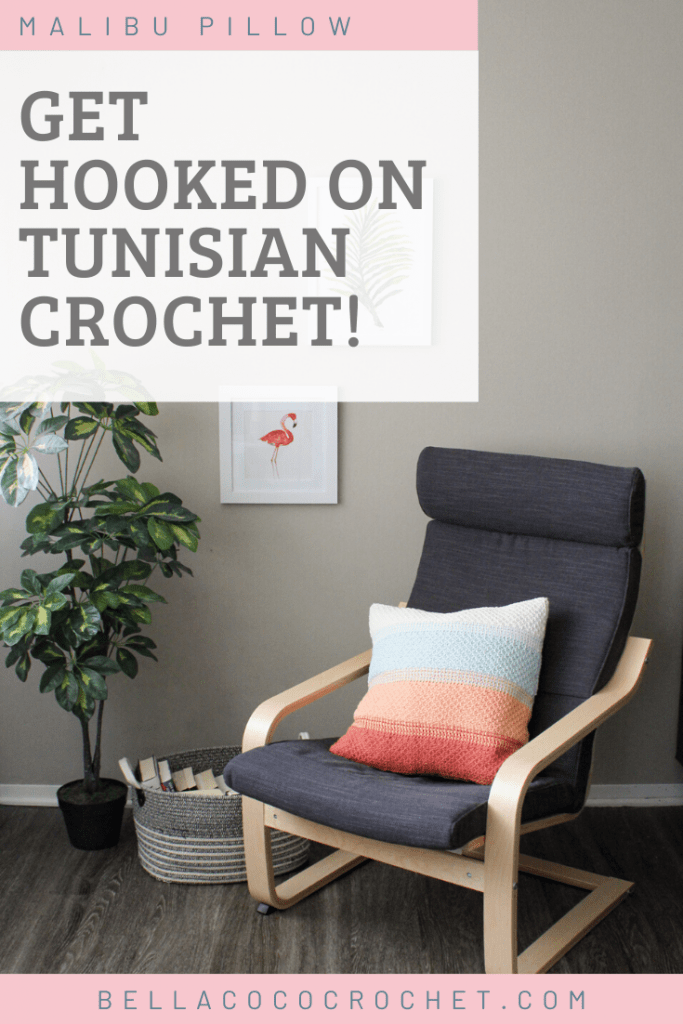
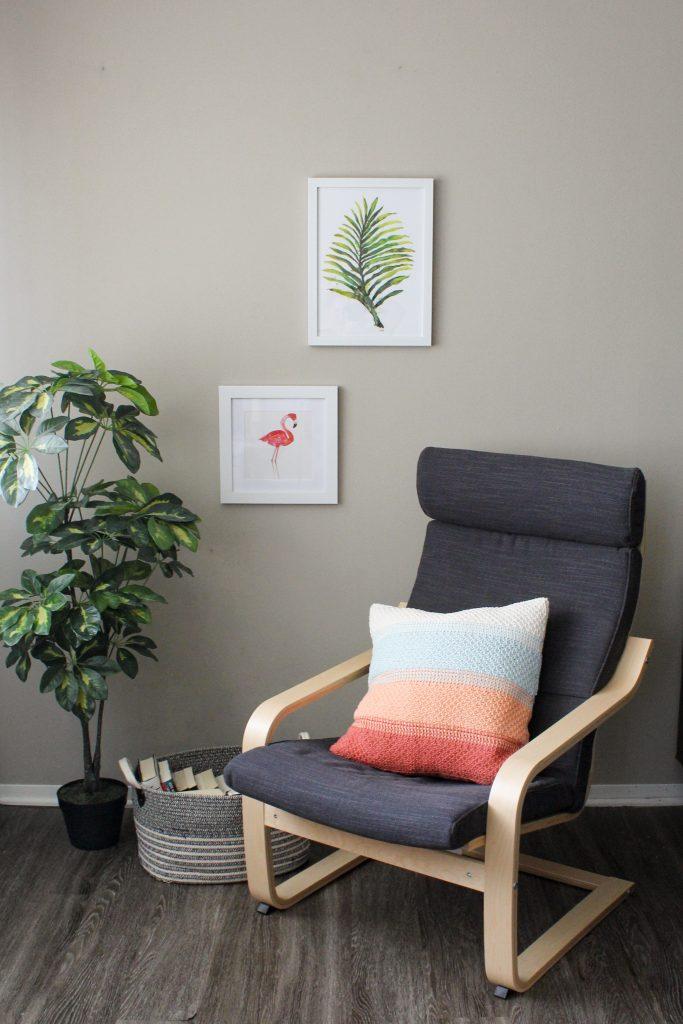
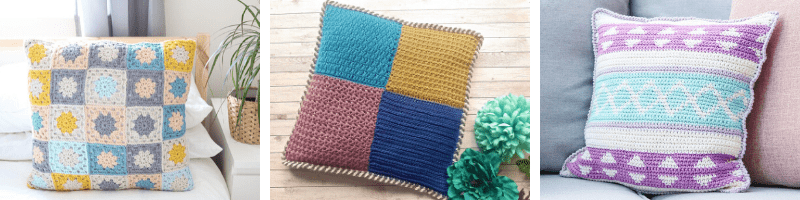
The hugely talented Joelle Reckinger from Trek and Peri is joining me on the blog today to share her superbly summery Malibu Pillow. Grab your Tunisian crochet hook and some sunset-coloured yarn and get ready to hook up this wonderful Tunisian crochet pillow.
Whether you want to bring some sunshine into your house, or add a bright pop of colour to your garden – it’s a joyful coloured pillow that will brighten up any dark spots.
“As this is a guest post, Bella Coco Crochet is unable to answer any queries. If you have a question, please contact the designer directly and they will be happy to help you.”
Joelle says, “warm west coast sunsets on the beach with a drink in hand, toes in the warm sand; those are my favorite kinds of summer evenings. Now that it is finally spring in the northern hemisphere, I decided it was time for some cotton yarn! Paintbox offer so many amazing colour palette possibilities, you really can make any combination imaginable.”
Materials and Tools
8mm (L, US 11) Tunisian hook, 14 inch cord
20×20″ pillow insert
Paintbox Cotton Aran in Vintage Pink (Yarn A), Peach Orange (Yarn B), Seafoam Blue (Yarn C), Light Champagne (Yarn D) – you need 100g of each colour

Gauge & Measurements
Gauge: 15sts by 13 rows = 4 inch Square
Gauge is not crucial to this project. Approximate measurements will be fine.
Finished Size: 20×20″. Actual square should be about 18.5×18.5″ so pillow puffs up once constructed.
Notes
You should be familiar with the Tunisian simple stitch (TSS), Tunisian purl stitch (TPS), a forward pass (FP), and return pass (RP).
If you want to learn how Tunisian crochet or just brush up on your skills you can watch the Bella Coco videos: Tunisian Crochet: Part 1 and Tunisian Crochet: Part 2.
You can also scroll to the bottom of this post for a written tutorial by Joelle!
You will make 2 pieces and then join them to create the Tunisian crochet pillow.
Terms & Abbreviations
Front Pass (fp): The first half of a Tunisian row. Pull up loops as pattern directs from right to left if right-handed, opposite if left-handed.
Return Pass (rp): ch 1 *yo, draw through 2 loops on hook, rep from * until 1 loop remains.
Tunisian Simple Stitch (tss): Insert into vertical bar, pull up a loop.
Tunisian Purl Stitch (tps): Yarn over frontwise, wrapping yarn in front of hook, insert into vertical bar, bring yarn back around hook to yarn over as normal, pull up a loop.
Chain (ch): Yarn over, pull through one loop on hook.

Unsure of the differences between UK and US terms? Need a refresher on how to do your stitches? In my ‘How to crochet: A handy reference guide’ EBook I help you with all of these terms and you can always have them to hand! You will also get exclusive access to free video instructions. Learn more about the eBook here.
To unlock this FREE crochet pattern all you need to do is enter your email and the grow app will appear, please enter your email and create a password. Now you’ve created a grow account you’ll be able to access all of the free patterns on the blog and bookmark your favourites so you can have them all in one place for easy access.
If you forget your password, click the “forgot password” link and follow the prompts. Please note that the team are unable to assist with resetting Grow passwords or accessing your Grow account, so please make sure you save your login information in a safe place.
Your grow account is separate from your Bella Coco account which you use to access your purchased patterns.
Malibu Pillow Pattern
Make 2
Do not carry yarn at any time throughout this pattern. When finished with a colour blending row, cut yarn leaving a 3 to 4 inch tail. You will tuck and weave ends in at construction.
Begin Honeycomb section
Row 1: With colour A, Ch 66 FP: pull up a loop from the back bump of each st, RP.
2. FP: *TSS, TPS* rep from * until 1 sts remains, TSS, RP.
3. FP: *TPS. TSS* rep from * until 1 sts remains, TPS, RP.
4-12: Rep 2 & 3
Begin Colour Blending Section
13 & 14: With color B, TSS across, after ch 1, change to color A, RP.
15 & 16: With color A, TSS across, after ch 1, change to color B, RP.
Begin 2nd Honeycomb Section, using only colour B
17: TSS in color B, RP.
18-28: Repeat Rows 2 & 3.
Begin 2nd Colour Blending Section
29 & 30: With color C, TSS across, after ch 1, change to color B, RP.
31 & 32: With color B, TSS across, after ch 1, change to color C, RP.
Begin 3rd Honeycomb Section, using only colour C
33: TSS in color C, RP.
32-44: Repeat Rows 2 & 3.
Begin 3rd Colour Blending Section
45 & 46: With color D, TSS across, after ch 1, change to color C, RP.
47 & 48: With color C, TSS across, after ch 1, change to color D, RP.
Begin Final Honeycomb Section, using only colour D
49: TSS in color D, RP.
50-60: Repeat Rows 2 & 3
Bind off in honeycomb pattern, fasten off.
Construction
With the wrong side of the work facing you, weave in all ends about 1 – 2 inches into the work. There is no need to cut the ends or hide them after weaving. Repeat for both panels.
Lay your work with wrong sides facing in, line up your colour stripes on both panels. Use the mattress stitch to seam 3 edges. Insert your pillow insert, then seam the final edge closed.
Congrats! You’ve made your very own Tunisian crochet pillow!
If you’re crazy about crochet cushions, you might enjoy hooking up one of these:
Tunisian Crochet Tutorial
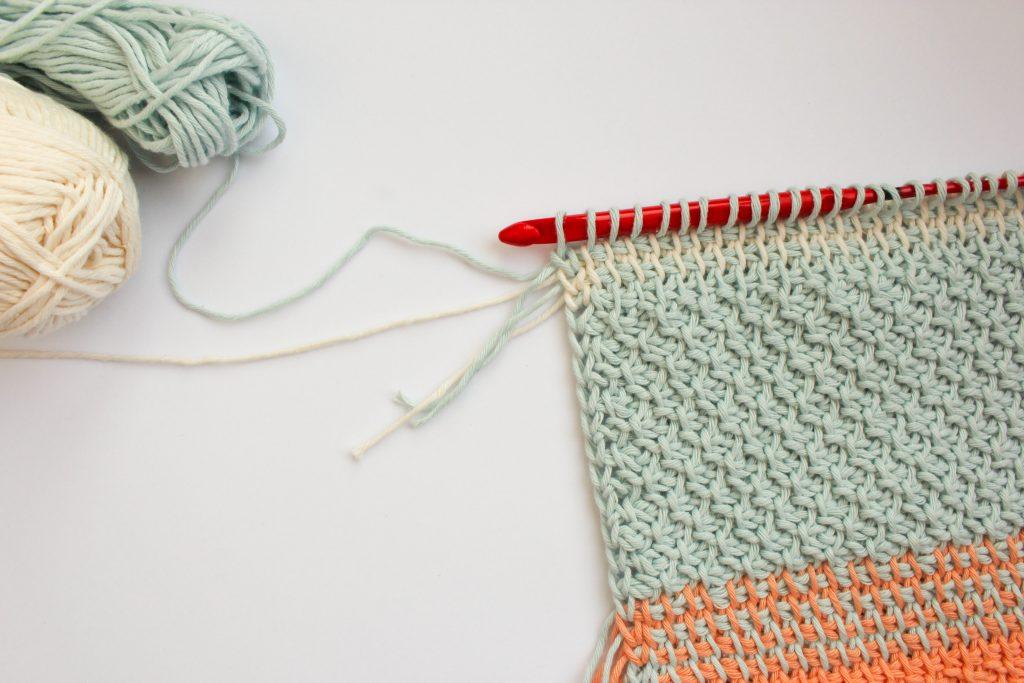
This project contains some of the easiest colour work you could ever do in Tunisian crochet and I will show you how in this tutorial. Then making your Tunisian crochet pillow will be a breeze! The Tunisian honeycomb stitch for the solid colour is made up by alternating TSS and TPS at the start of each row. You can have any number of stitches to make the Tunisian honeycomb stitch, as long as you alternate which stitch you use to begin the row.
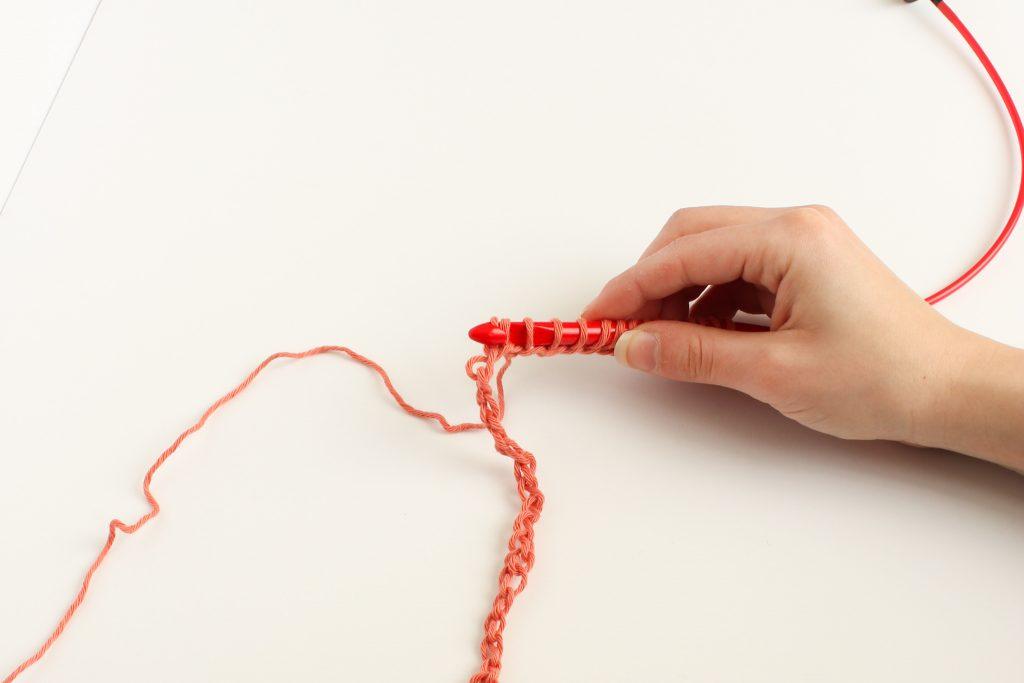
Start with the base: with the Vintage Pink I chained 66. This is also the first row in the pattern. Work a front pass: pull up a loop from the back bump of each st and chaining 1 at the end, then do a return pass by yarning over, and pulling through two loops on your hook across the entire row.
Now that your base row is done, you will start to alternate. On the front pass, you will alternate TSS and TPS and do a return pass for each row. Do this for a total of 12 rows, stop when you have 2 loops remaining on your hook at the end of your twelfth row.
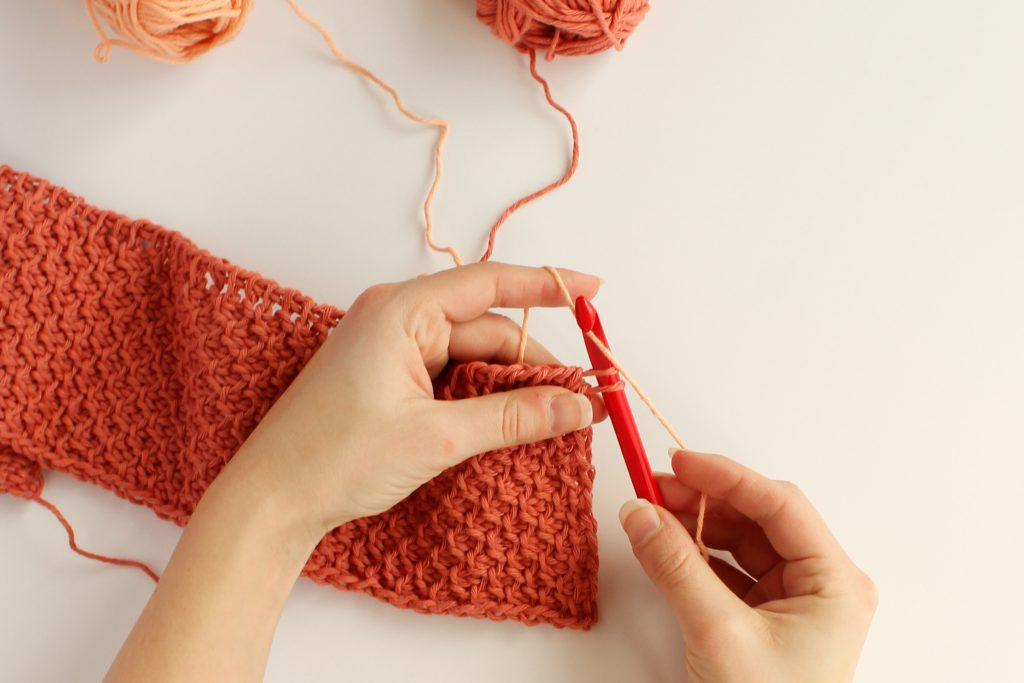
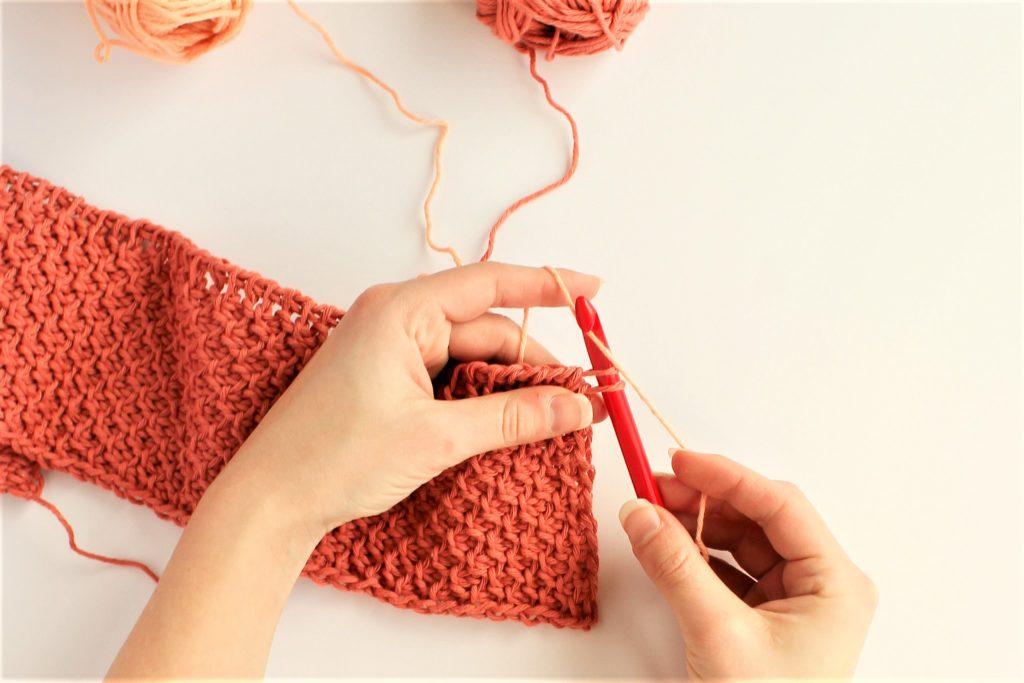
To add the second colour, I added the second colour, Peach Orange, with two loops of Vintage Pink on my hook and pulled through. This creates a clean line along the edge. I used the Tunisian simple stitch across in Peach Orange and after the chain 1, I dropped Peach Orange, cut a 3 inch tail on the Vintage Pink at the beginning of the row and did my whole return pass with Vintage Pink. This makes the vertical bars of the simple stitch in the front pass colour, and the colour behind it will be your return pass colour, creating a beautiful colour blend.
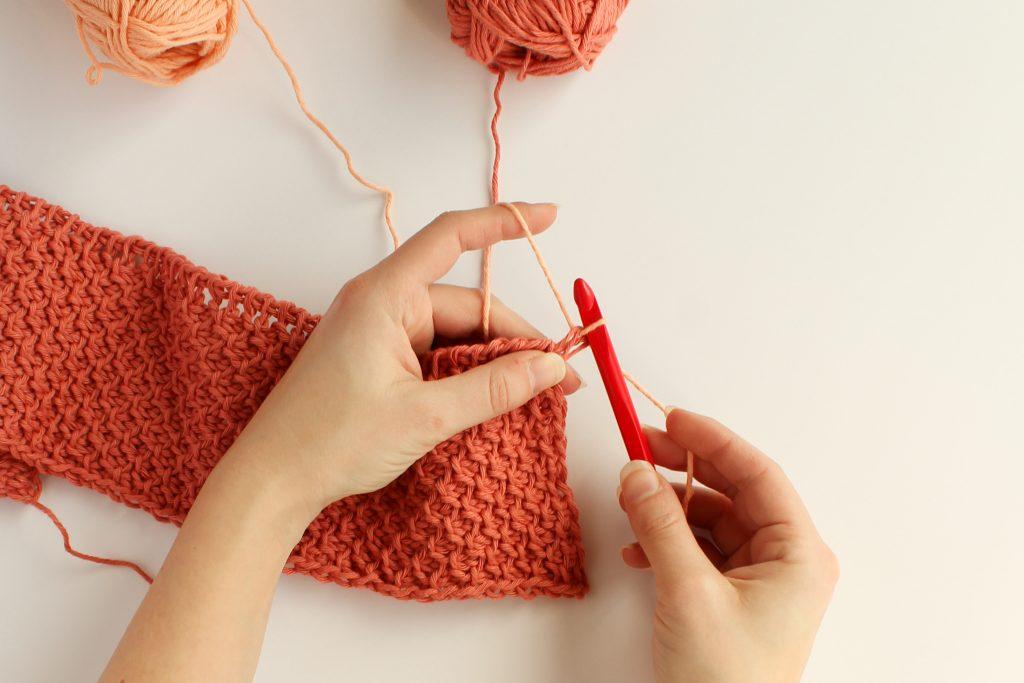
The colour blending section is a total of 4 rows. I repeated this same step once more for two rows of Peach Orange vertical bars, then I reversed the colours, starting the third and fourth row of colour blending in Vintage Pink and doing the return pass in Peach Orange. Pictured below is an example of what the end of the front pass, after you’ve chained 1, in row 3 of the colour blending section would look like.
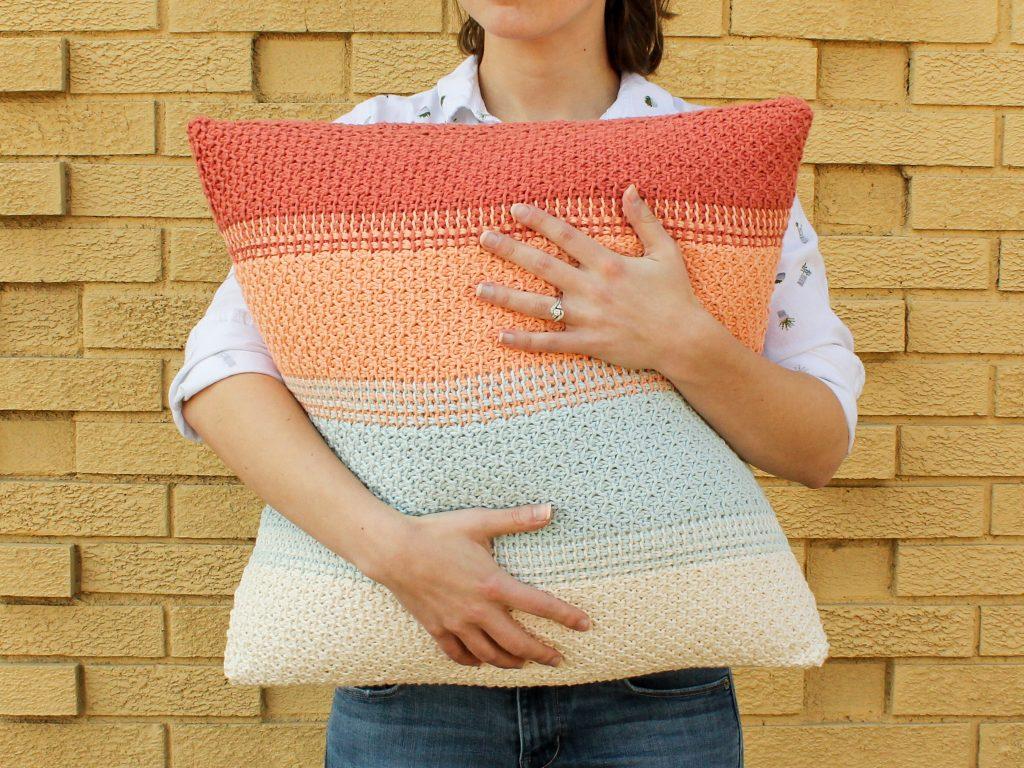
I crocheted 12 rows of the honeycomb pattern in Peach Orange, followed by a colour blend section adding in Seafoam Blue. Then 12 more rows of the honeycomb pattern and added Champagne White in the colour blending section, and finished it off with 12 rows of the honeycomb pattern in Champagne White.
I finished with a bind off in the honeycomb pattern so I didn’t disturb the flow of the hexagons. To do this, I began my bind of row as a normal honeycomb row, but once I have two loops on my hook, I loosely slip stitched through the first stitch, leaving only one loop on my hook. I repeated this all the way to the end.
Pin For Later