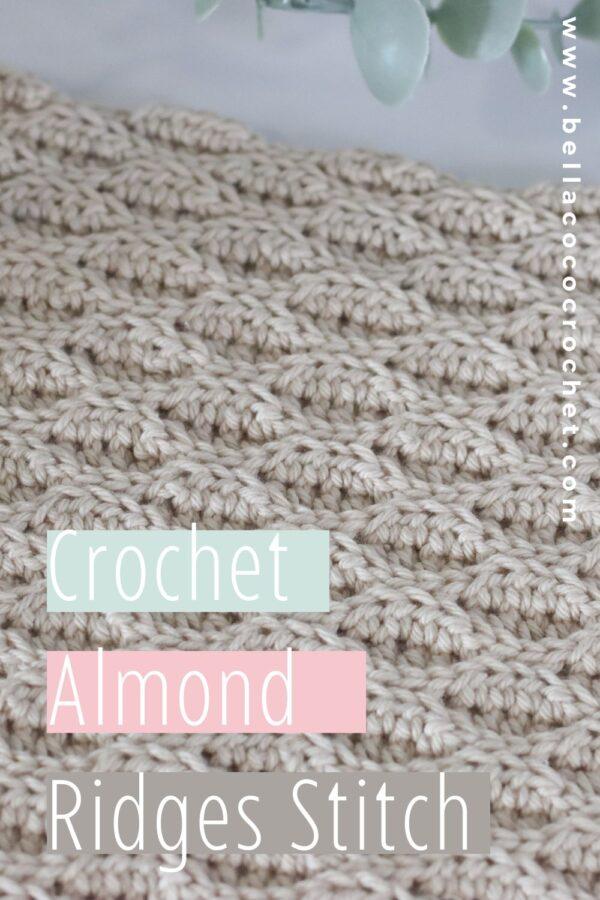
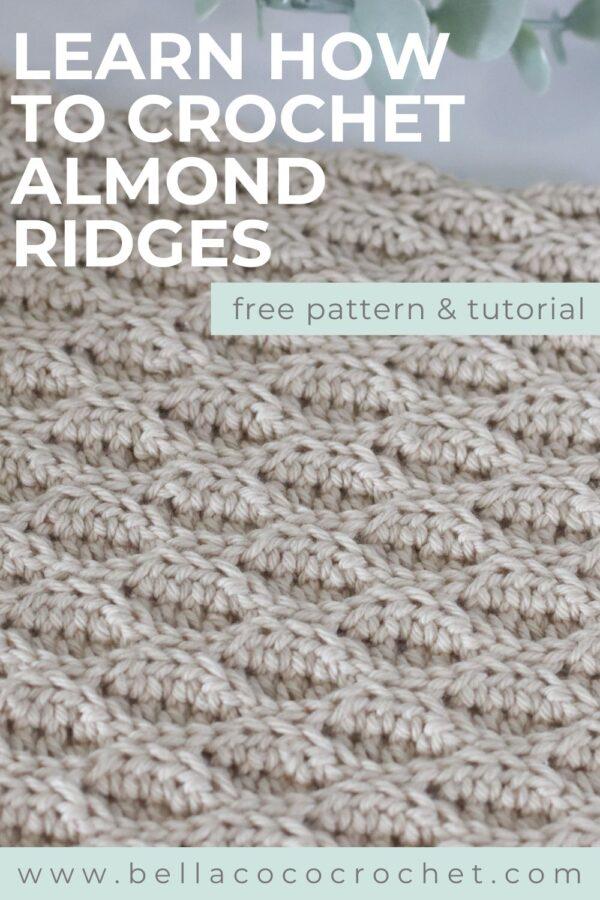
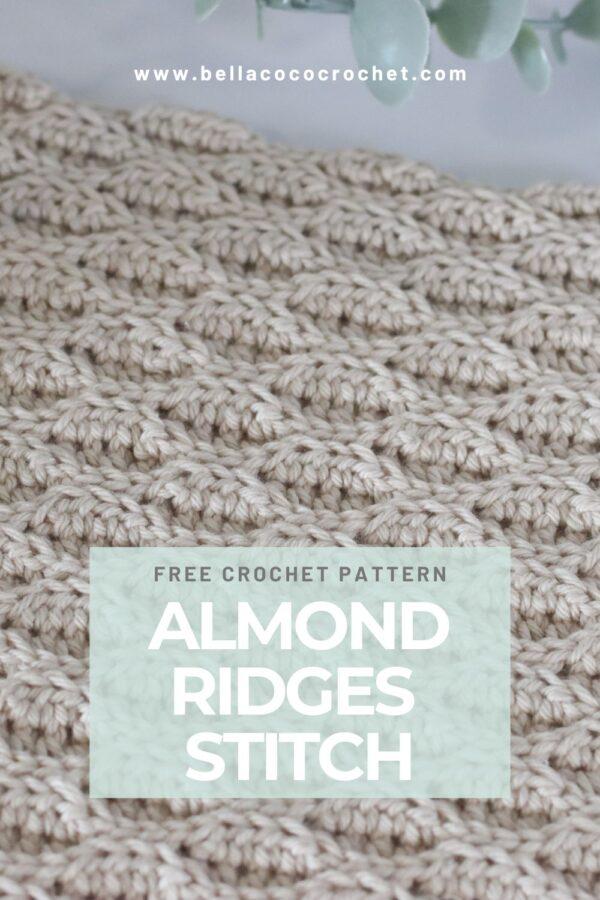
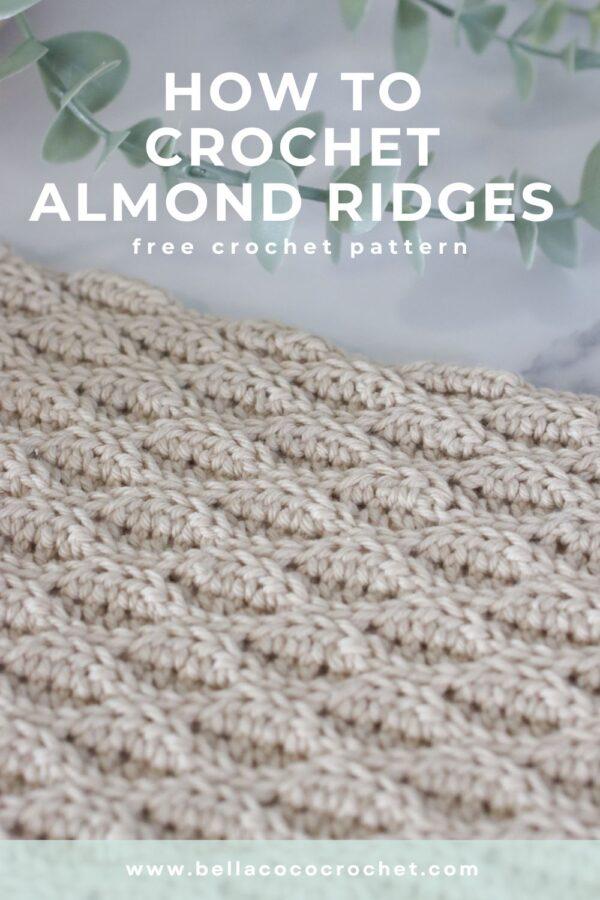
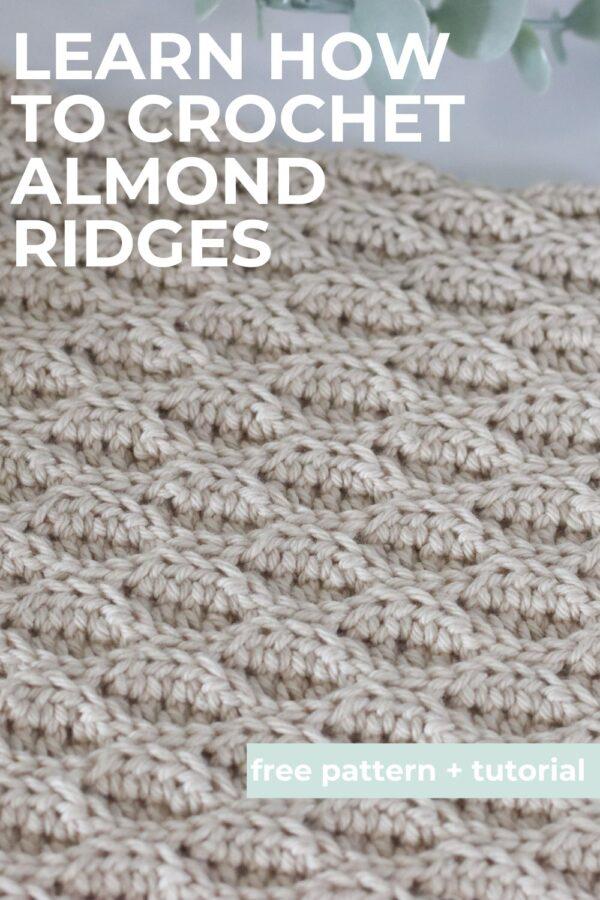
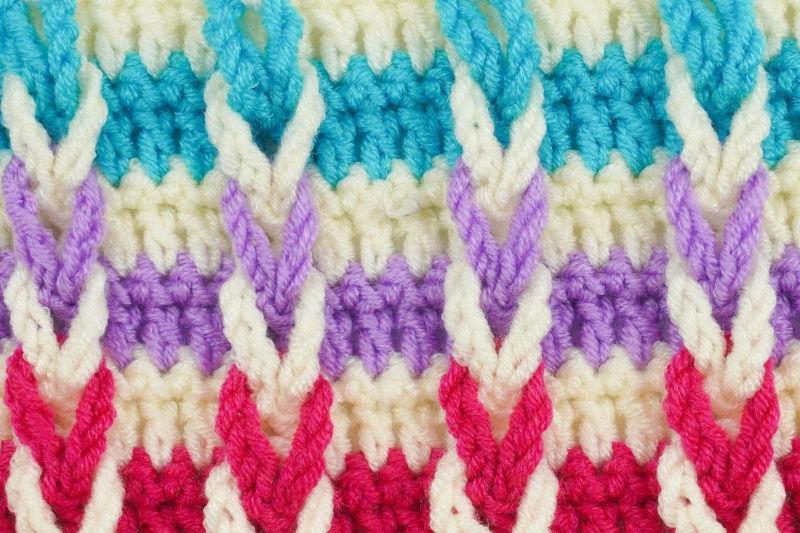
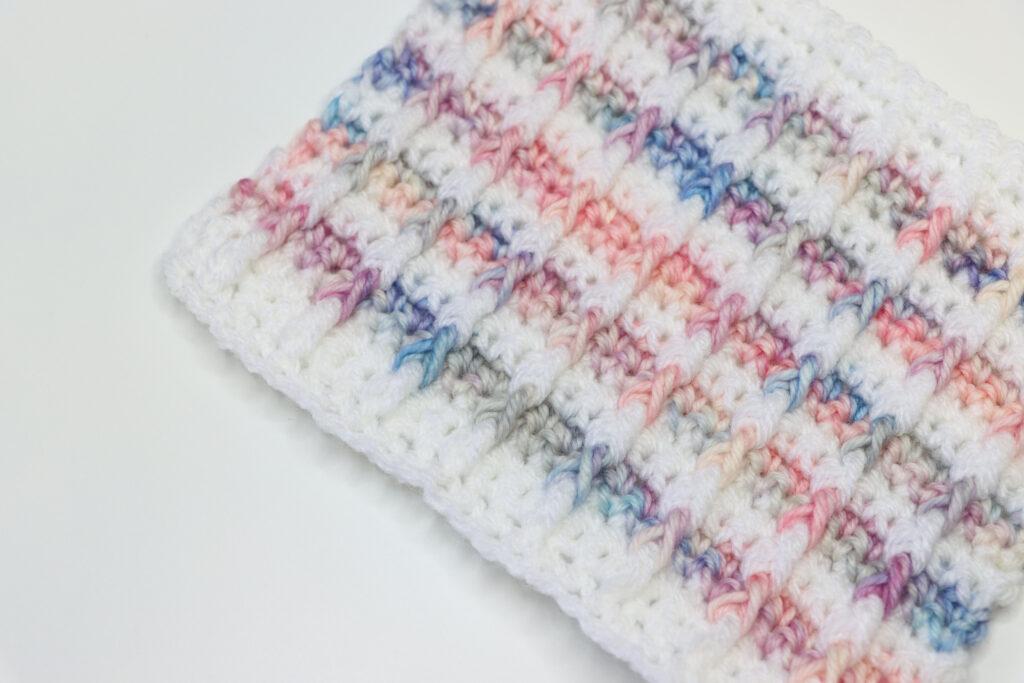
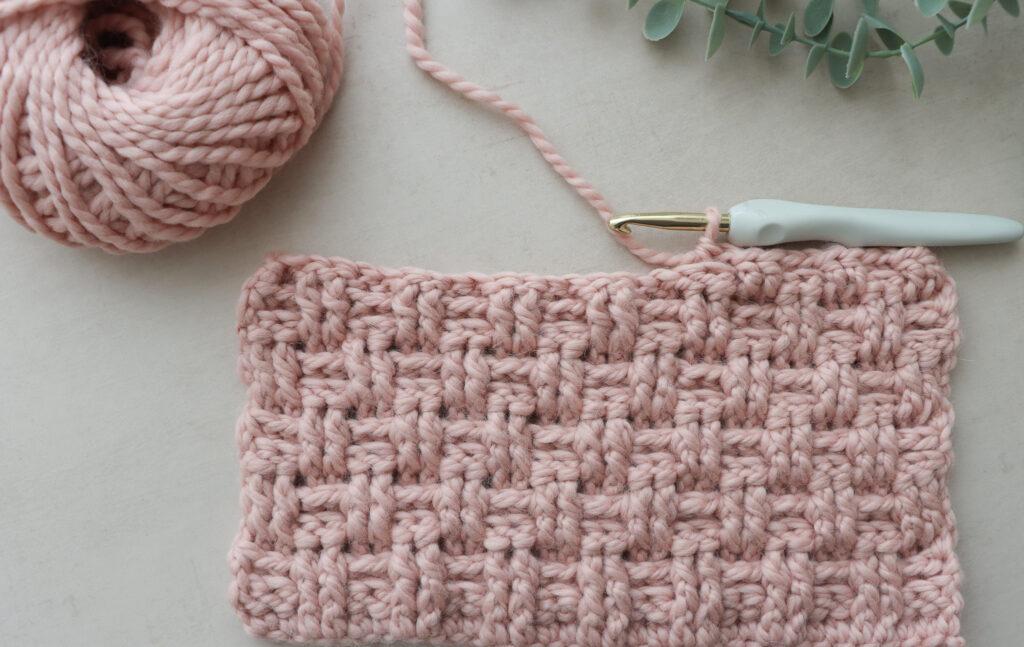
Learn how to crochet the almond ridges stitch with my free step-by-step pattern and video tutorial. This versatile and eye-catching pattern combines depth and detail, making it perfect for everything from cosy blankets to garments and accessories.
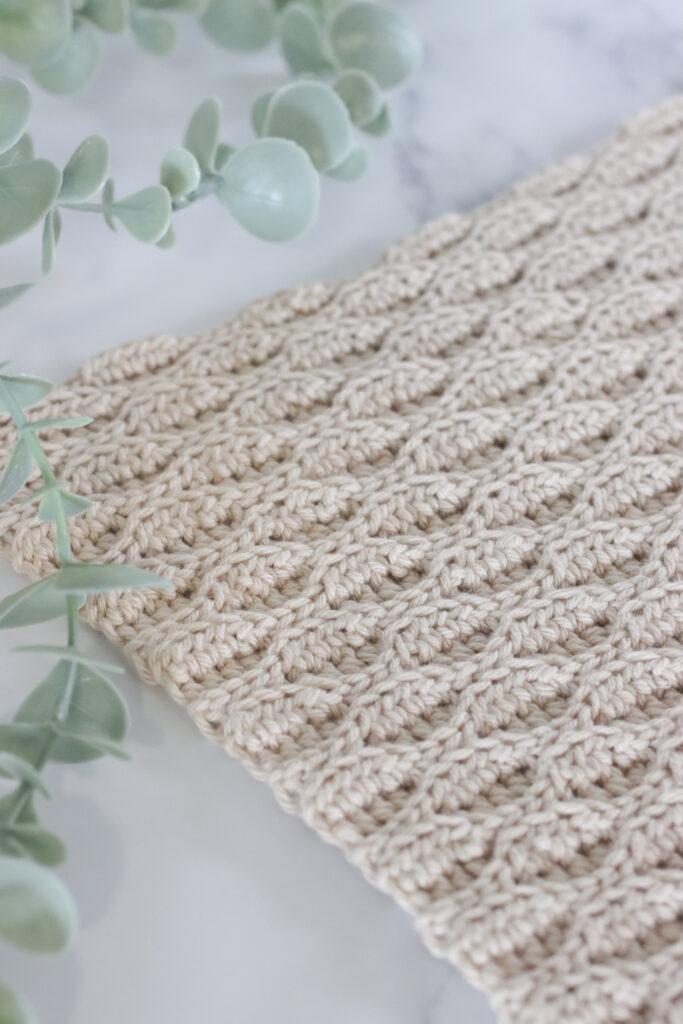
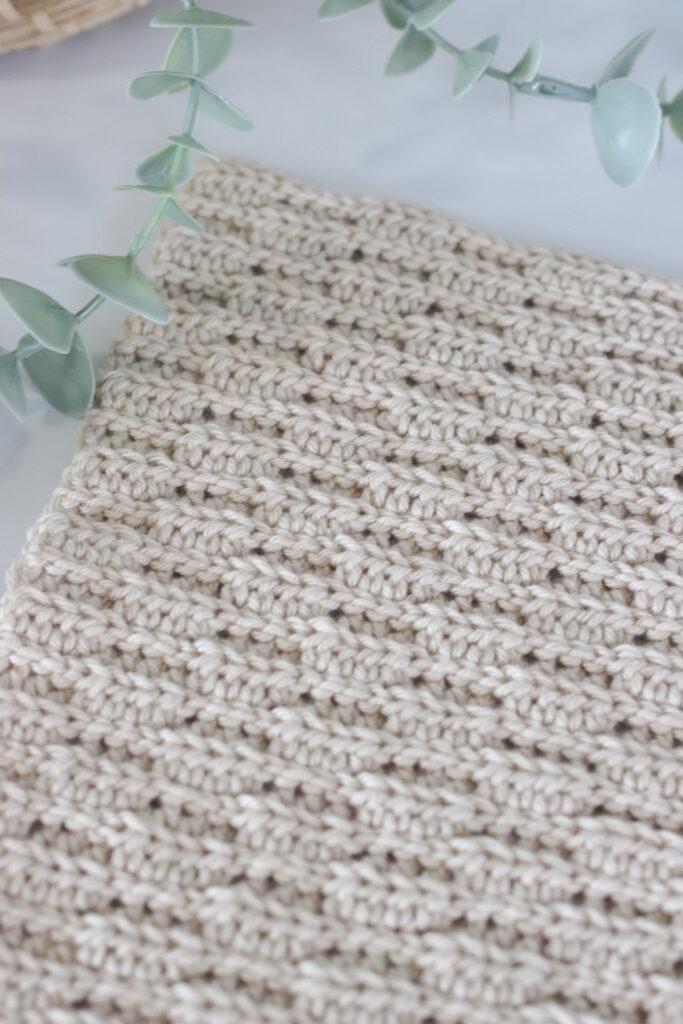
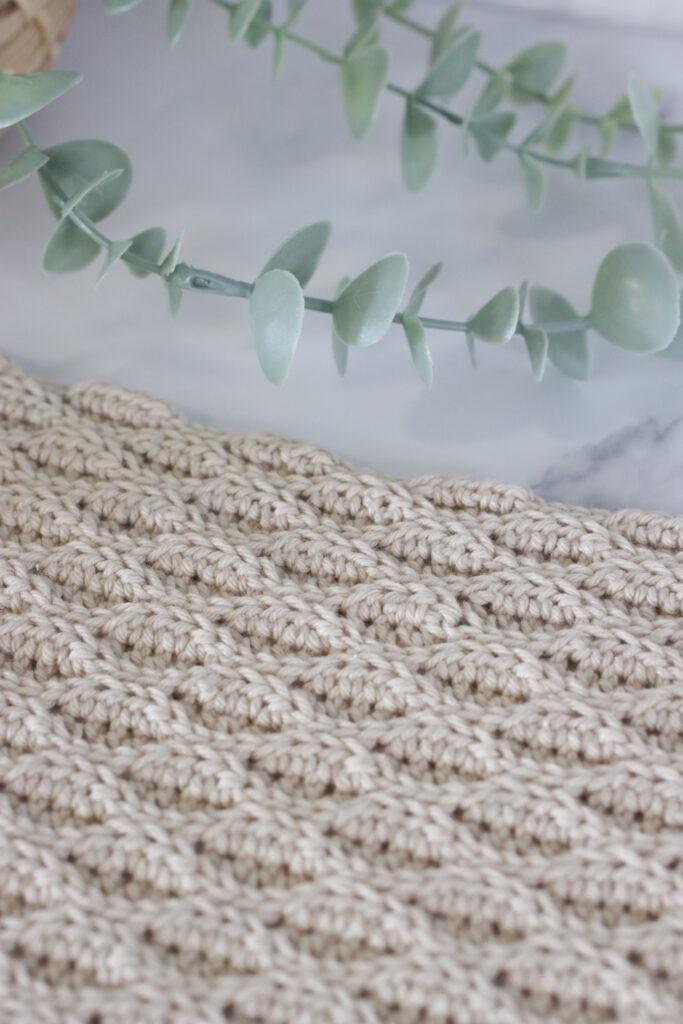
The almond ridges stitch uses a four-row stitch repeat to build up a beautifully ornate pattern that’s much simpler to crochet than it looks! As with most ridge patterns, you’ll be crocheting into the back loop only (BLO) for the majority of the work.
About the Stitch
While the Almond Ridges pattern is simple to pick up, it relies on you having knowledge of the UK half treble/US half double. This neat little stitch adds more height than a UK double/US single but less than a UK treble/US double so it’s the perfect midpoint. Because of this, it’s sturdier than than a UK treble, but still adds a decent amount of height to your project.
It works perfectly for Almond Ridges because it creates a firm fabric with plenty of stitch definition to show off the ornate pattern.
Materials & Tools
- Yarn: For the sample in the images I have used Paintbox Cotton DK in Vanilla cream. In the video tutorial, I use: Milla Mia Naturally Soft Aran in Dusk. However, you can use any weight yarn and recommended hook size that can be found on the belly band to your chosen yarn.
- Hook: 5mm
- Scissors
- Darning Needle
Pattern Notes
- Written in UK terms but switchable to US terms below.
- Skill Level: Intermediate
- Stitch Multiple: 8 +5
- Ensure your slip stitches aren’t too tight.
- From rows 2 onwards you will be working into the BLO of each st.
Gauge & Size
- Please check specific patterns for the gauge.
- For a practice swatch gauge and completed size isn’t important.
- Do you struggle with tension? CLICK HERE to watch a video that can help!

Pattern Support
The fastest way to get pattern support is to ask in our dedicated facebook group for Bella Coco Crochet patterns. This is the best place for you to connect with other crocheters.
Please note, if you wish to change and adapt this pattern in any way, this must be done at your own exploration and we cannot offer assistance with this.
Convert Pattern Terms
Here you can quickly switch between UK and US crochet terms. This will make following the pattern easier as all terms will be converted to your preferred version.
Terms & Abbreviations
Chain(s): ch(s): Yarn over, pull through loop on the hook.
Slip Stitch(s): ss(s): Insert hook, yarn over, pull through stitch and loop on hook.
Half Treble Crochet(s): htr(s): Yarn over, insert into stitch, yarn over, pull up a loop, you will have three loops on the hook. Yarn over, pull through remaining three loops.
Special Stitches
Back Loop Only (BLO): Working into the back loop only. The stitch to be worked will follow e.g. BLOss (Back Loop Only Slip Stitch)

Unsure of the differences between UK and US terms? Need a refresher on how to do your stitches? In my ‘How to crochet: A handy reference guide’ EBook I help you with all of these terms and you can always have them to hand! You will also get exclusive access to free video instructions. Learn more about the eBook here.
Pin For Later

Free Pattern: Almond Ridges Stitch
You are viewing this pattern in UK terms.
Foundation: Ch in multiples of 8 +5.
(In the video, I have done 24 + 5 = 29)
Row 1 (RS): sl st in second ch from hook (skipped ch does not count as st), sl st in next 3 ch, *htr in next 4 ch, sl st in next 4 ch, rep from * across. Turn.
Rows 2 and 3 (WS): 1 ch (does not count as st here or throughout), *BLOhtr in next 4 sts, BLOsl st in next 4 sl st, rep from * until 4 sts rem,
BLOhtr in last 4 sts. Turn.
Rows 4 and 5 (RS): 1 ch, *BLOsl st in next 4 sl st, BLOhtr in next 4 sts, rep from * until 4 sts rem, BLOsl st in last 4 sl st. Turn.
Rep Rows 2–5 until desired height.
Final Row (WS): 1 ch, *BLOhtr in next 4 sts, BLOsl st in next 4 sl st, rep from * until 4 sts rem, BLOhtr) in last 4 sts.
Fasten off and sew in ends.
Video Tutorials
Time Stamps
- 00:00 Intro
- 01:14 Foundation Chain
- 01:52 Row 1
- 04:00 Row 2
- 06:18 Rows 3 & 4
- 08:20 Rows 5 & 6
- 09.53 Repeat Rows 3 to 6
- 10:32 How to count your rows
Right-handed
[adthrive-in-post-video-player video-id=”c6nyN34l” upload-date=”2025-03-12T15:05:29+00:00″ name=”HOW TO CROCHET ALMOND RIDGES STITCH | PERFECT FOR BLANKETS, HATS AND MORE | Bella Coco Crochet.mp4″ description=”null” player-type=”default” override-embed=”default”]Or you can watch on YouTube
Left-handed
[adthrive-in-post-video-player video-id=”FMWEkXEE” upload-date=”2025-03-12T15:27:21+00:00″ name=”LEFT HANDED CROCHET_ ALMOND RIDGES STITCH | PERFECT FOR BLANKETS, HATS AND MORE | Bella Coco Crochet.mp4″ description=”null” player-type=”default” override-embed=”default”]Or you can watch on YouTube
Crochet Stitches
If you love exploring new textures I think you’ll enjoy these stitches:


Pattern Ideas Using Almond Ridges
Elm Draught Excluder
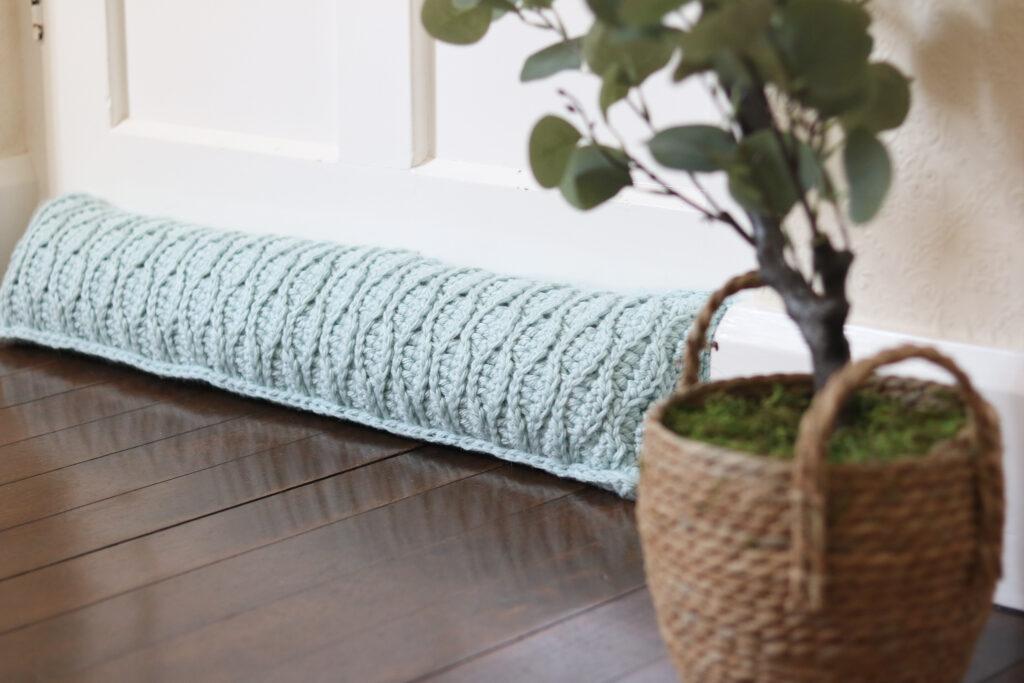
Are you ready to turn this stitch into a pattern? The Elm draught excluder is a great project to put this stitch to the test. CLICK HERE for the pattern details.
I always love to see your makes so if you try any of my patterns or follow my stitch tutorials please tag me @bellacococrochet or use the #bellacococrochet
sarah-jayne
Hi..I am so happy I found your blog! Also your videos. Over lockdown ell the last couple of months since Christmas I’ve been learning to crochet & I have been working through your tutorials and videos, they are detailed and so very well explained and easy to understand. I am still struggling but i come back to you for explanations time & time again.
Thank you for the new stitch tutorial one day I am going to progress from granny squares onto something that I can use these stitches on I just know, I am loving crochet and just wish I had attempted it before. Thank you so much xx
You are so very welcome 🙂
Hi. I love your crochet hook. Do you mind me asking where it’s from please?
It’s a furls crochet hook 🙂
I would love to make a square with this stitch how do I make the Bottom & Top straight thank you
Hi Alice To straighten the top and bottom you would need to work a border using stitches of different heights; so double crochets along the top parts but treble crochets in the dips, for example
Do you have a video of how to make the top and bottom straight? I understand what your saying but are you talking uk terns or us terms when you say about the dips and peaks
Could you please send to csal1164@gmail.com so I don’t miss your reply
Hi Pat, I do have several YouTube videos on how to keep your edges straight, maybe one of these would be of help to you 🙂
Hi Bella Coco! I love your content! I’m new to crochet and your videos are really helping me learn the different stitches – thank you.
There’s something that’s not clear to me in this video: I’m working with multiples of 8 + 5 but, as a result, I always have 5 chains left at the end that don’t fit with the pattern (4 DHC + 4 slip stitch on repeat then a chain of 5 leftover at the end). I’ve watched the video loads of times and can’t figure out why there aren’t 5 stitches leftover at the end of yours. Can you help me? Thank you!
Hi Tia Thank you so much, I’m happy to hear my videos are helping you learn to crochet You might find it helpful to take a look at the written instructions for this pattern here: https://blog.tcctest.co.uk/almond-ridges/ – each row should begin and end with four slip stitches (to keep the pattern looking the same at both ends). The extra five chains on top of the pattern multiple adds the extra four spaces needed to finish with the slip stitches, plus one extra chain which enables us to begin at the correct height. Make sure you’re working your first stitch into the second chain from the hook, and you find you end with four chains to finish the repeat